5
ASSEMBLY AND SET-UP
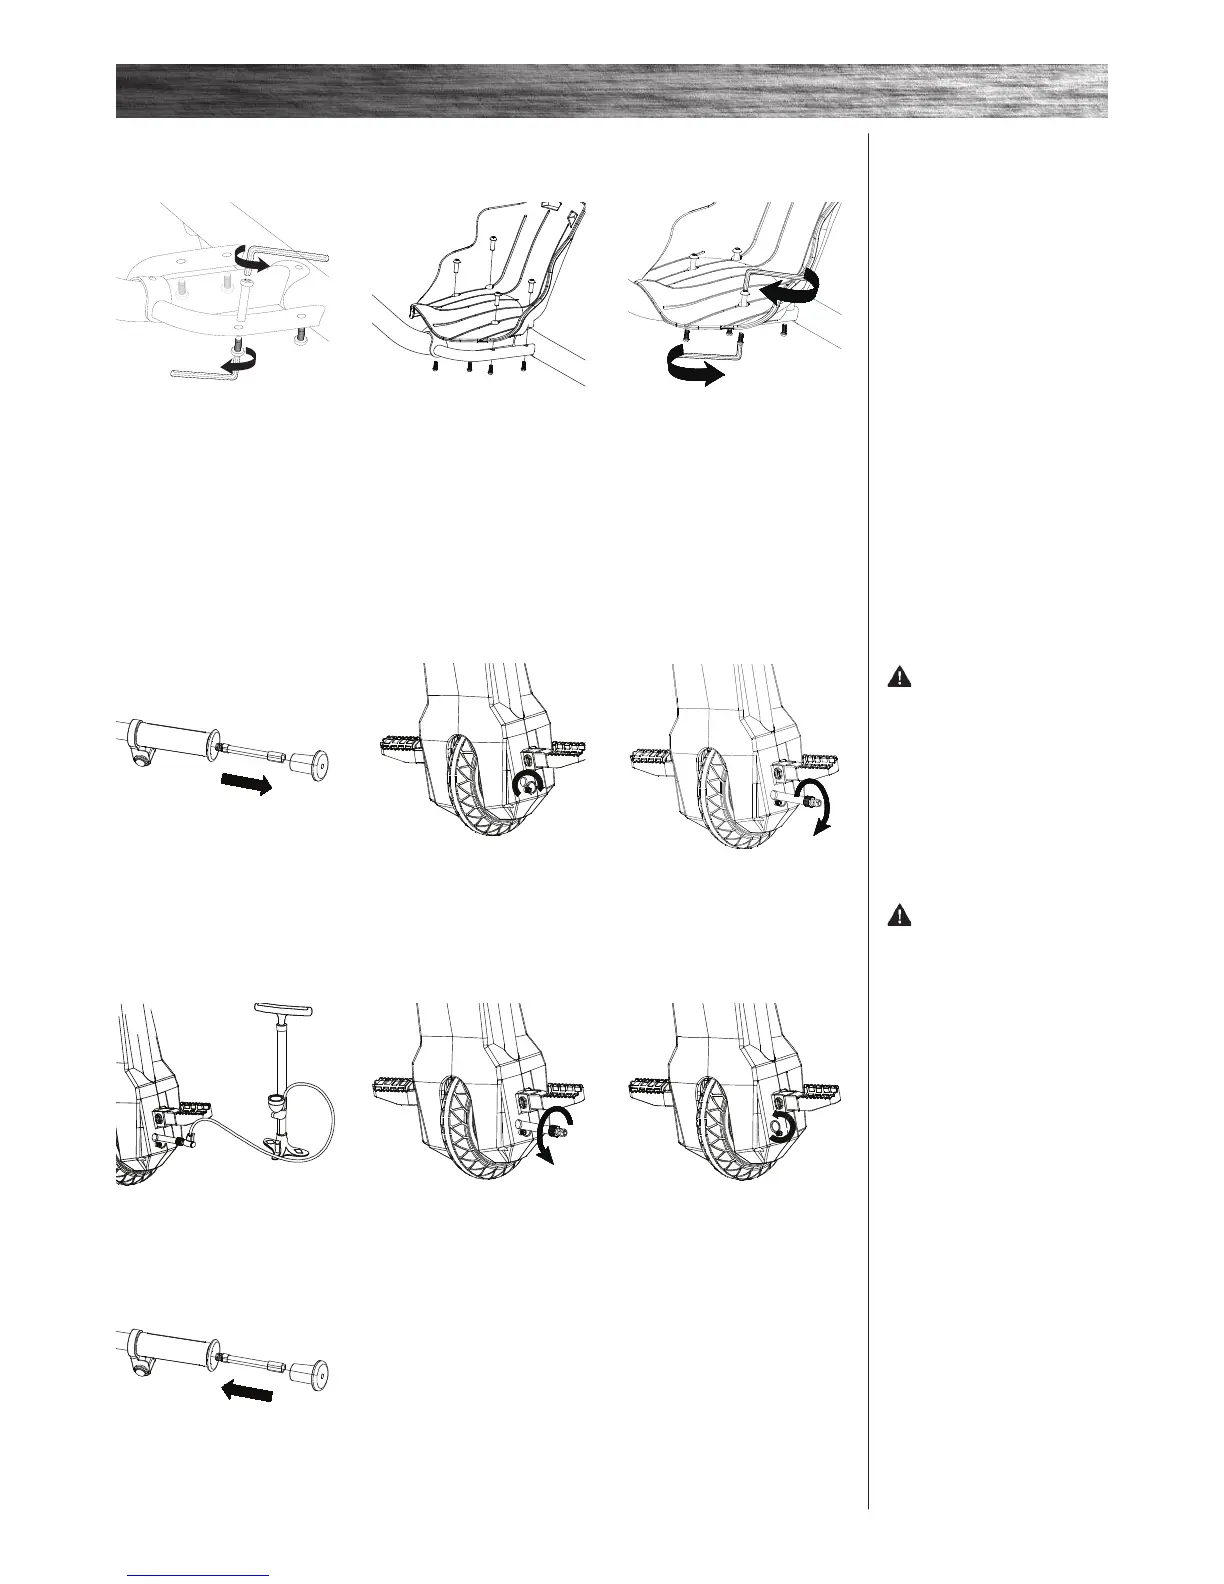
q Inflating the Front Tire
The tire is inflated when shipped, but it invariably loses some pressure between the point of manufacturing and your
purchase. Always inflate tire to the correct PSI before first time use.
1 Remove valve extender from
right handlebar grip.
4 Attach the pump and inflate to
36 PSI.
7 Place the valve extender back
into the right handlebar grip.
2 Open the round cover located
on the chain cover by sliding the
cover upward.
5 Remove valve extender
immediately after inflating.
3 Align the opening in the
drive sprocket with the valve
stem. Thread the valve extender
completely onto the valve stem.
6 Close the cover by sliding the
cover downward.
WARNING:
Failure to remove the valve
extender after inflating will cause
the inner tube and/or adapter to be
severed by the front drive sprocket.
Note: If you lose the valve
extender, contact customer service,
or one can be purchased at almost
any auto parts store.
WARNING:
Do not over inflate as this
could damage tire or wheel
Note: The pressurized air supplies
found at gasoline stations are
designed to inflate high-volume
automobile tires. If you decide to
use such an air supply to inflate
your PowerRider 360 tire, first
make sure the pressure gauge is
working, then use very short bursts
to inflate to the correct PSI. If
you inadvertently over-inflate the
tire, release the excess pressure
immediately.
q Attaching the Seat
Required Tools: Two (2) 5 mm Allen wrenches
1 Using two (2) 5 mm Allen
wrenches, remove the four (4)
coupling bolts from the rear frame.
2 Align the four (4) holes in seat
with the four (4) holes in frame.
Insert the coupling bolts through
the top and bottom of the frame.
3 Tighten the coupling bolts
using two (2) 5 mm Allen
wrenches.
 Loading...