4
ASSEMBLY AND SET-UP
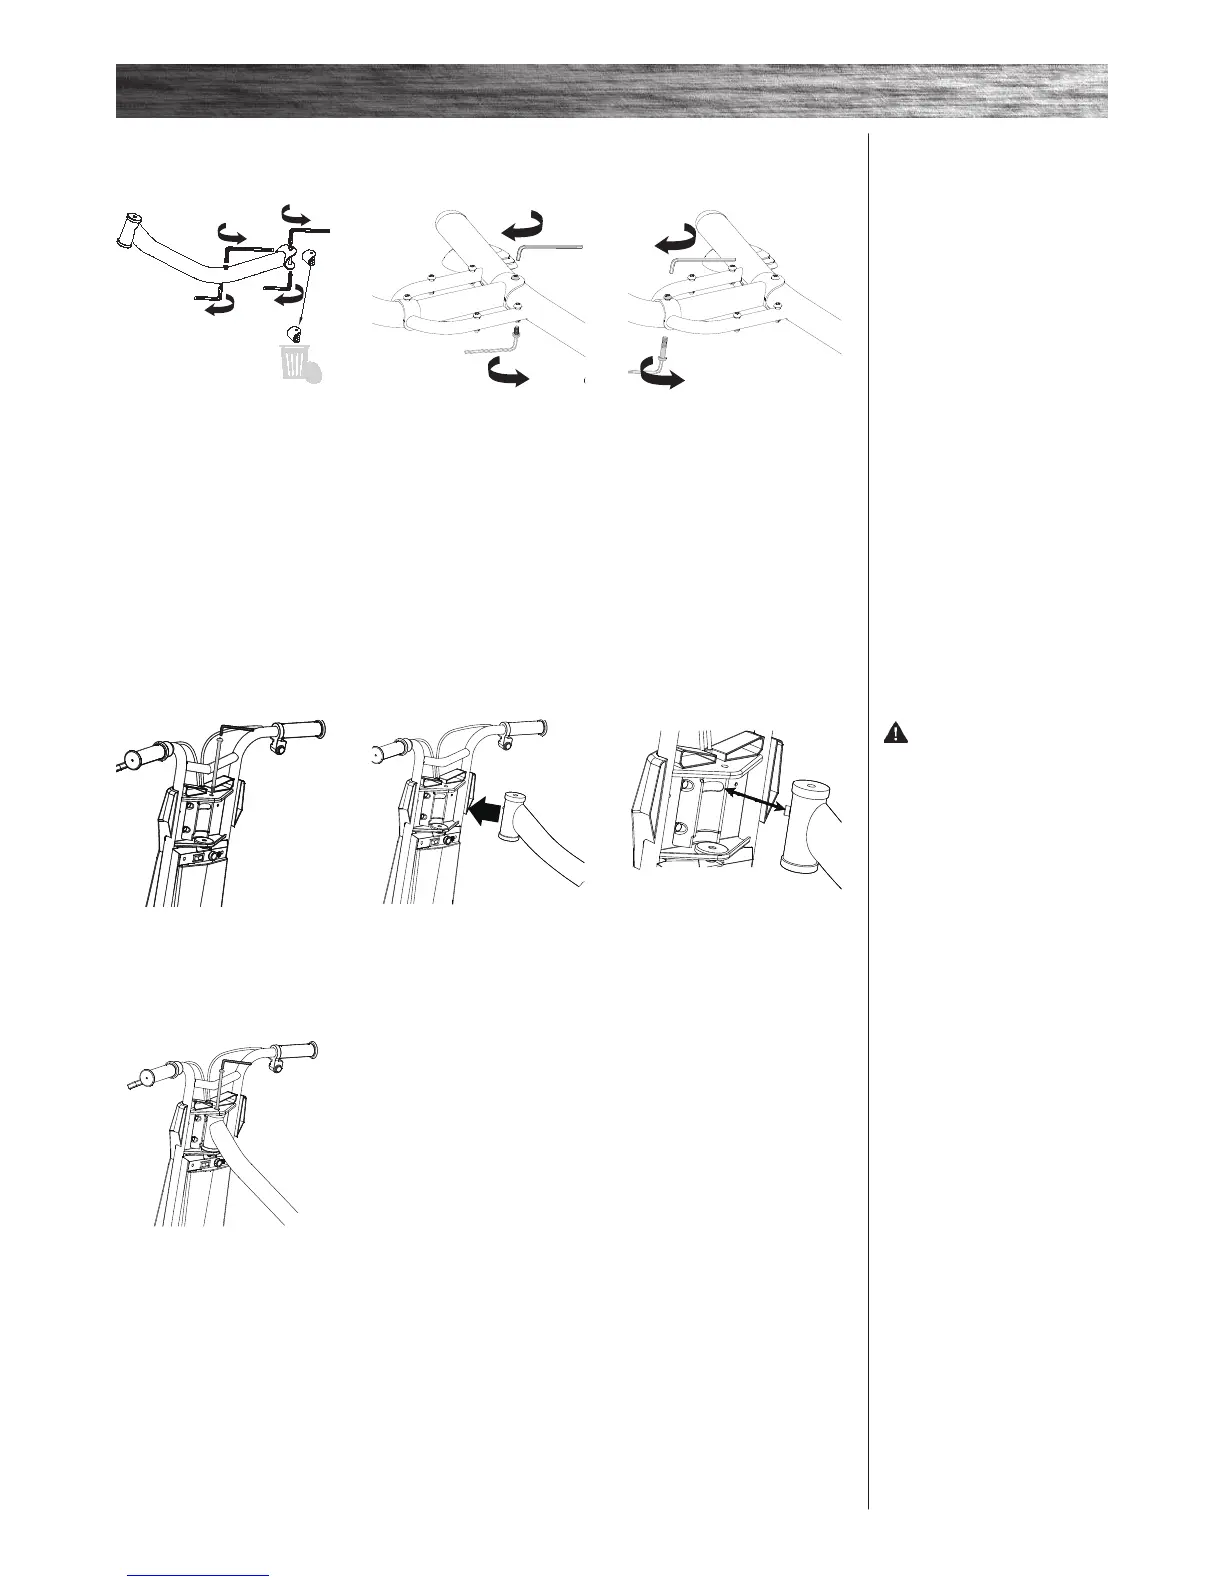
1 Using two (2) 5 mm Allen
wrenches, remove the coupling
bolt on the end of the frame and
discard the plastic insert. Remove
the coupling bolt in the middle of
the frame.
2 Insert the rear frame into the
frame assembly. Securely tighten
the (long) coupling bolt on the rear
frame using two (2) 5 mm Allen
wrenches.
3 Securely tighten the (short)
coupling bolt in the middle of the
frame using two (2) 5 mm Allen
wrenches.
q Attaching the Frame
Required Tools: Two (2) 5 mm Allen wrenches
1 Using a 5 mm Allen wrench,
remove the steering bolt from the
frame assembly.
2 Insert the front fork into the
frame assembly.
q Attaching the Front Fork
Required Tools: 5 mm Allen wrench
4 Reinsert the steering bolt
and secure using a 5 mm
Allen wrench.
3 Be sure to properly align the
slot on headtube with the pin on
the front fork as shown.
WARNING: Failing to
properly tighten the steering
bolt that attaches the front fork
assembly to the frame assembly can
cause you to lose control and fall.
Note: The coupling bolts on the
frame are different lengths.

 Loading...