3
ASSEMBLY AND SET-UP
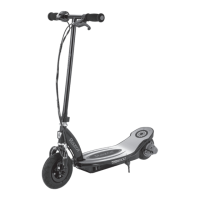
3 Re-insert the coupling bolts
and tighten using two (2) 5 mm
Allen wrenches.
Attaching the Platforms
Tools Required: Two (2) 5 mm Allen wrenches
1 Using two (2) 5 mm Allen
wrenches, remove the two coupling
bolts from the frame.
2 Align the holes on the right
and left platforms with the holes
on the frame.
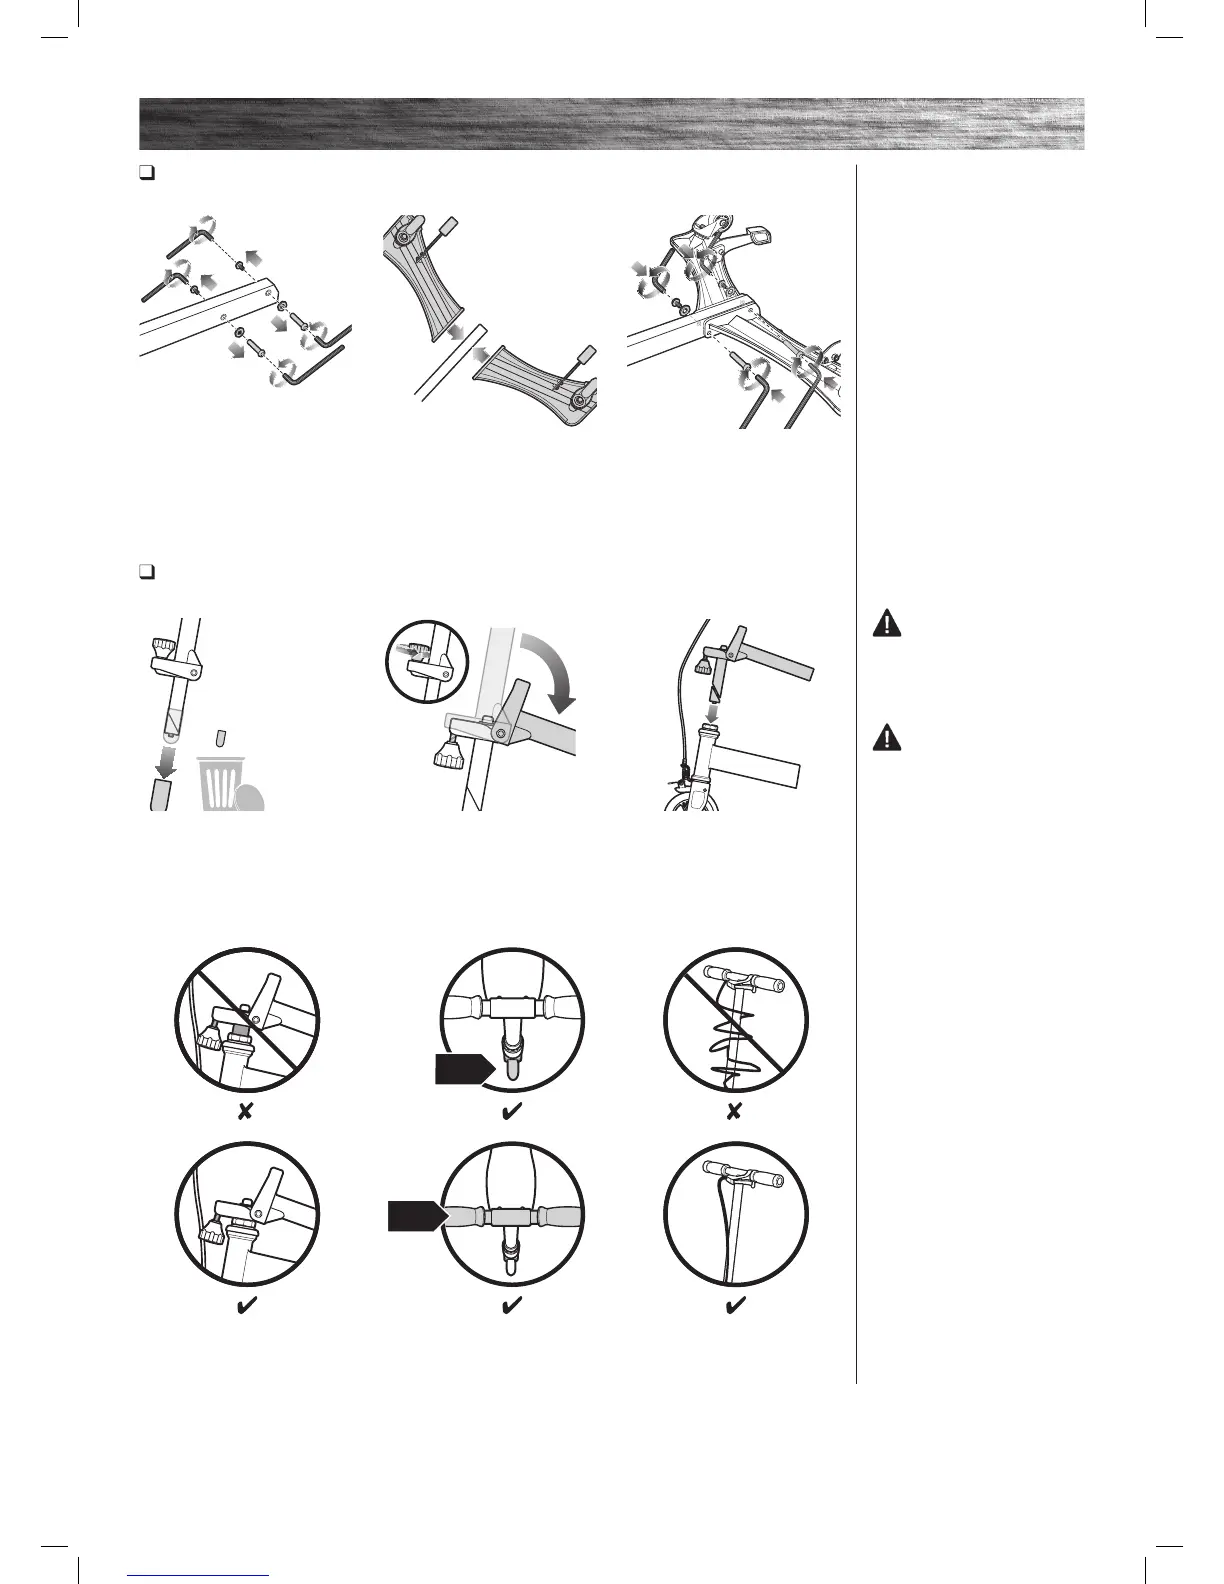
1 Remove the plastic protector
covering the wedge.
Note: Slide the handlebar stem
down into the front fork until it
fi ts snuggly into the lock nut on
the headset.
Note: The cable and wire
assembly from the handlebar must
not wrap around the handlebar
stem or handlebar. Sharp bends
or twisting of the brake cable can
cause the brake to malfunction.
Note: Make sure the front
wheel is pointed straight ahead,
the handlebars square to the
front wheel and the Razor logo
facing the front.
2 Loosen the black folding knob,
and swing to the 6 o’clock position
to unfold the handlebar stem.
3 Insert the handlebar stem
into the front fork. You may need
to slightly loosen the wedge
using a 5 mm Allen wrench to
allow it to slip into the front fork.
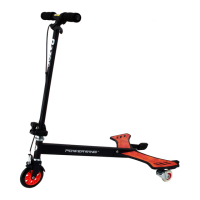
WARNING:
Parents must assist children in
the procedures to unfold and fold
PowerWing DLX.
WARNING:
Keep your fi ngers clear of the
pivoting mechanism when folding or
unfolding the PowerWing DLX, and
make sure others are standing clear.
Attaching the Handlebars
Tools Required: 5 mm Allen wrench

 Loading...