EasyManua.ls Logo

RCA ANT752

RCA ANT752
8 pages
To Next Page IconTo Next Page
Loading...
Small YAGI Antenna
User’s Guide
Step 1: Unpack
Remove the antenna and the hardware bag from package. Make sure the following parts
are in the package:
Antenna rear section • Antenna front section
VHF element • Mounting pipe and foot
Hardware bag
U-Bolt (2) 10/32” Hex nuts
(2) Black plastic end-caps (5) 1/4” Hex nuts
Matching transformer (2) 5/8” Bolts
(4) 7/16” Washers 2 1/2” Screw
Unfold the elements on the rear section of
the antenna until they lock into place as
pictured here. Make sure the elements are
flat and parallel to each other when youre
finished.
BEFORE YOU START!!!
Please read the IMPORTANT SAFETY INFORMATION sheet included in this
package.
Step 2: Unfold the antenna’s rear section
Step 3: Unfold the antenna’s front section
Unfold the UHF elements on the front
section until they lock into place as pictured
here. Make sure the elements are flat and
parallel to each other when youre finished.
Question and Answer IconNeed help?

Do you have a question about the RCA ANT752 and is the answer not in the manual?

RCA ANT752 Specifications

General IconGeneral
BrandRCA
ModelANT752
CategoryAntenna
LanguageEnglish

Summary

Before You Start

Step 1: Unpack

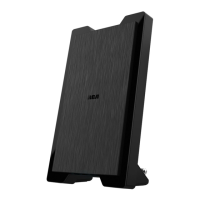
Remove the antenna and hardware bag. Verify all listed parts are present in the package.

Step 2: Unfold the antennas rear section

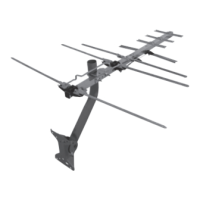
Unfold the elements on the rear section until they lock into place, ensuring they are flat and parallel.

Step 3: Unfold the antennas front section

Unfold the UHF elements on the front section until they lock into place, ensuring they are flat and parallel.

Antenna Assembly Steps

Step 4: Attach the front section to the rear section

Slide the front section into the rear section, align holes, attach VHF element and phasing lines.

Step 5: Attach the mast clamp U-bolt

Insert the U-bolt into the mast clamp and loosely thread the 1/4" hex nuts onto the U-bolt.

Step 6: Install the transformer and coaxial cable

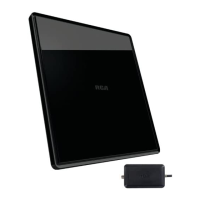
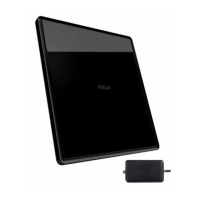
Attach the transformer to the coaxial cable and then to the antenna's UHF element studs.

Final Assembly and Mounting

Step 7: Insert the end caps

Insert plastic end caps into the ends of the booms, tapping gently with a rubber mallet.

Step 8: Attach the mounting pipe to the foot

Insert the mounting pipe into the foot, securing with a 2 1/2" screw and 1/4" hex nut.

Step 9: Mount the foot and pipe

Secure the foot, adjust the pipe to be perpendicular to the ground, and tighten nuts.

Step 10: Attach the antenna to the mast

Loosen U-bolt, slide over mast, point antenna towards broadcast towers, and tighten securely.

Warranty Information

Related product manuals