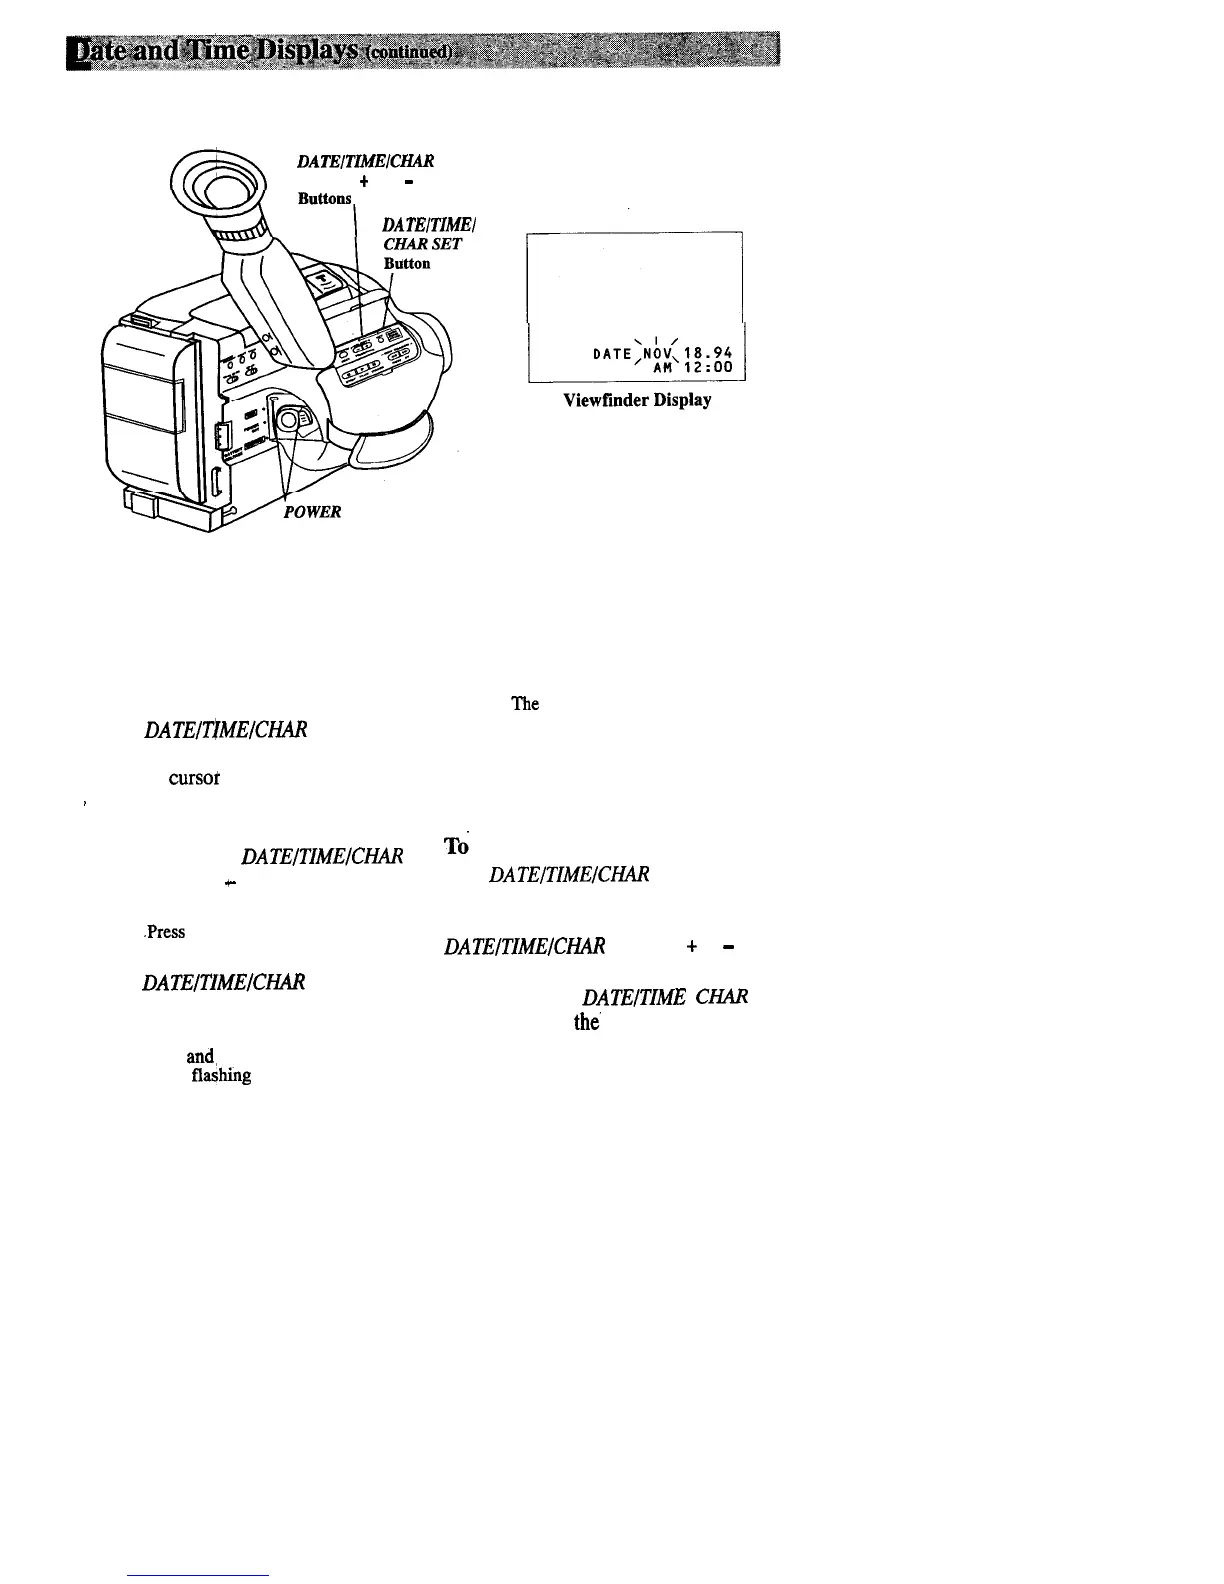
After the date and time have been set, they can be displayed and recorded on your
tapes. The clock cell must be installed.
DATEITIiUElCHAR
SELECT
+
and
-
DATE/TIME1
Switch and Indicator
r-7
Set the Date and Time
1. Install the clock cell.
2. Attach a power supply.
3. Place the
POWER
switch in
CAMERA.
The POWER indicator will light.
4.
Press
DATEIT~MElCIdAR SET. The
date and time display appear with a
flashing
cursor
on the month. The
I
flashing cursor lets you know which
part of the display you are setting.
5. Repeatedly press
DATEITIMEICHAR
SELECT
+ or
+-
until the correct month
appears.
Note:
.Press and hold the button to rapidly
advance the digits.
6.
Press
DATEITIMEJCH-iR SET
to
move flashing cursor to the next part
of the display.
Note: Press
and hold the button to rapidly
advance the
fla$hiig
cursor.
7.
Repeat steps 5 and 6 until you have
entered the correct month, day, year,
hour (including AM or
PM),
and
minutes.
Note: The clock begins when the minute
digits stop flashing. The clock does not
keep time while any digits are flashing.
Tb Correct the Displays
Press
DATEITIMEICIUR SET
to display
the time and date and select the item you
want to change. Repeatedly press
DATEITIMEKHAR SELECT
+
or
-
to
enter the correct digit(s).
Repeatedly press
DATEITIME CHAR
SET
to remove
the
flashing cursor and
start the clock.
(continued on next page)
29