Rea®Clematis®
2.5Rearwheels
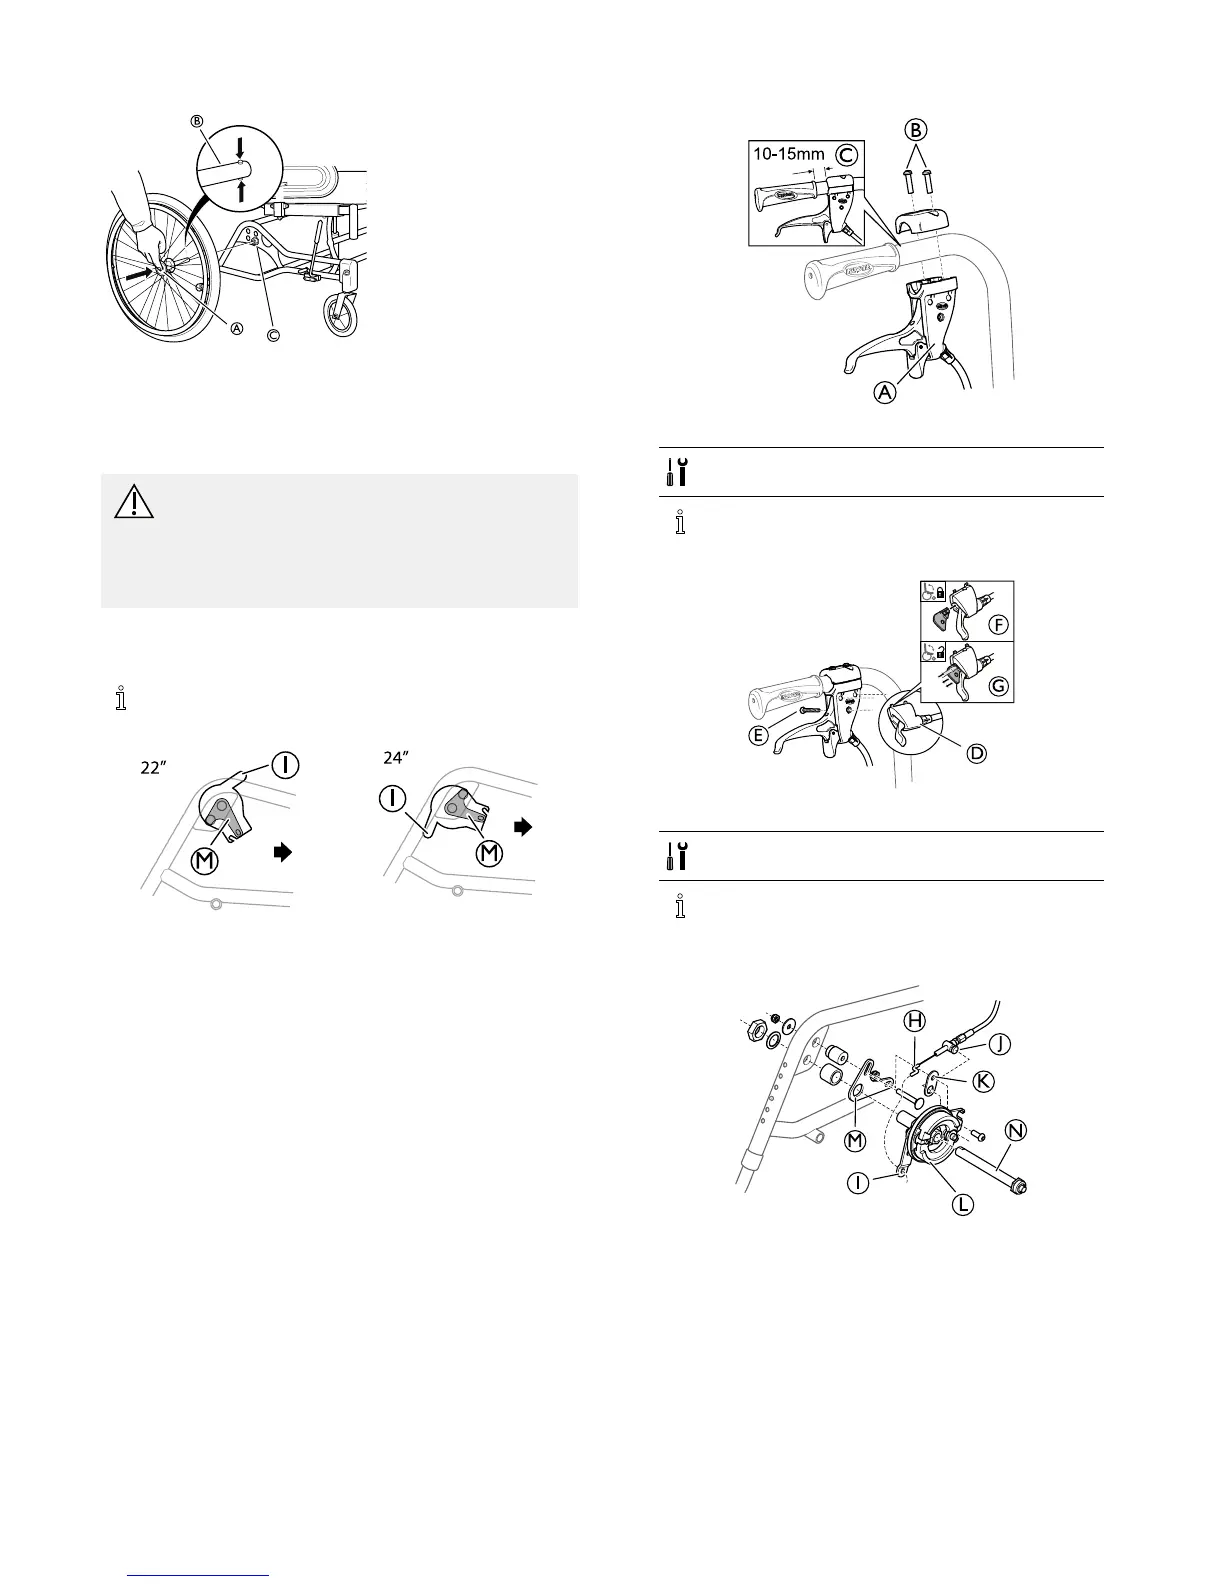
1.Pressandholdinthequick-releasebuttonA.
2.PlacetherearwheelaxleBintherearwheel
attachmentC.
3.Pullthewheelsoutwardstocheckthatthewheelis
securelylockedinposition.
WARNING!
Riskofinjury
–Itisreallyimportanttocheckthattherear
wheelissecurelylockedinposition!Itshould
notbepossibletoremovethewheelswhenthe
quick-releasebuttonAisinactivated.
2.6Drumbrakefor22–24”
Thepositionofthebrakeunitdiffersdependingon
therearwheelsize.
22”wheels=Thewire
holderIshouldbeplaced
upwardsandtheattachment
plateMasshownonthe
picture.
24”wheels=Thewire
holderIshouldbe
placeddownwardsand
theattachmentplateMas
shownonthepicture.
Mounting
1.
Mountthehandlefortheassistantmaneuvereddrum
brakeAonthepushhandleandattachthescrewsB.
TorxT20
Thedistancebetweenthehandleandthehandle
fortheassistantmaneuvereddrumbrakemust
be10—15mmC.
2.
MountthetilthandleDonthebrakehandleunitand
tightenthescrewE.
Screwdriver
Thereisalockingfunctiononthetilthandle,
insertthelockingkeyFtolockthetiltfunction.
RemovethelockingkeyGinordertounlock
thetiltfunction.
3.
MountthewirehookfromthebrakehandleHinthe
wireholderI.
4.MountthewireJintheattachmentwasherKand
mounttheattachmentwasherKonthebrakeunitL.
5.Tightenthescrew.
6.MounttheattachmentplateMontheframeofthe
wheelchair.
7.MountthebrakeunitLandtherearwheelaxleNon
theattachmentplate.
8.Tightenthescrews.
61580314-C



 To Next Page