RTL8773B Motherboard User Guide
12
·Copyright 2019 Realtek Semiconductor Corporation.
All Rights Reserved.
2 Getting Start
2.1 Introduction
This chapter describes how the RTL8773B Motherboard works. Certain hardware and
utilities are essential for supporting the evaluation/development according to different
demo applications. This chapter will discuss the following topics:
Hardware requirements
Performance testing
Power consumption demonstration
RF test demonstration
2.2 Hardware Requirements
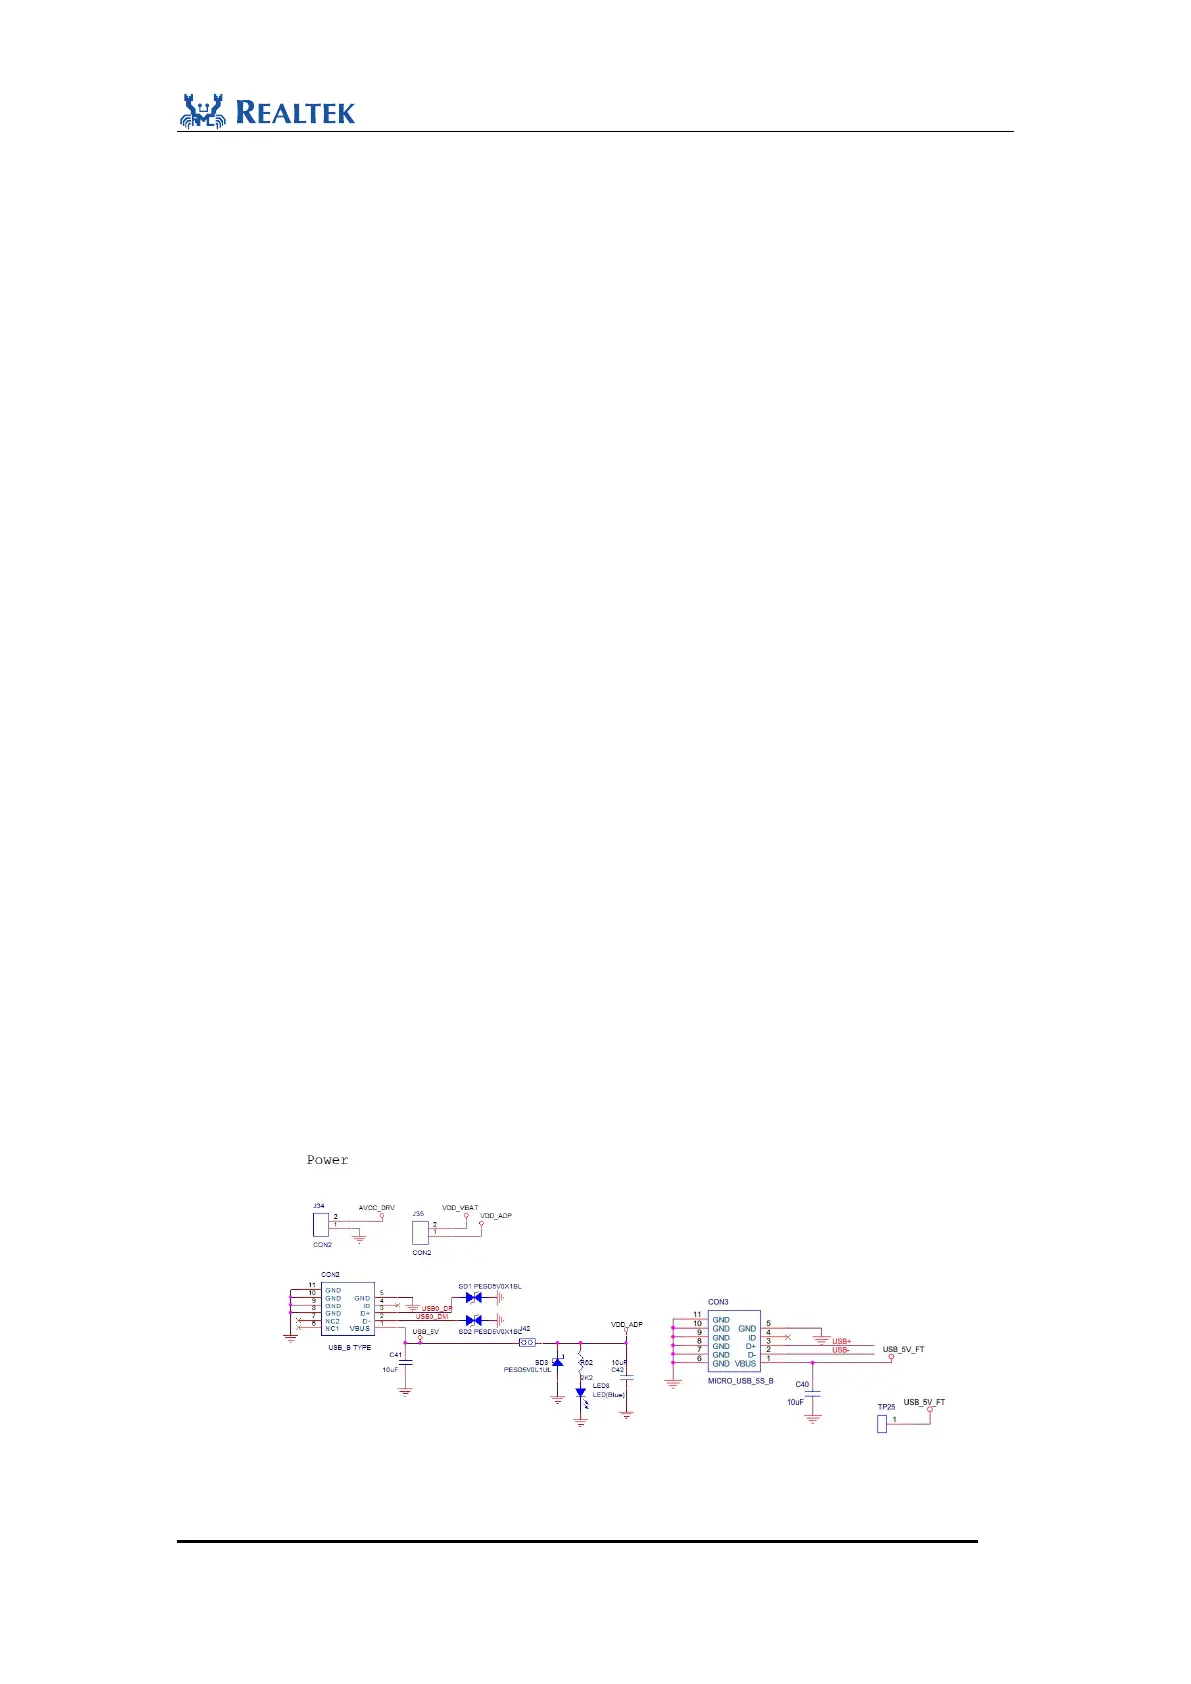
2.2.1 Power Supply
Evaluation board can control charging process of Li-ion battery. USB interface and
Li-ion battery are optional for powering evaluation board on:
1. Connect Li-ion battery to BAT socket J36.
2. Short jumper J38, battery begins to supply power for EVB, then LED8 is on.
3. Connect two AC adaptor to micro-USB connectors CON2, CON3.
4. Short jumper J42, then LED7 is on and USB_5V from micro-USB connector CON2 on the
front side of the board starts to supply power for RTL8773B Motherboard and EVB. OR
connect VADP of jumper J42 to U_5V_FT (TP25), micro-USB connector CON3 on the
opposite side of the board starts to supply power for RTL8773B Motherboard and EVB.
If Li-ion battery is connected to the socket, the Li-ion battery charging process begins. By
placing a current meter in series with J38 or J42, the charging current and working current
can be measured respectively as parameters of motherboard and EVB power consumption.