7
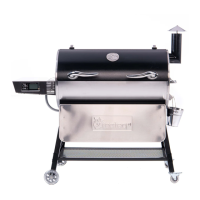
RT-1250 Assembly
Start with grill on its backside. Use packaging styrofoam to protect the hooks from
breaking off on the back of the hopper before laying grill on its back.
On the left side, attach the rear fixed wheel leg (3) with bracket holes facing outward from the grill.
Then on the right side, attach the rear caster wheel leg (2) with bracket holes facing outward from
the grill.
Attach the front legs with just the side bolts. The front bolts will be used with both the shelf and legs.
Step 1
Unpack and Prepare for Assembly
With assistance, remove all items from inside grill body and lay grill body on its back.
Tip: Flatten the cardboard box out and lay everything on it. This serves as a good working area and it
helps prevent the grill from getting scratched or damaged during installation.
Step 2
Flip Grill and Attach Legs
If you purchased a competition cart, please proceed to page 16.