UMP Replacement Instructions Replacing the UMP for the Red Jacket STP
11
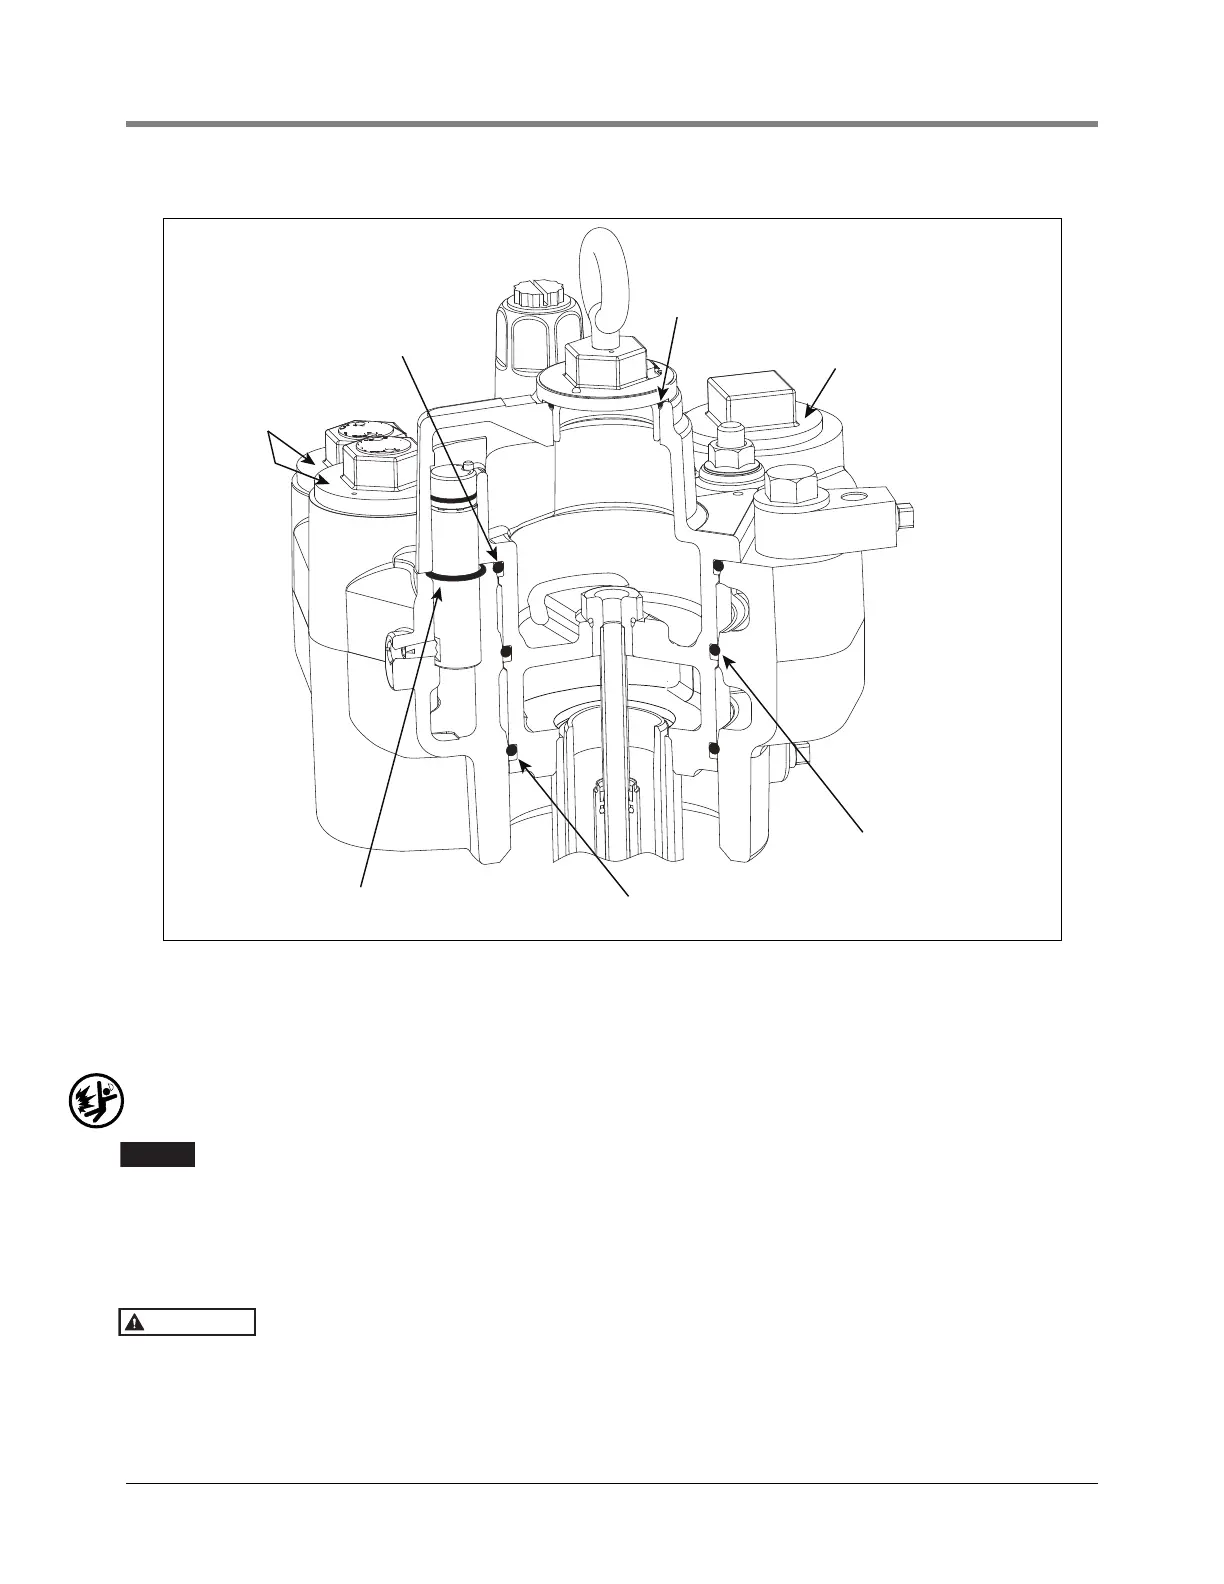
Figure 5. Locating Packer And Manifold O-Rings
13. Remove the manifold’s female connector’s o-ring (see Figure 5). Get a 0.862’’ ID x 0.103’’ wide o-ring from
the hardware/seal kit and lubricate it with petroleum jelly. Slide the o-ring over the female connector and push
it down into its groove.
14. Reinstall the extractable unit into the manifold and tank. Torque the extractable lock-down nuts in an alternating
pattern to 50 ft-lbs (68 N•m).
Remove the springs around the lock-down studs and replace with the springs from the kit.
For all models with the ‘RA’ suffix, stainless steel lock-down nuts and washers are used and
found in the kit. Apply anti-seize (also found in the kit) to the lock-down studs prior to nut
and washer installation.
15. Turn the air purge screw 2 - 3 turns counterclockwise (see Figure 2).
The air purge screw is retained by a hitch pin to limit travel. Do not attempt to rotate
beyond 3 turns.
16. Turn the pump on and let it run for about 2 minutes to purge air from the manifold’s hydraulic cavities. While
the pump is still running, turn the air purge screw clockwise until it is completely closed.
Upper extractable o-ring
(-345 [3.975'' ID x 0.210'' wide])
Middle extractable o-ring
(-344 [3.850'' ID x 0.210'' wide])
Lower extractable o-ring
(-343 [3.725'' ID x 0.210'' wide])
Female connector o-ring
(-118 [0.862'' ID x 0.103'' wide])
Contractors box o-rings
(-928 [2.090'' ID x
0.118'' wide])
Extractable wiring compartment cover
o-ring (-928 [2.090'' ID x 0.118'' wide])
Leak detector port o-ring
(-228 [2.234'' ID x 0.139'' wide])
053-4
WARNING