Programming Flow Chart
Programming (Continued)
5. The Red LED will flash the number of times that corresponds to the number of the
option listed along the top of the chart. (1 flash = Option 1, 2 flashes = Option 2, etc.)
6. Press and release the set button until the desired number of Red flashes is achieved.
7. To finish set up, turn OFF the ESC.
8. You can now power the ESC back on. The settings should now be saved.
9. Repeat steps 1-8 for each setting you wish to adjust.
Press and release
the SET button
once the desired
number of Red
flashes is
reached.
Turn off
the ESC.
The Red LED
flashes. The
number of
flashes indicates
the program
option on the
chart.
Programming (Continued)
In the program process, the motor will emit a “Beep” tone when the LED flashes.
A long flash and long “Beep---” tone is used to represent the number “5”, to easily identify items of a large number.
“A long flash” (Motor sounds “B---”) = the No. 5 item
“A long flash + a short flash” (Motor sounds “B---B”) = the No. 6 item
“A long flash + 2 short flashes” (Motor sounds “B---BB”) = the No. 7 item
“A long flash + 3 short flashes” (Motor sounds “B---BBB”) = the No. 8 item
“A long flash + 4 short flashes” (Motor sounds “B---BBBB”) = the No. 9 item
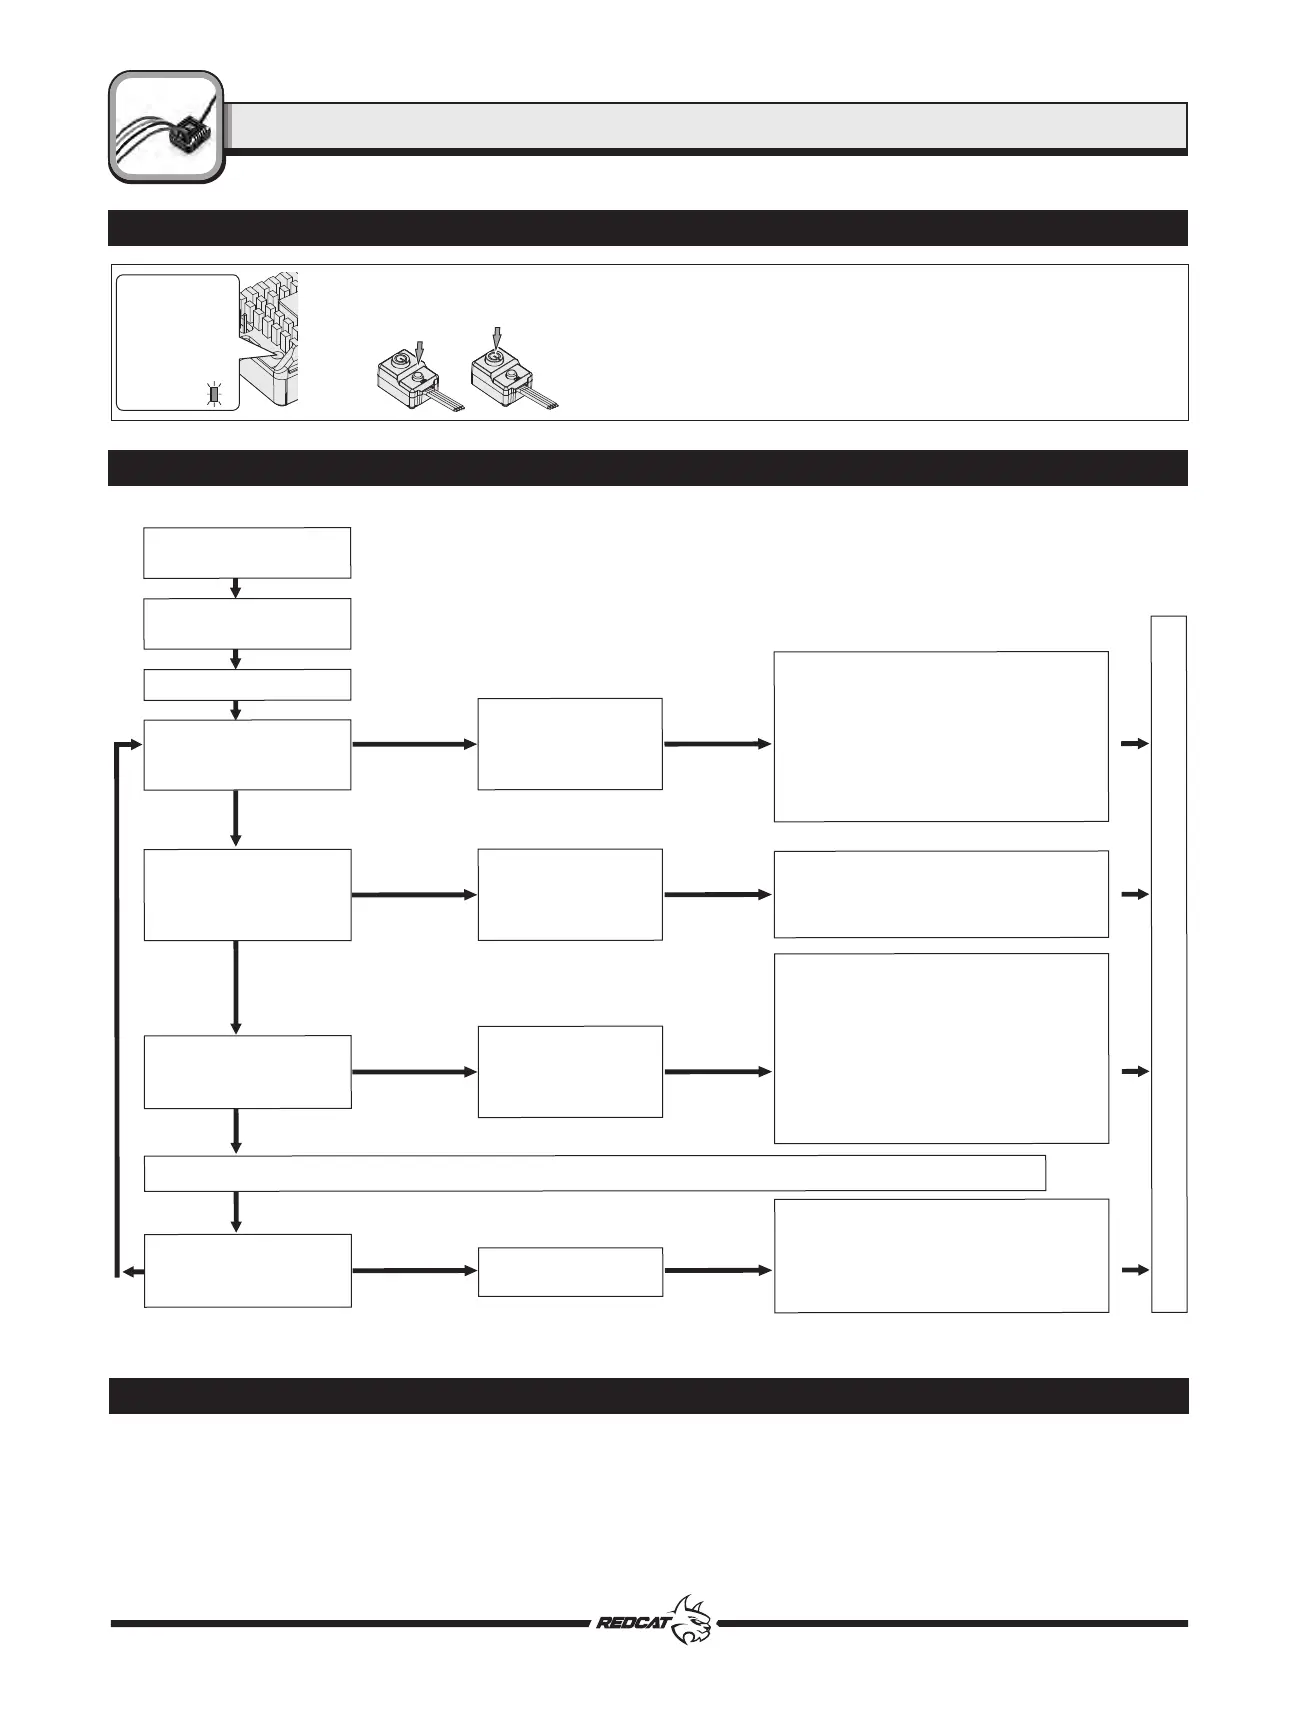
Enter the 2
nd
item
"Battery Type"
Hold the SET key while
Switching on the ESC
Red LED flashes
Red LED flashes
1 time
Red LED flashes
2 times
Red LED flashes
3 times
Red LED flashes
N times
Release
SET key
Release
SET key
Press
SET key
Press
SET key
Press
SET key
Press
SET key
Release
SET key
Release
SET key
Red LED flashes 1 time, choose "LiPo"
Red LED flashes 2 times, choose "NiMH"
Red LED flashes 1 time, choose
"Disabled"
Red LED flashes 2 times, choose
"Auto (Low)"
Red LED flashes 3 times, choose
"Auto (Medium)"
Red LED flashes 4 times, choose
"Auto (High)"
Enter the 3
rd
item
"Cutoff Voltage"
Enter the N
th
item
Enter the 1
st
item
"Running Mode"
Turn off the ESC &
Turn on the transmitter
Hold SET key for 3 seconds
Hold SET key for 3 seconds
Hold SET key for 3 seconds
Hold SET key for 3 seconds
......The following steps are just like the above steps......
Finish programming, switch off the ESC, and then switch it on again
Click the SET button to choose the option,
the times the red LED blinks indicates the
option number you are going to select.
After entering the
corresponding item, the red
LED starts to blink, the times it
blinks represents the current
option number.
Press SET key to choose the value, the
number of times the Red LED flashes equals
the option number.
ex. 1 time equals the 1st option, 2 times equals
the 2nd option, etc.
Red LED flashes 1 time to choose
"Forward with brake"
Red LED flashes 2 times to choose
"Forward / Reverse with brake"
Red LED flashes 3 times to choose
"Forward / Reverse"
RCR-2CENR RADIO SYSTEM
ESC
TM
16