BushChook – Installation and Operation Manual
Page 3 of 48
Issue date: 19/12/2023. Version 1.1
Ta b l e o f C o n t e n t s
Overview .............................................................................................................................................................................................................................. 4
Dimensions and positioning information ............................................................................................................................................................... 6
BushChook weight, size, and IP rating: ............................................................................................................................................................. 6
Positioning information summary: ....................................................................................................................................................................... 6
Overview of the installation tasks ............................................................................................................................................................................ 7
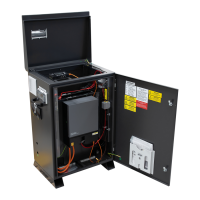
Internal Components Description .......................................................................................................................................................................... 10
Opening the BushChook ...................................................................................................................................................................................... 10
Inside Layout ............................................................................................................................................................................................................. 10
Battery area ............................................................................................................................................................................................................... 10
Inverter area ............................................................................................................................................................................................................... 11
Electrical panel area .............................................................................................................................................................................................. 11
Parts kit and documentation: ............................................................................................................................................................................. 12
Installation: 8 steps for installation and customer handover .................................................................................................................... 13
Step 1. Transporting ................................................................................................................................................................................. 13
Step 2. Positioning ..................................................................................................................................................................................... 14
Step 3. Solar installation .......................................................................................................................................................................... 15
3.1 PV String configuration .................................................................................................................................................................. 15
3.2 PV Isolators ......................................................................................................................................................................................... 17
Step 4. Electrical connections .............................................................................................................................................................. 17
4.1 Grid, Load and Smart Port connection ................................................................................................................................... 18
4.2 Main Switchboard wiring & Feed-in Meter Installation .................................................................................................... 20
4.3 Battery connection .......................................................................................................................................................................... 23
4.4 Earth Fault Alarm ............................................................................................................................................................................... 24
4.5 Solar connection .............................................................................................................................................................................. 24
4.6 Connecting the BushChook in an Off-Grid Installation ................................................................................................... 25
Step 5. Understanding the Turn ON/SHUTDOWN Procedure ................................................................................................. 26
Step 6: Commissioning the system .................................................................................................................................................... 27
6.1 Power up the BushChook system ............................................................................................................................................ 27
6.2 Access the inverter via the Solarman APP, using Local Mode. ................................................................................... 27
6.3 Confirm the Inverter Initial configuration including regional settings ....................................................................... 28
6.4 BushChook Fault Codes ................................................................................................................................................................ 32
6.5 Te s t t h e o p e r a t i o n o f t h e c o m p l e t e s y s t e m p r i o r t o h a n d o v e r t o t h e c u s t o m e r . ................................................ 34
Step 7. Activating Remote Monitoring and Communications ................................................................................................. 34
Step 8: Customer Handover .................................................................................................................................................................. 35
Services and options available for your BushChook .................................................................................................................................... 37
Te c h n i c a l s u p p o r t ......................................................................................................................................................................................................... 38
Appendix A ....................................................................................................................................................................................................................... 39
Single Line Diagram—Power (1-phase and 3-phase versions) .......................................................................................................... 39
Single Line Diagram—Communications (1-phase and 3-phase are the same) ........................................................................... 41
Single Line Diagram—Main Switchboard (1-phase and 3-phase versions) .................................................................................. 42
Appendix B ....................................................................................................................................................................................................................... 44
Te c h n i c a l S p e c i fi c a t i o n s - BushChook systems ....................................................................................................................................... 44
Troppo-4841 battery specifications ............................................................................................................................................................... 45
 Loading...