EasyManua.ls Logo

Redexim Turf Tidy 3000 - User Manual

Redexim Turf Tidy 3000
34 pages
Print Icon
To Next Page IconTo Next Page
Loading...
NOTE:
IN THE INTERESTS OF SAFETY AND ACHIEVING THE BEST RESULT, IT IS VERY
IMPORTANT THAT THIS MANUAL IS READ CAREFULLY BEFORE USING THE TURF TIDY.
1821 English 941.120.406
User manual and parts
book
Turf Tidy 3000
Turf Tidy 2300
Serial number:
Translation of the original user manual
Kwekerijweg 8
3709JA Zeist
The Netherlands
T: (31)306933227
F: (31)306933228
E: verti-drain@redexim.com
www.redexim.com

Questions and Answers

  • D
    Dylan JonesAug 2, 2025
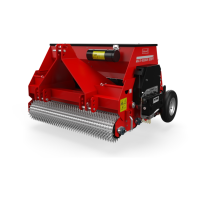
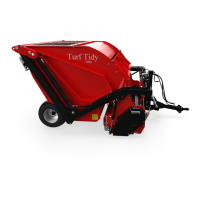
    Why does my Redexim Farm Equipment vibrate?
    • M
      Matthew SalasAug 2, 2025
      Your Redexim Farm Equipment might be vibrating due to several reasons: - Missing blades: Check and replace if necessary. - Rotor out of balance: Inspect for damage or material wrapped around it. - PTO shaft damaged: Check, repair, or replace the PTO shaft. - Surface too hard: Postpone work until conditions improve. - Rotor bearings defective: Check and replace if needed. - PTO shaft RPM too high: Adjust the RPM. - Working speed too high: Adjust the working speed.
  • F
    fritzdianaAug 16, 2025
    What to do if the blade rotor does not rotate on my Redexim Farm Equipment?
    • K
      Krystal HarrisAug 16, 2025
      If the blade rotor on your Redexim Farm Equipment isn't rotating, it could be due to the following: - The machine depth setting is too deep: Decrease the depth setting on the machine. - V-belts slipping: Adjust the V-belts.

Summary

! SAFETY INSTRUCTIONS!

3. FIRST INSTALLATION TURF TIDY

4. CONNECTING; DISCONNECTING TURF TIDY

1. Carefully reverse the tractor

Positioning the tractor for connection.

2. Connect the Turf Tidy to the tractor

Securing the tow bar pin to the tractor.

3. Connect the hydraulic hoses 2

Connecting hydraulic hoses for machine operation.

4. Position the disconnecting rope 3

Routing the disconnecting rope for safety.

5. Connect the PTO shaft 4

Connecting the PTO shaft for power transmission.

6. Retract the height adjustable leg.

Adjusting the machine's height leg.

7. Expand or retract the spindles 7

Adjusting spindles to align the machine frame.

5. THE PTO SHAFT

5.1 LENGTH OF THE PTO SHAFT

Importance of PTO shaft length and adjustment for safe operation.

6. TRANSPORTING THE TURF TIDY

7. WORKING SPEED

8. USING THE TURF TIDY

9. WORKING DEPTH ADJUSTMENT

9.1 ADJUSTING WORKING DEPTH USING THE FRONT ROLLER

Step-by-step guide to setting working depth with the front roller.

10. START;STOP PROCEDURE TURF TIDY

11. EMPTYING THE COLLECTION TRAY

12. TROUBLESHOOTING

13. MAINTENANCE

13.1 POSITION OF LUBRICATING POINTS

Identification of lubrication points on the machine.

14.0 TENSIONING V-BELTS TURF TIDY TILL SERIAL NUMBER C310212

14.1 TENSIONING V-BELTS TURF TIDY FROM SERIAL NUMBER C310212

14.2 CHANGING; REPLACING BLADES

14.3 REPLACING HARROW; MOWING ROTOR WITH SWEEPING ROTOR

15.0 OPTIONAL EXTRAS: HARROWING BLADES

15.1 OPTIONAL EXTRAS: FLAIL BLADES

Details on optional flail blades for different applications.

15.2 OPTIONAL EXTRAS: BRUSH KIT

Information on fitting the brush kit for sweeping.

15.3 OPTIONAL EXTRAS: FRONT WHEELS

15.4 OPTIONAL EXTRAS: DOUBLE REAR WHEELS

15.5 OPTIONAL EXTRAS: PLATE PULLBAR

Redexim Turf Tidy 3000 Specifications

General IconGeneral
BrandRedexim
ModelTurf Tidy 3000
CategoryFarm Equipment
LanguageEnglish

Related product manuals