18
3. Repeat this operation with the adjacent crank and continue this way till the crankshaft will operate
more smoothly.
@ After any repair on the crankshaft, the crankshaft nuts should be checked regularly, see 12.0
@ Don’t assemble the cranks at the wrong side of the machine. See the spare part for the right part
numbers
.
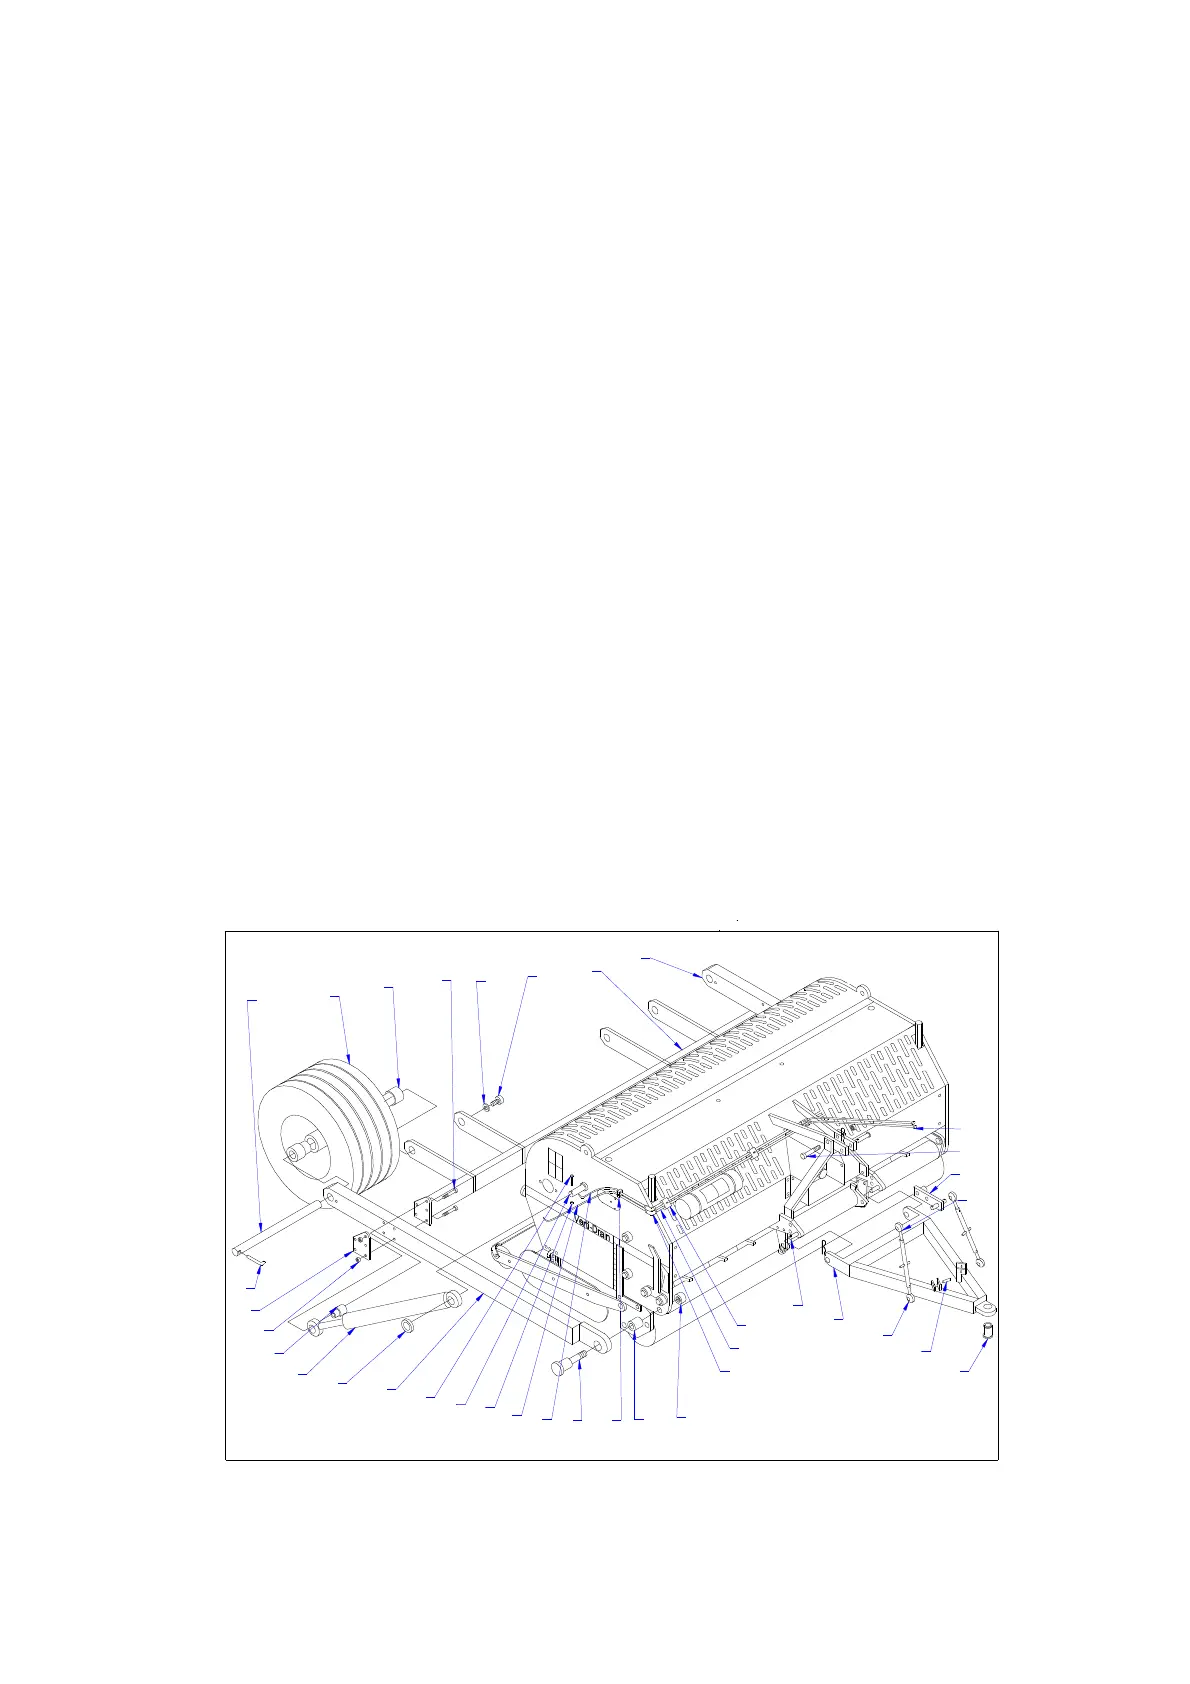
15.3 ALIGNMENT OF AN ELEMENT
In the event that an element is no longer in line with the adjacent elements, the alignment can be
corrected as follows (see fig.8.):
- Slacken the four bolts/nuts A, that connect the crankshaft to the element.
- Slacken the two bolts B, that fix the element to the main frame.
- Try to align the element by moving it side wards, till it ligns up with the adjacent ones.
- Start to tighten all bolts/nuts.
@ The element may be pushed out of line due to overload to the machine
@ When a crank is replaced, always realign the element, because if no additional tension is created
in the total element assembly.
@ Any pre-tension in the element assembly will shorten the bearing life and may damage other parts
as well.
16.0 OPTIONS, WHEEL KIT
The partnumber for a full transport kit for the 7516 is 9500100. This kit will be separately delivered
and can be mounted to a standard 3-point linkage machine. Generally speaking, a machine with
wheel kit will reduce the minimum horsepower required by 10 HP It also can be taken off quickly, so
the machine can be used either way
#
*
+
,
-
)
.
/
0
1
&
2
3
4
5
6
7
3
(
8
#
"
9
"
9
8
(
+