Do you have a question about the Reebok 8050 ES RBTL07107.0 and is the answer not in the manual?
Locate and record the model and serial numbers for product support and warranty.
Provides toll-free phone number and website for customer care and assistance with questions or missing parts.
Highlights the importance of reading all precautions and instructions before operating the equipment.
Details the location of warning decals and instructions for requesting replacements if missing or illegible.
Emphasizes keeping hands and feet clear of the treadmill area during operation to prevent injury.
Lists critical safety instructions including using handrails, safety clip, stopping if unwell, and keeping children away.
Covers physician consultation, user requirements, treadmill placement, and environmental considerations for safe operation.
Details rules for treadmill use, children/pets, starting, speed, handrails, emergency stop, and pulse sensor limitations.
Emphasizes the critical need for proper power cord connection, surge suppression, and grounding to prevent electrical hazards.
Provides guidance on safe storage, moving the treadmill, regular inspection, and preventing object insertion.
Highlights DANGER warnings regarding immediate power cord unplugging and mandates servicing by authorized representatives only.
Specifies that the treadmill is for in-home use only and not for commercial or institutional settings.
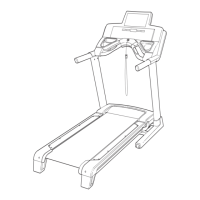
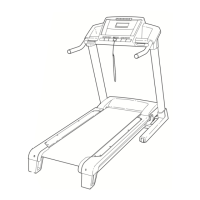
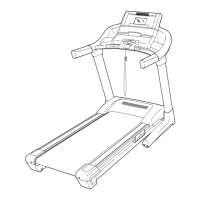
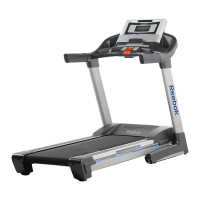
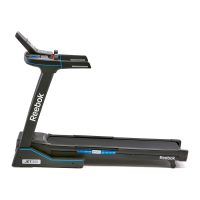
Introduces the Reebok 8050 ES treadmill and highlights its features for home workouts and space-saving design.
Emphasizes the importance of reading the manual thoroughly before operating the treadmill for questions and proper use.
Instructs users to register their treadmill online to avoid potential fees for warranty service.
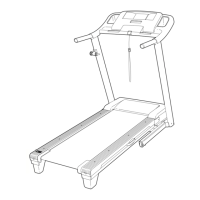
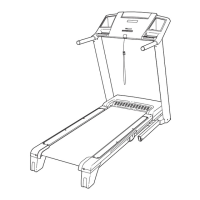
Encourages users to identify and understand the various parts of the treadmill using the provided diagram.
Offers a service number for hiring an authorized technician for treadmill assembly if needed.
Highlights that assembling the treadmill requires assistance from a second person.
Lists the necessary tools, including the included hex key and a Phillips screwdriver, and identifies assembly hardware.
Details the initial assembly steps involving attaching extension legs and base pads to the treadmill frame.
Continues assembly by attaching the second extension leg and base pads, then uprighting the frame.
Guides the installation of the latch assembly, ensuring the sleeve and knob are correctly positioned and locked.
Details attaching the latch assembly to the frame and uprights using specific bolts and nuts.
Covers lowering the frame and attaching the handrail using bolts and washers, ensuring wire harness is routed correctly.
Explains connecting the ground wire to the handrail using a ground screw.
Details connecting the console wire harness to the main harness, emphasizing proper connection to avoid console damage.
Describes setting the console assembly onto the handrail and finger-tightening screws, ensuring wires are not pinched.
Details tightening all console screws to secure the assembly, warning against overtightening.
Ensures all parts are tightened, plastic on decals is removed, and a floor mat is used.
Provides instructions for installing an optional chest pulse sensor, including connecting wires and securing the receiver.
Explains that the walking belt is pre-lubricated and warns against applying silicone spray or other substances.
Details safe power connection, emphasizing the use of a grounded outlet, surge suppressor, and avoiding GFCI outlets.
Warns about electrical shock risks from improper grounding and the need for qualified electricians.
Specifies voltage requirements and the use of adapters for non-standard outlets, advising professional installation.
Illustrates the treadmill console, identifying buttons, displays, and key components for operation.
Describes the console's capabilities, including manual mode, heart rate monitoring, and pre-programmed workouts.
Directs users to specific pages for instructions on using the manual console mode.
Advises removing protective plastic from the console screen before use to ensure proper visibility.
Explains how to check or change the unit of measurement (miles/kilometers) displayed on the console.
Warns against operating the treadmill immediately after exposure to cold temperatures to prevent damage to electrical components.
Details the steps to power on the treadmill, including plugging in the cord and setting the circuit breaker.
Explains the console's demo mode and how to turn it on or off, referencing information mode for persistent displays.
Instructs users to attach the safety clip, insert the key, and test the emergency stop function by stepping backward.
Provides step-by-step instructions for operating the treadmill in manual mode, starting with key insertion and mode selection.
Explains how to start the walking belt using the Start button or speed buttons and how to adjust speed incrementally.
Details how to adjust the treadmill's incline using dedicated buttons, noting gradual changes.
Explains how to interpret the console display for time, distance, incline, calories, speed, and heart rate.
Guides users on how to measure heart rate using the handgrip pulse sensor, including preparation and technique.
Describes how to use the treadmill's built-in fan, including speed settings and auto-shutoff.
Provides instructions for safely ending a workout, including stopping the belt, setting incline, removing the key, and powering down.
Instructs users to insert the key to begin operating the treadmill and select a program.
Details how to select one of the nine pre-programmed cross trainer workouts using specific console buttons.
Explains how to start a selected program, how the treadmill adjusts speed/incline, and how to monitor progress via the display.
Informs users about the personal trainer voice guidance available during programs and how to adjust its volume or settings.
Guides users through performing strength exercises prompted by the program, including count and form advice.
Advises users to consult an exercise chart for correct form and provides specific tips for lunges and dumbbell rows.
Explains how to resume the cross trainer program after completing strength exercises, including pressing Start.
Instructs users to insert the key to access program creation features.
Guides users to select available custom program slots (P10, P11) on the console.
Details how to set speed and incline for each segment of a custom program, saving settings as segments are completed.
Explains the meaning of indicators in the matrix display for custom programs, referencing further details on page 17.
Explains how to continue programming segments (up to 40) and save the custom program by pressing the Stop button twice.
Details starting custom programs, how speed/incline change, and how to manually adjust settings during a segment, which saves the new setting.
Explains how to change speed/incline for the current segment and how to increase or decrease program length.
Describes how to stop, restart, or resume custom programs, noting automatic adjustments upon restart.
Explains how to enter the information mode to track usage, set units, adjust audio, and manage demo mode.
Details the capabilities of the information mode, including tracking hours, distance, and setting measurement units or audio trainer settings.
Explains how the 'd' indicator appears in the information mode when the demo mode is active.
Instructs users on how to exit the information mode by removing the console key.
Provides information on purchasing an optional chest pulse sensor for hands-free heart rate tracking.
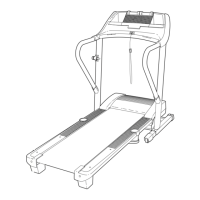
Provides detailed steps for folding the treadmill into its storage position, including incline adjustment and latch engagement.
Warns users about the required lifting capacity (45 lbs / 20 kg) for safely raising, lowering, or moving the treadmill.
Advises proper lifting techniques, emphasizing bending legs and keeping the back straight, and avoiding lifting by foot rails.
Outlines the procedure for moving the folded treadmill, including using handrails, tilting, and rolling on wheels.
Details the first step in lowering the treadmill: pulling the latch knob to release the frame.
Explains how to safely lower the treadmill frame to the floor, emphasizing proper posture and avoiding dropping.
Provides solutions for issues where the treadmill does not power on, checking cord, key, and circuit breaker.
Offers solutions for the treadmill unexpectedly shutting off during use, checking circuit breaker and cord.
Addresses console displays remaining lit after key removal, suggesting demo mode deactivation.
Details steps to troubleshoot console display issues, involving removing the key, unplugging the cord, and checking screws.
Instructs on removing the hood to access and adjust the reed switch and magnet for speed reading accuracy.
Provides solutions for a walking belt that slows during use, checking surge suppressor and belt tension.
Details how to center an off-center walking belt and tighten a slipping belt using rear roller bolts.
Explains how to recalibrate the incline system by removing and reinserting the key during incline changes.
Covers medical consultation, pulse sensor limitations, and planning exercise programs with proper nutrition and rest.
Explains determining exercise intensity for fat burning and aerobic exercise using heart rate training zones.
Provides guidelines for warming up, training zone duration, cooling down, and recommended exercise frequency.
Emphasizes slow, controlled movements when stretching and avoiding bouncing.
Describes the toe touch stretch, its target muscles (hamstrings, back), and execution details.
Details the hamstring stretch, focusing on leg and lower back muscles, with instructions for execution.
Explains the calf and Achilles stretch, targeting lower leg muscles, and provides variations for deeper stretching.
Describes the quadriceps stretch, focusing on thigh and hip muscles, with balance tips.
Details the inner thigh stretch, targeting hip and quadriceps muscles, with instructions for proper form.
Instructs users to refer to the exploded drawings to locate parts listed by key number and description.
Provides instructions on ordering replacement parts, requiring model, serial, and part key numbers.
Details the product's limited warranty, covering drive motor and parts/labor, and specifies exclusions.