10
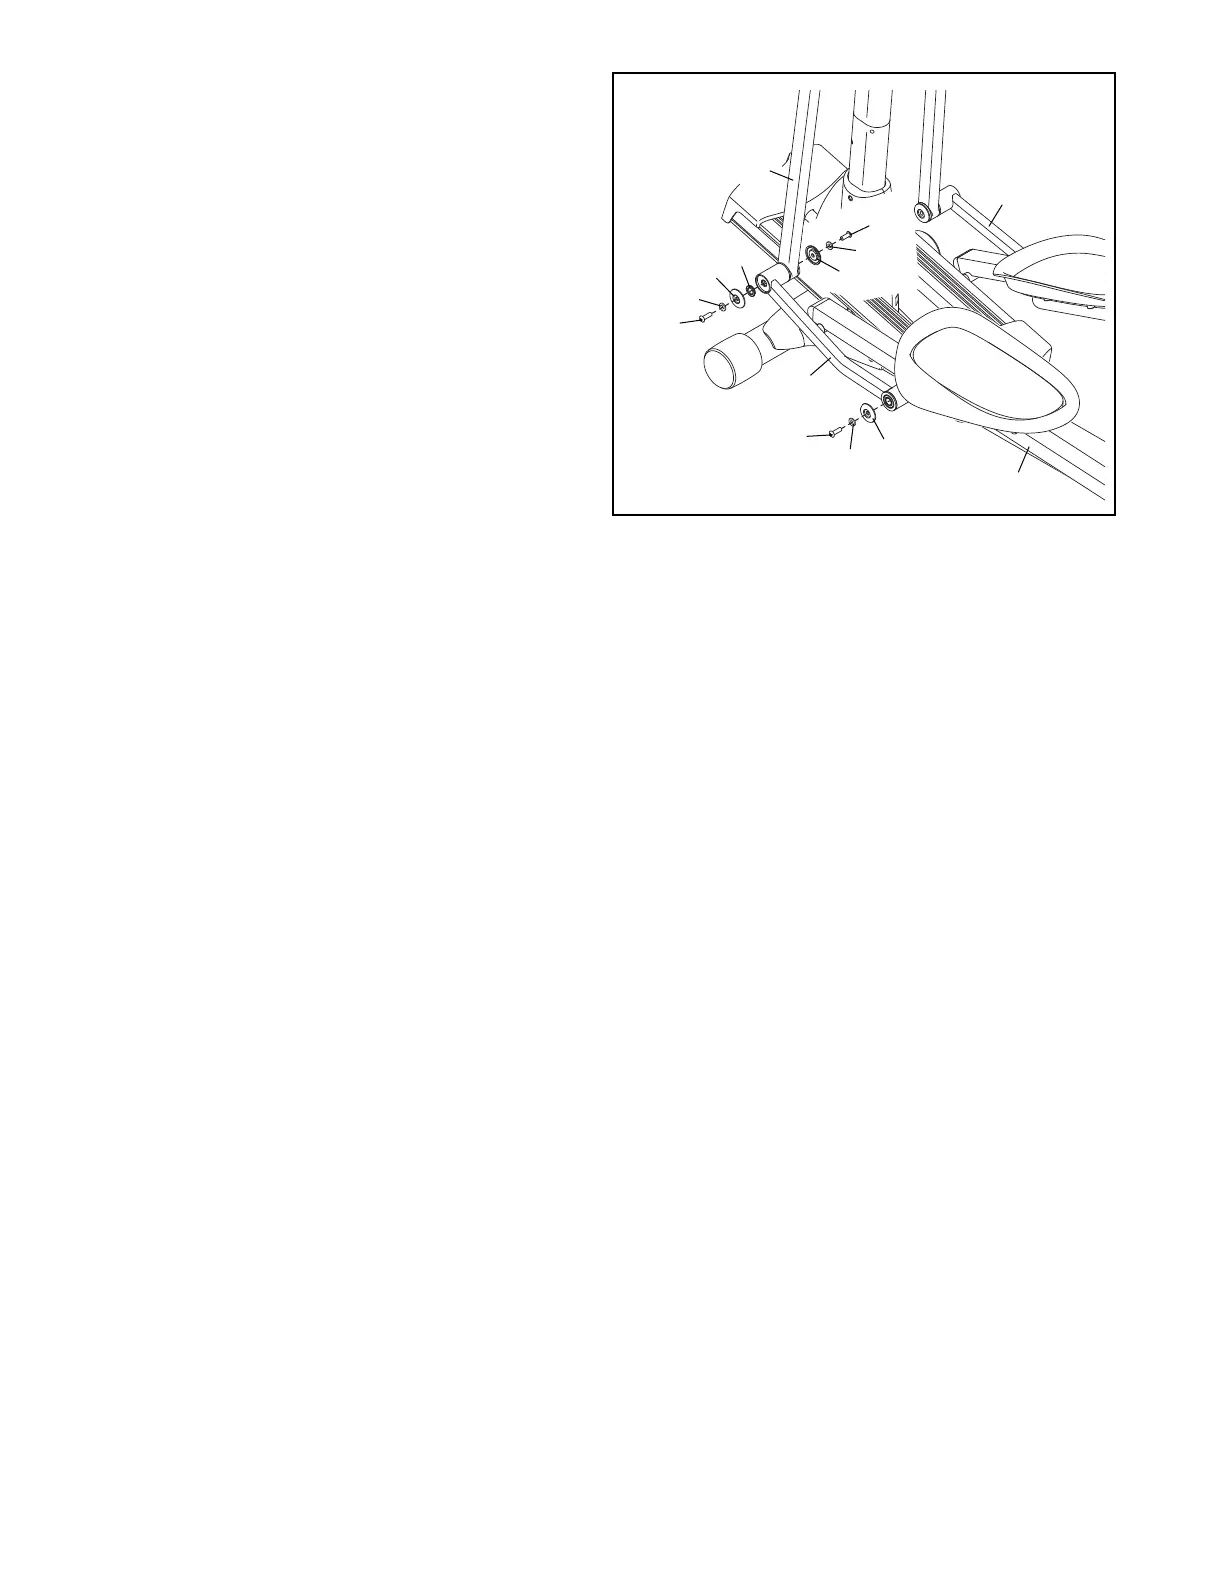
10. Attach the Left Link Arm (30) to the Left Pedal
Arm (32) with an M8 x 15mm Patch Screw
(106), an M8 x 16mm Washer (103), and an
A
xle Cover (66).
A
ttach the Left Link Arm (30) to the left Upper
Body Leg (24) with an M8 x 25mm Patch Screw
(110), two M8 x 16mm Washers (103), two Axle
Covers (66), a Link Arm Spacer (74), and an
M8 x 15mm Patch Screw (106) as shown.
Attach the Right Link Arm (31) in the same
way.
10
66
74
103
110
66
32
30
31
103
106
24
66
103
106
11. Plug the power cord into the power receptacle at the rear of the elliptical exerciser (see HOW TO PLUG IN
THE POWER CORD on page 11). IMPORTANT: If the elliptical exerciser has been exposed to cold tem-
peratures, allow it to warm to room temperature before plugging in the power cord. If you do not do
this, you may damage the console displays or other electronic components.
Make sure that all parts of the elliptical exerciser are properly tightened. Note: Some hardware may be
left over after assembly is completed. To protect the floor or carpet from damage, place a mat under the
elliptical exerciser.