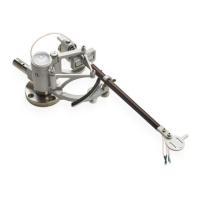
6. Azimuth adjustment (Figure 24)
a) If you need to adjust azimuth, hold the
armwand cylinder [7b] and loosen
azimuth adjustment screw [7c] by using
hex (allen) key [4].
b) By carefully turning the armtube [7]
clockwise or counterclockwise adjust
azimuth and tighten azimuth adjustment
screw [7c]. While adjusting azimuth
do not apply excessive force – it can
damage tonearm bearings.
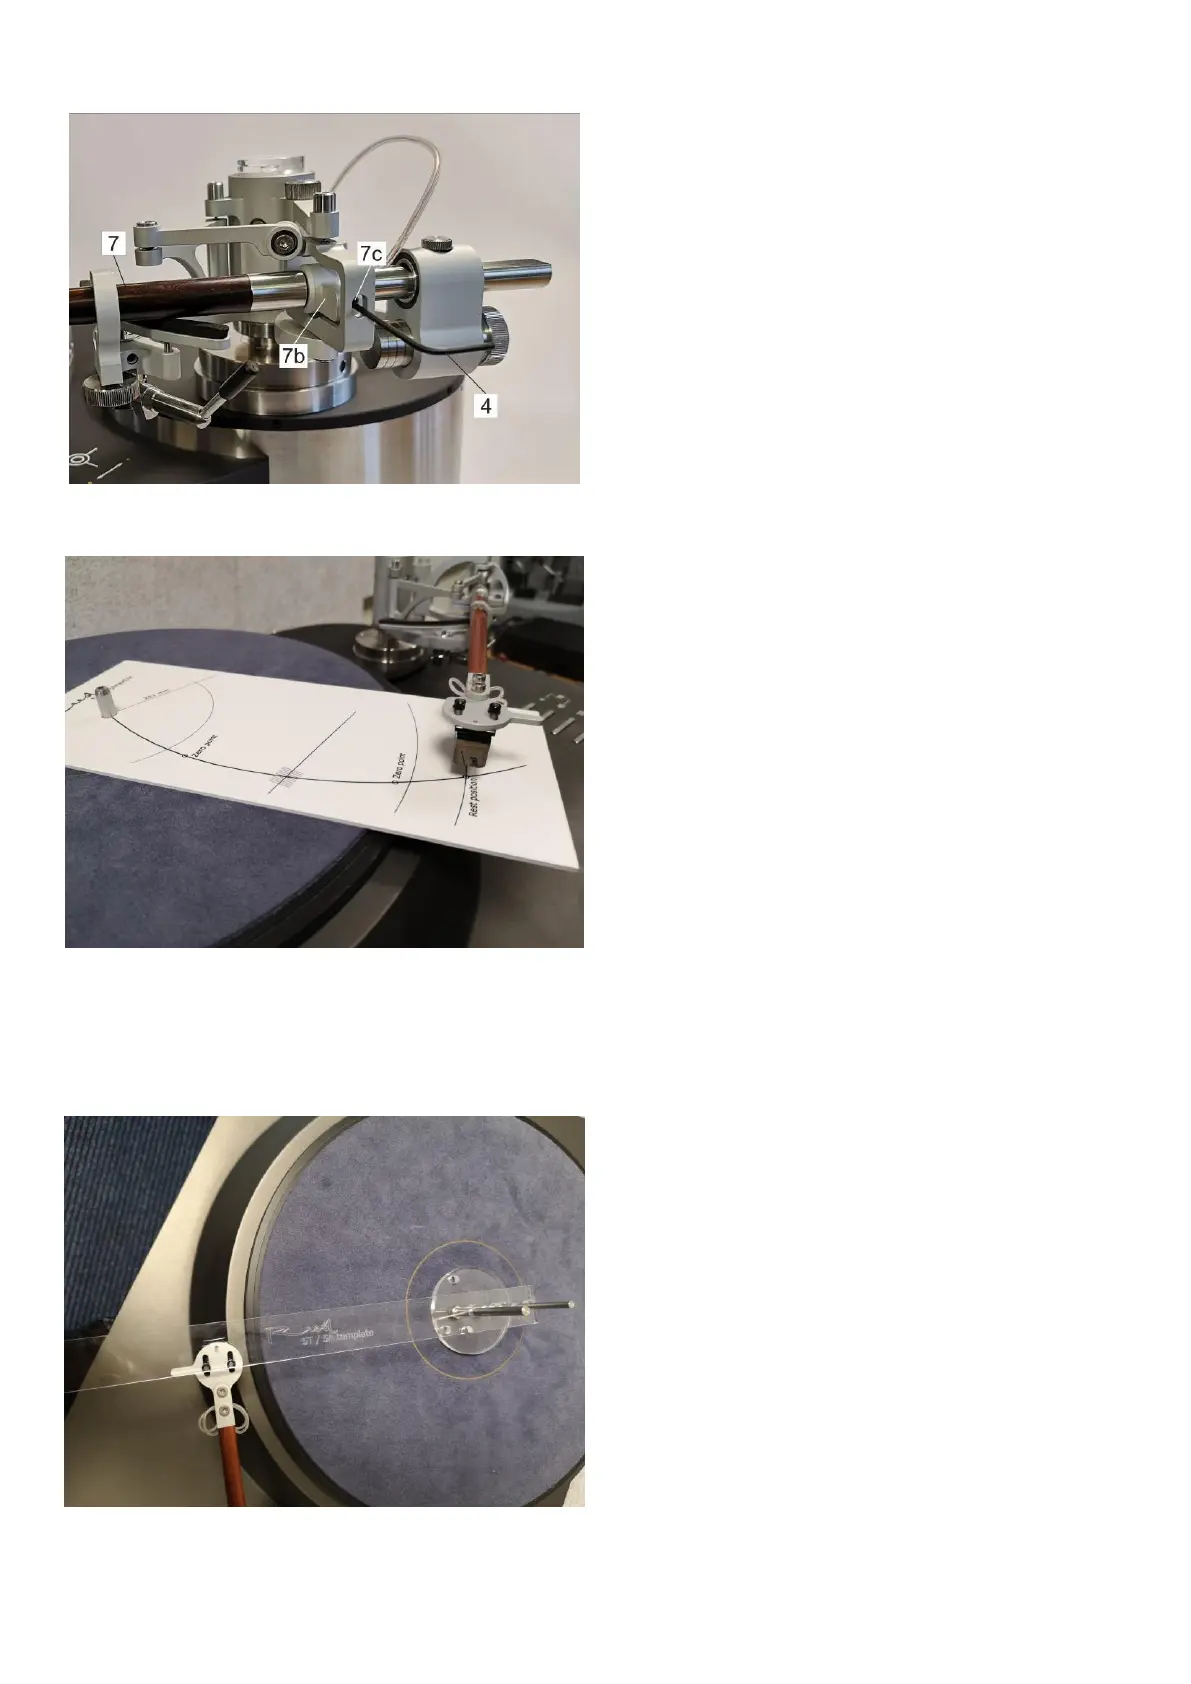
7. Check if the tonearm is mounted
correctly with protractor [1] (Figure 1)
and template [2] (Figure 2)
a) Protractor hole should be mounted on
the turntable spindle.
b) Needle of the cartridge should follow the
line towards the center of the turntable
spindle.
c) Needle of the cartridge should match
zero points on the protractor.
(Figure 25)
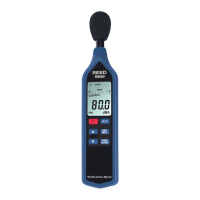
d) Check tonearm setup using Reed 5T-5A
template [2] (Figure 2). Template’s
small hole should be aligned with small
hole in the headshell and the needle of
the cartridge (Figure 26). Max allowed
deviation is +/- 1 mm. If deviation is
bigger, please check your tonearm setup
according to steps 2-a, 2-b, 2-c, 2-d and
2-e of this manual.