Installation and assembly
— English Reflex ex separator — 21.11.2016
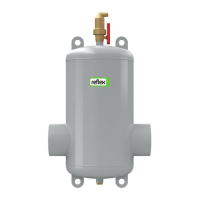
• Fit the safety plug on the bottom side of the separator.
• Fit the large vent with 3-way valve bottom part on the top side of the separator. Maintain the large vent freely opened.
• Fit the draw-off tap on the bottom side of the separator. Close the valves.
• Fit the vent plug on the top side of the separator. Ensure the vent plug is always correctly closed, open it for manual venting.
• Installation of the Exferro magnetic insert on the bottom side of the separator:
First insert the Exferro component in the separator, as can be seen in the figure see chapter 5.2.3 "Sludge separator with magnet
insert" on page 12 . Then fit the draw-off tap (supplied with the Exdirt) correctly to the side on the T-piece of the magnetic insert.
Lastly close the valve.
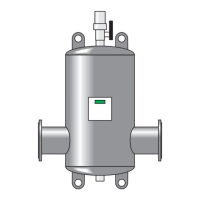
• Fit the draw-off tap on the bottom side of the separator. Close the valves.
• Fit the large vent with 3-way valve bottom part on the top side of the separator. Maintain the large vent freely opened.
• Installation of the Exferro magnetic insert on the bottom side of the separator:
First insert the Exferro component in the separator, as can be seen in the figure see chapter 5.2.3 "Sludge separator with magnet
insert" on page 12 . Then fit the draw-off tap correctly to the side on the T-piece of the magnetic insert. Lastly close the valve.
Comply with the following instructions:
• To drain the released air or gases (odour, explosive gases), you may connect an additional hose or pipe at the ½“ thread of the blow-
off opening.
Note!
The device is now ready for use.
Note!
If the separators are equipped with a Reflex Exiso heat insulation unit or another type of heat insulation, then tap
extensions must be fitted on the upper or lower side of the connection according to the thickness of the insulation.
These
are supplied with the insulation or made available on site. This ensures accessibility of the add
-on components.
Cooke Industries - Phone: +64 9 579 2185 Email: sales@cookeindustries.co.nz Web: www.cookeindustries.co.nz