Exigo RU
3
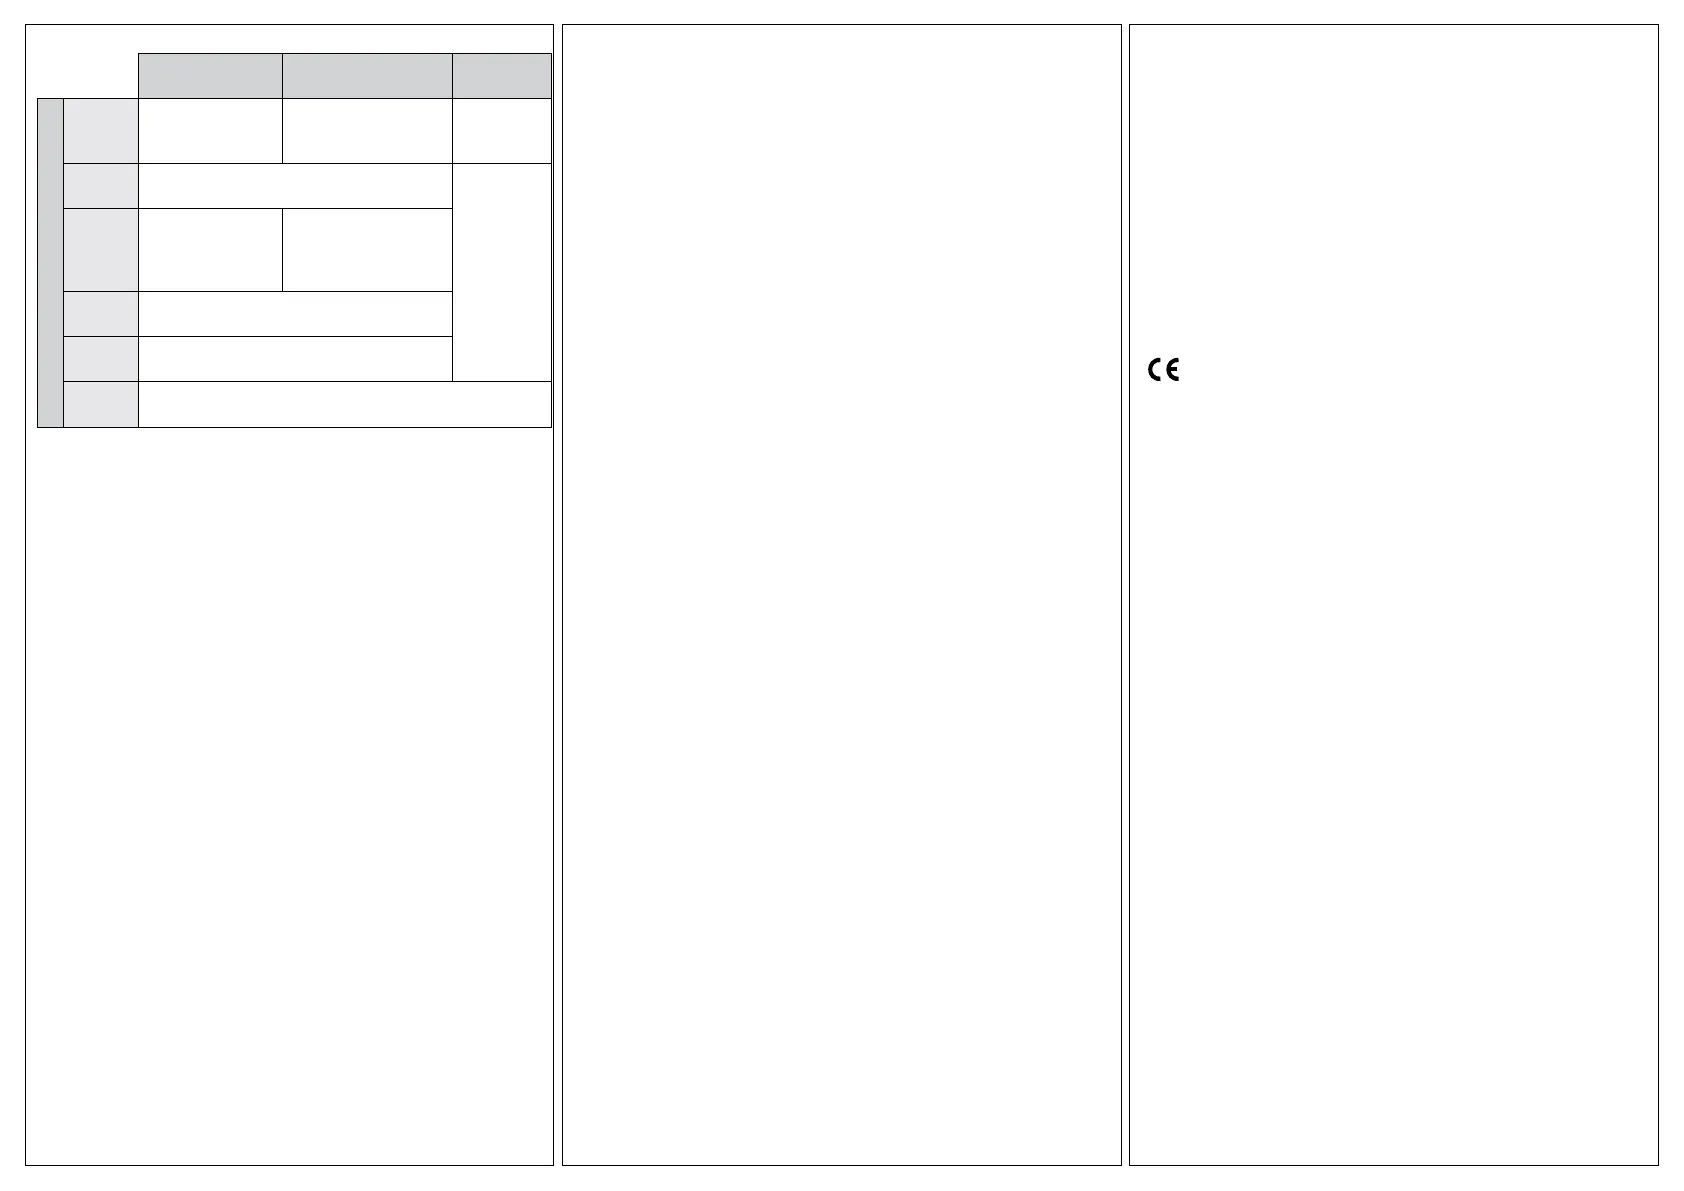
Heating circuits Domestic hot water
circuits
Heat
producer
Off Off: Valve stays in
current position,
pump off
Off: Valve stays in cur-
rent position, pump off
Off
Auto Automatic operation: Automatic setpoint switch-
ing depending on timer program (day/night)
Automatic
operation:
Setpoint
according to
demand
Summer Switch-off operation:
Valve closed, Pump
off, Frost protection
remains active
Automatic operation:
Automatic setpoint
switch depending on
timer program
Holiday Reduced operation/support operation: Setpoints
of non-operating time NO (night) apply
Duration Nominal operation: Setpoints of operating time
1 OT1 day apply
Manual Manual operation: Valve and pump function as dened in the
“Manual operation” menu
Switch position
System overview
1. If you are not already in the default display, press ”UP” until you
are.
2. Press ”-”. You will see a list of the most important parameters.
These give you an overview of your system.
3. Use ”UP” and ”DOWN” to go through the list.
Activate overtime in HC - start loading of DHW
1. If you are not already in the default display, press ”UP” until you
are.
2. Press “DOWN” will get you to the overtime menu.
3. Select the library program for which you want to activate or
deactivate the overtime (overtimeHCx, LoadDHW) by using
”UP” and ”DOWN”.
4. Select activate (ON) or deactivate (OFF) the overtime / loading
function by using ”-” or ”+”.
5. Press ”OK” to enter the selected value.
Enter access code
1. If you are not already in the default display, press ”UP” until you
are.
2. Press and hold ”OK”. You will be asked to enter the access
code digit by digit. To change setpoints or adjust the system
clock, enter the access code ”1111”.
3. Use ”-” and ”+” to select the digit.
4. Press ”OK” to enter the digit. The display will jump automatically
to the next digit.
5. When the access code has been correctly entered, it will be
shown by the controller in the display.
Start boiler or heat pump for maintenance
1. If you are not already in the default display, press ”UP” until you are.
2. Press “UP” for more than 2 s to start the function.
3. Press “UP” again to stop the function.
Adjusting setpoints
1. If you are not already in the default display, press ”UP” until you are.
2. Press ”OK” to enter the MCR/BMS menu.
3. Select the library program for which you wish to adjust the setpoints
(heating circuit 1, heating circuit 2 or the domestic hot water circuit
(DHW)).
4. Press ”OK” to enter the menu for the selected library program.
5. Press ”DOWN” to select setpoints.
6. Press ”OK” to enter the list of setpoints.
7. Use ”UP” and ”DOWN” to select the setpoint you want to change.
8. Use ”-” and ”+” to adjust the setpoint.
9. Press ”OK” to enter the new value.
Adjusting the timer
1. If you are not already in the default display, press ”UP” until you are.
2. Press ”OK” to enter the MCR/BMS menu.
3. Use ”UP” and ”DOWN” to select the menu item timers.
4. Press ”OK” to enter the timer menu.
5. Press ”DOWN” to select timer chan. select..
6. Press ”OK” to enter the timer channel selection menu.
7. Use ”UP” and ”DOWN” to select the timer you wish to adjust. A
maximum of 4 timers are available, depending on the selected sys-
tem diagram (one for each heating circuit, one for the DHW circuit
and one free timer).
8. Press ”OK” to enter the specied timer menu.
9. Use ”UP” and ”DOWN” to select the menu in which you want to
make the adjustment (weekly program, special occupation time
or special non-occupation time).
10. Press ”OK” to enter the selected menu.
11. To make the adjustment, go to the parameter you wish to adjust.
12. Use ”-” and ”+” to adjust the parameter.
13. Press ”OK” to enter the new value.
Adjusting the system clock
1. If you are not already in the default display, press ”UP” until you are.
2. Press ”OK” to enter the MCR/BMS menu.
3. Use ”UP” and ”DOWN” to select the menu item timers.
4. Press ”OK” to enter the timer menu.
5. Use ”UP” and ”DOWN” to select the menu item timer service.
6. Press ”OK” to enter the timer service menu.
7. Use ”UP” and ”DOWN” to select the menu in which you want to
make the adjustment (time or date).
8. Press ”OK” to enter the selected menu.
9. Use ”-” or ”+” to adjust the parameter.
10. Press ”OK” to enter the new value.
Trouble indication
A trouble indication is shown in the display when the display is in the
standard menu. The trouble indication message is shown in an inter-
val. Please contact your service personnel and supply the information
which you will nd in the ”System overview” menu (see the ”System
overview” section).
Low Voltage Directive (LVD) standards
This product conforms to the requirements of the European Low
Voltage Directive (LVD) 2006/95/EC through product standards
EN 60730-1 and EN 60730-2-9.
EMC emissions & immunity standards
This product conforms to the requirements of the EMC Direc-
tive 2004/108/EC through product standards EN 61000-6-1 and
EN 61000-6-3.
RoHS
This product conforms to the Directive 2011/65/EU of the European
Parliament and of the Council.
Contact
AB Regin, Box 116, 428 22 Kållered, Sweden
Tel: +46 31 720 02 00, Fax: +46 31 720 02 50
www.regin.se, info@regin.se
 Loading...