4. Insert tting into pipe up to the stop. After a brief period, the tting will sit
tightly in the pipe (memory effect).
Attention:
All sealing ribs must be covered. Until the memory effect sets in fully, the
tting can fall out of the pipe! Make sure to seat the tting in level position.
6. Start compression process by actuating the operating switch and press in
the compression sleeve up to the tting collar.
Attention:
Do not touch moving parts (risk of trapping ngers)!
The compression process can be interrupted at any time by releasing the
operating switch.
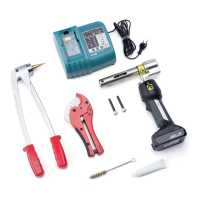
7. The tool comes equipped with a semi-automatic release valve. If the tool is
moved to its nal position for a prolonged period or used again after arriving
at its nal position, the tool will automatically return to its starting position.
Furthermore, the tool can be manually returned to its starting position if the
release valve is actuated (black button opposite the operating switch).
8. Completely compressed compression sleeve joint.
Processing at temperatures under -10 °C and over +45 °C may result
in damage to jointing components, to the tool and/or in personal
injury.
- Do not work below the minimum processing temperature of -10°C!
- At lower temperatures (below 0 °C) it is recommended that the
jointing components be stored in a warm environment before being
processed.
5. Fully insert the joint into the clamping tool.
Attention:
Do not tilt! Tool must be applied over full surface and at right angles.
 Loading...