10
DE
EN
IT
ES
FR
FI
DK
SE
3. MOUNTING INSTRUCTIONS
2 people are needed for the assembly.
1. Remove the mounting extrusion from the carton and mount it on the bottom side of your
tent (in a 90° angle to your roof rack). If you intend opening the roof tent off the rear of
your vehicle, you have to cut the aluminium profiles).
2. Place the tent on its side on the ground onto a clean surface.
3. Using the four supplied 6mm bolts and 6mm fender washers, slide your hand in between
the inside of the case and mattress and insert the bolts into the predrilled holes.
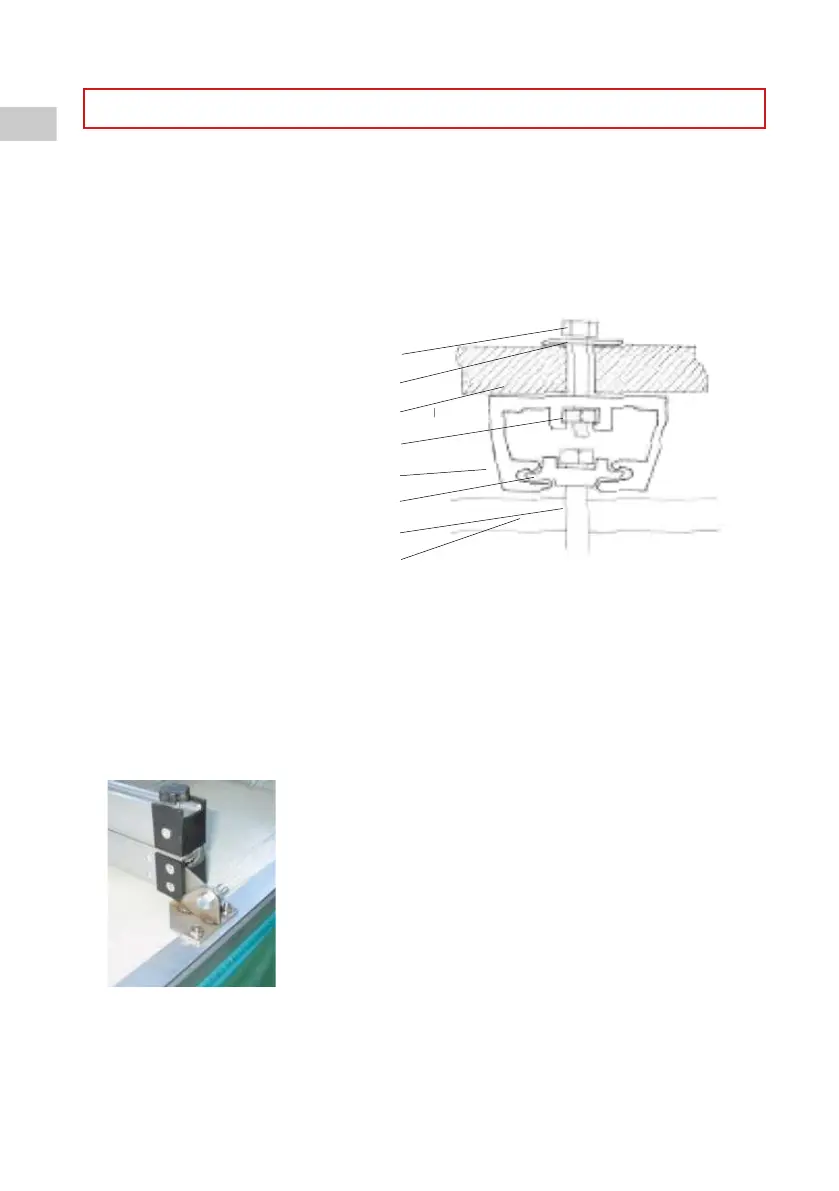
See diagram
- 6mm stainless steel bolt
- fender washer
- tent base
- 6 mm nut
- aluminum mounting extrusion
- slide plate with 8mm
- stainless steel bolt
- roof rack or roof bars
4. Place the mounting extrusion into position over the bolts.
5. Slide the 6mm nuts into the mounting extrusions and tighten the bolts firmly from inside
the tent.
6. Mount the ladder to the base of the tent using four 6mm bolts. Bolt each ladder bracket to
the base of the tent through the predrilled holes.
See figure 1.
figure 1