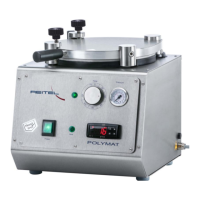
Installation
The electric equipment is being delivered fully installed. The sealed plug can be connected
directly to the mains supply 230 V/16 A. For installation please refer to chapter 2.
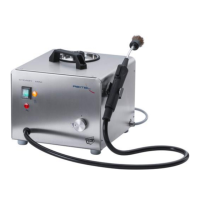
Operating Instructions
Chronological run of operation
1. Use the device only when it’s filled with water. (Pay attention to the safety notes in
chapter 2). In order to avoid an unintended dry run a daily filling in the morning is
recommended. Turn the heating control (5) completely to the left (if necessary ventilate
tank by activating steam gun). Fill the device only in a cold state. Open tank cap (6) and
fill in distilled or decalcified water up to the edge (a filling funnel is recommended). Close
the tank cap (6) hand-tight.
2. Attach the required steam nozzle or brush (16 / 18 / 19) and be sure it is securely
attached during steam cleaning.
3. Turn power switch (2) on. Set heating control (5) to max. by turning in clockwise direction.
After the maximum pressure has built up and the control lamp (4) goes out. If the heating
control is not set to max., the control lamp heating (4) might shine, although the tank was
filled up. However the STEAMY MINI is ready for operation, but at low temperature. The
heating is automatically activated and the lamp (4) shines.
4. Adjust steam pressure with controller (5).
5. For dry steam please press steam gun switch (13). (Pressure builds up only in the upper
quadrant of the controller area. Pressure builds up with a slight delay.)
6. For nozzle change use the special tool (17) when the nozzle (18 / 19) is too hot or the
steam brush has been attached too tight. Slide the tool (17) with its round opening over
the steam nozzle or brush (18 / 19), gently press together and detach the nozzle or
brush. When attaching another nozzle or brush be sure it is securely attached during
steam cleaning.
 Loading...