Page 9
Clean air filter element
1. Clean the outside of the air filter body and release the two
clips retaining the body to the base plate. (figure 8)
2. Carefully withdraw the element from the base plate.
3. Clean the base plate and body interior
4. Clean between folds of the element using a low pressure air
line or soft brush.
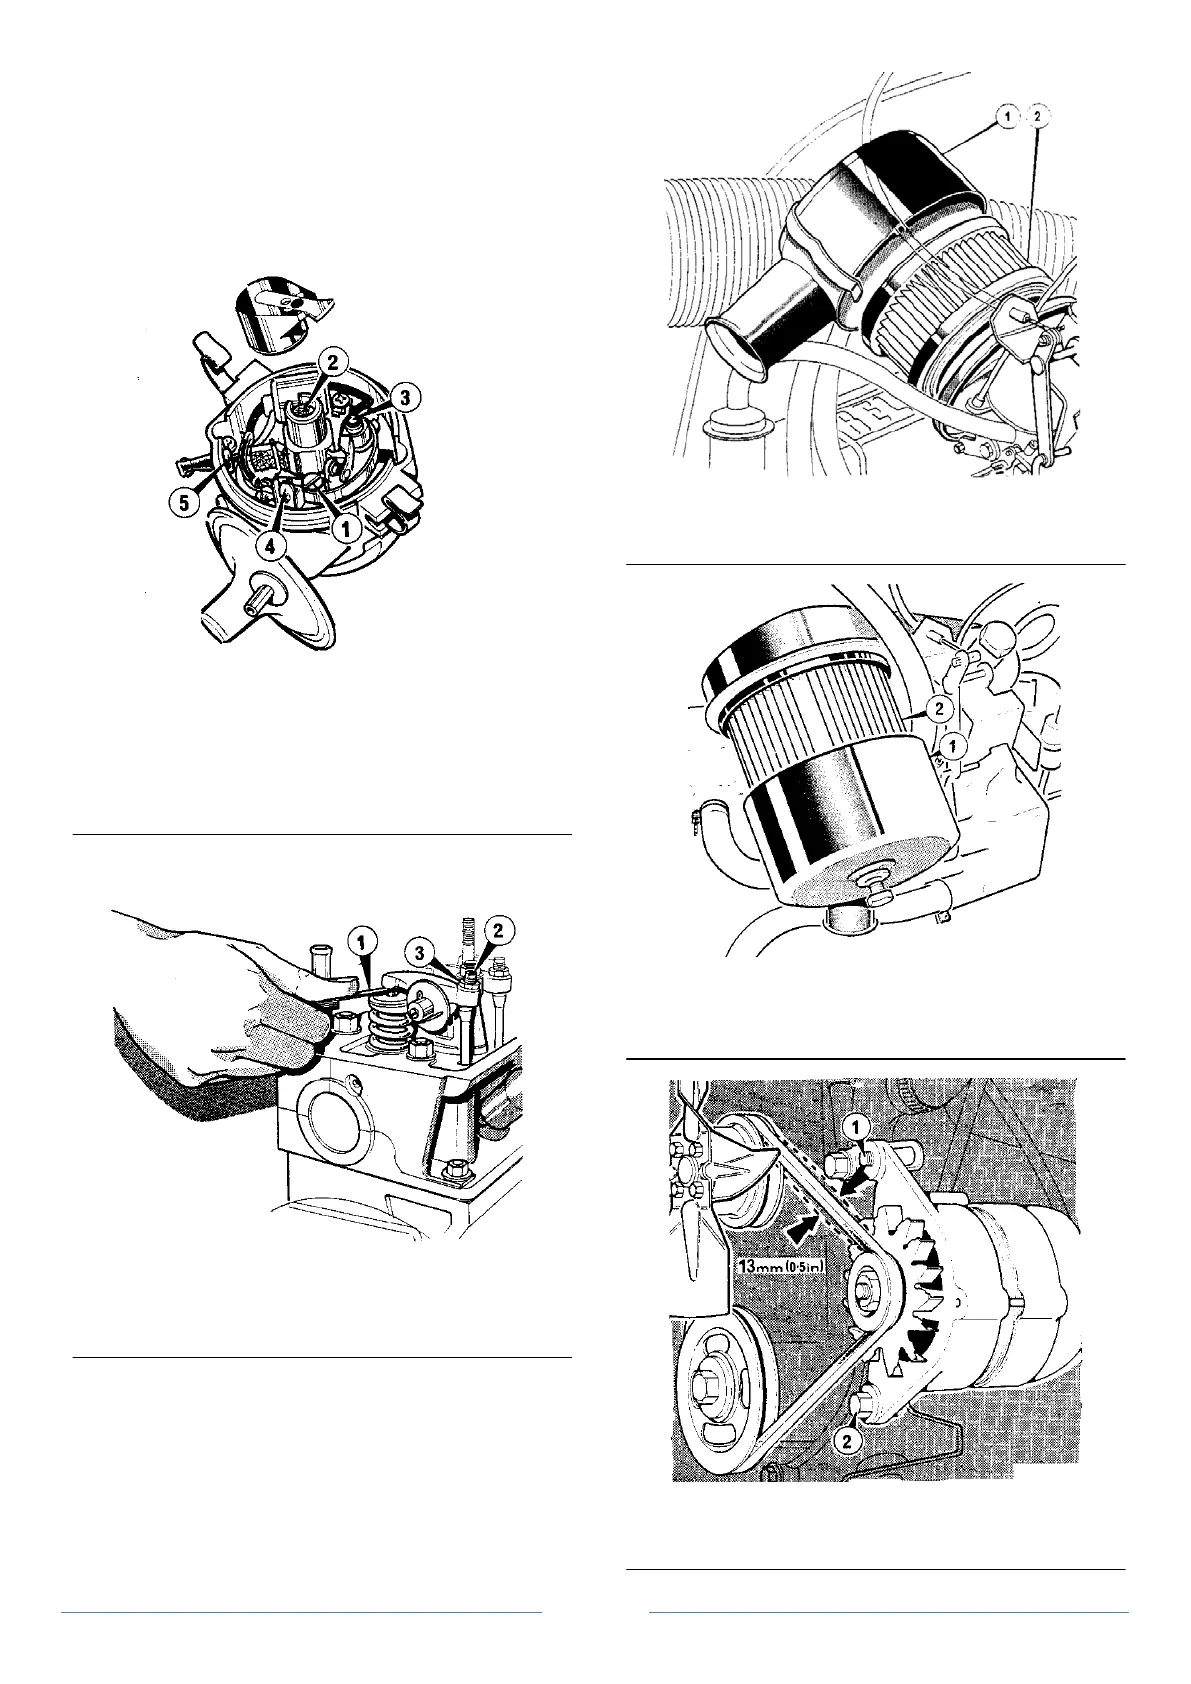
Figure 6 Distributor - general view
1. Locking/adjustment screw.
2. Cam spindle lubrication pad.
3. Breaker arm pivot post.
4. Terminal post.
5. Low tension lead.
Figure 7 Valve clearance - tappet adjustment
1. Feeler gauge.
2. Adjusting screw.
3. Lock nut.
5. refit the element or replace with a new element ensuring
the plastic ends of the element are smeared with petroleum jelly or
grease to facilitate sealing.
6. Replace the body and secure with the two clips.
Note: The frequency necessary for cleaning or replacing the element
will depend on the severity of the operating conditions and where
there are heavy dust concentrations or unusually severe conditions
more frequent attention should be given to the cleanliness of the unit.
Figure 8 Air Cleaner
1. Body.
2. Element.
Figure 8A Air cleaner from chassis No 6F7/14701001sal,
6F7/14801002 estate, 6H1/14901043 van
1. Body
2. Element
Figure 9 Fan belt adjustment
1. Adjustment locking screw.
2. Alternator front mounting bolt.