EasyManua.ls Logo

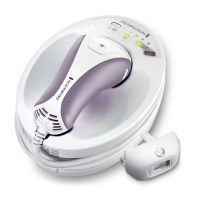
Remington iLIGHT Ultra User Manual

Remington iLIGHT Ultra
108 pages
To Next Page IconTo Next Page
Page #1 background imageLoading...
Page #1 background image
IPL6500
Use and
Care Guide
Register Your New Product Today!
By registering your new Remington
®
product, you will receive these important benefits:
Proof of Ownership • Product Protection • Product Registration • Special Offers
Register online at: RemingtonProducts.com
®
®
Question and Answer IconNeed help?

Do you have a question about the Remington iLIGHT Ultra and is the answer not in the manual?

Remington iLIGHT Ultra Specifications

General IconGeneral
Skin Tone SensorYes
Treatment Levels5
Corded/CordlessCorded
Clinically provenYes
Warranty2 years
TechnologyIPL (Intense Pulsed Light)
Treatment AreasLegs, underarms, bikini line, face
Pulse Count120, 000 flashes

Summary

Hair Color Suitability

Contraindications: Who Should Not Use the Device

General Warnings for Safe Operation

Precautions for Device Use

Potential Risks and Side Effects

What to Expect During and After Treatment

Expected Results: One to Two Weeks Post-Treatment

Expected Results: Two Weeks Post-Last Treatment

Using the Device for Treatment: Step 1 - Prepare Skin

Using the Device: Step 2 - Turn On and Unlock

Step 2a: Power Switch and Skin Tone Sensor Status

Details turning on the device and the initial indication of the Skin Tone Sensor.

Step 2b: Correct Skin Tone Sensor Placement

Guides on properly positioning the Skin Tone Sensor window on the skin for accurate readings.

Step 2c: Placing Skin on Sensor for Test

Explains how to position the body part on the sensor to initiate the skin tone reading.

Step 2d: Unsuitable Skin Tone Indication

Describes the device's response for unsuitable skin tones and the option to re-test.

Step 2e: Suitable Skin Tone Confirmation

Explains the audible and visual confirmation when the skin tone is suitable for treatment.

Step 2f: Device Ready for Use

Indicates the device is enabled and set to the lowest energy level after a successful skin tone test.

Step 3: Select Energy Level

Energy Level Settings and Controls (Table 1)

Step 4: Skin Patch Test Procedure

Provides instructions for performing a patch test to determine the correct energy level.

Skin Patch Test Guidance (Table 2)

Important Warning: Single Flash Per Skin Patch

Step 5: Treat Your Skin - Core Procedure

Recommended Treatment Schedule

Additional Treatment Tips for Optimal Results

After Your Treatment: Device Care and Storage

Replacing the Lamp Cartridge

Step-by-Step Cartridge Replacement Guide (Figure 7)

Troubleshooting Common Device Issues

Troubleshooting: Device Not Responding on Skin

Troubleshooting: No Flash When Button Pressed

Troubleshooting: Cooling Down Indicator and Beeping

Troubleshooting: Flashing Lights and Beeping Errors

Troubleshooting: System Flash and Constant Beeping

Troubleshooting: Skin Tone Sensor Yellow Light Issue

Troubleshooting: Obstruction on Flash Window

Refined Treatment Schedule and Skin Irritation Advice

Related product manuals