_6_0
__
6_1_0_[;]
21
CABINE
Déshabillage
- Habillage
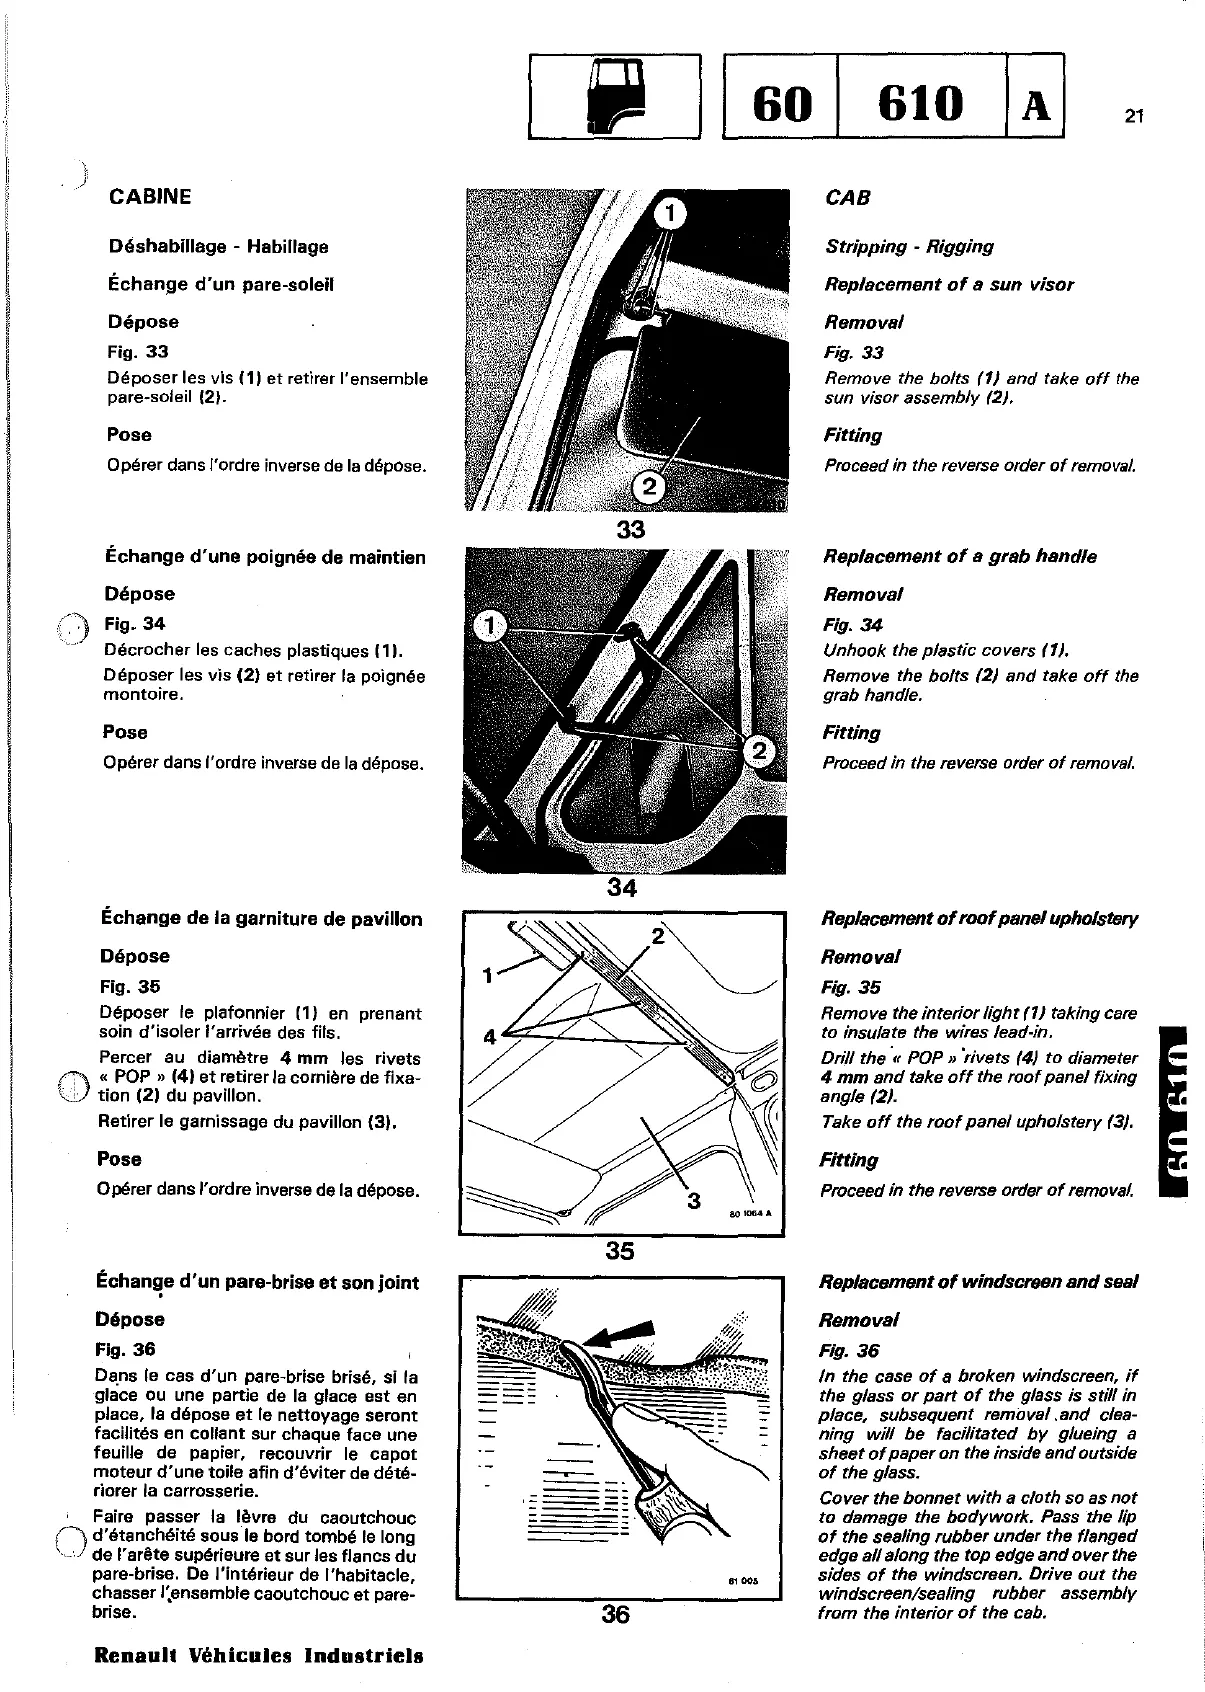
Échange
d'un
pare-soleil
Dépose
Fig.
33
Déposer
les vis
f1J
et
retirer l'ensemble
pare-soleil
(21.
Pose
Opérer
dans
l'ordre
inverse de
la
dépOse.
33
CAB
Stripping
-
Rigging
Replacement
of
a
sun
visor
Removal
Fig.
33
Remove the bolts
"J
and
take
off
the
sun visar assembly
(2).
Fitting
Proceed in the reverse arder
af
remaval.
Échange
d'une
poignée de
maintien
Dépose
Fig.
34
Décrocher
les
caches plastiques
Ill.
Déposer
les
vis
(2)
et
retirer la poignée
montoire.
Pose
Opérer
dans
l'ordre
inverse de
la
dépose.
Échange
de
la
garniture
de
pavillon
Dépose
Fig.
35
Déposer le plafonnier
11)
en
prenant
soin
d'isoler
l'arrivée des fils.
Percer au diamètre 4
mm
les rivets
o « pOP » (4)
et
retirer la cornière
de
fixa-
\.Jj
tion (2) du pavillon.
Retirer le garnissage
du
pavillon (3).
Pose
Opérer dans "ordre inverse
de
la
dépose.
Échan~e
d'un
pare-brise
et
son
joint
Dépose
Fig.
36
Ds.ns
le cas d'un pare-brise brisé, si la
glace
ou
une partie
de
la
glace
est
en
place,
la
dépose
et
le nettoyage
seront
facilités
en
collant
sur chaque face une
feuille
de
papier, recouvrir le
capot
moteur d'une toile afin d'éviter
de
dété-
riorer la carrosserie.
Faire passer la lèvre du caoutchouc
O
d'étanchéité sous le bord tombé
le
long
,~-'.
de
"arête
supérieure
et
sur les flancs
du
pare-brise.
De
l'intérieur
de
l'habitacle,
chasser I:ensemble caoutchouc
et
pare-
brise.
Renau"
Véhicules
Industriels
~
-_.
-----
'=======
36
.""
Replacement
of
a
grab
handle
Removal
Fig.
34
Unhook the
plastic
co
vers
"J.
Remove the
bolts
,2J
and
take
off
the
grab handle.
Fitting
Proceed in the reverse arder
af
remaval.
Replacement
of
roof
panel
upholstery
Removal
Fig.
35
Remave the interiar
light
(1)
taking care
to
insulate the wires lead-in.
Drill
the
'tt
POP
}}
'rivets
(4)
ta
diameter
4
mm
and
take
off
the
roof
panel fixing
angle ,2J.
Take
off
the
roof
panel
upholstery '3J.
Fitting
Proceed in the reverse order
of
remaval.
Replacement
of
windscreen
and
seal
Removal
Fig.
36
ln
the case
of
a braken windscreen,
if
the glass
or
part
of
the glass is
still
in
place, subsequent
removal.and
c/ea-
ning
will
be facilitated
by
glueing a
sheet
of
paper
on the inside
and
outside
of
the glass.
Caver
the
bonnet
with
a c1ath so as
not
to
damage the
bodywork.
Pass the /ip
of
the sea/ing rubber under the flanged
edge
ail
along the top edge
and
over
the
sides
of
the windscreen. Drive
aut
the
windscreenlsealing rubber assembly
tram
the
interior
of
the cab.