62
Li]
1_6_0
L--
6
_
tO
_[;]
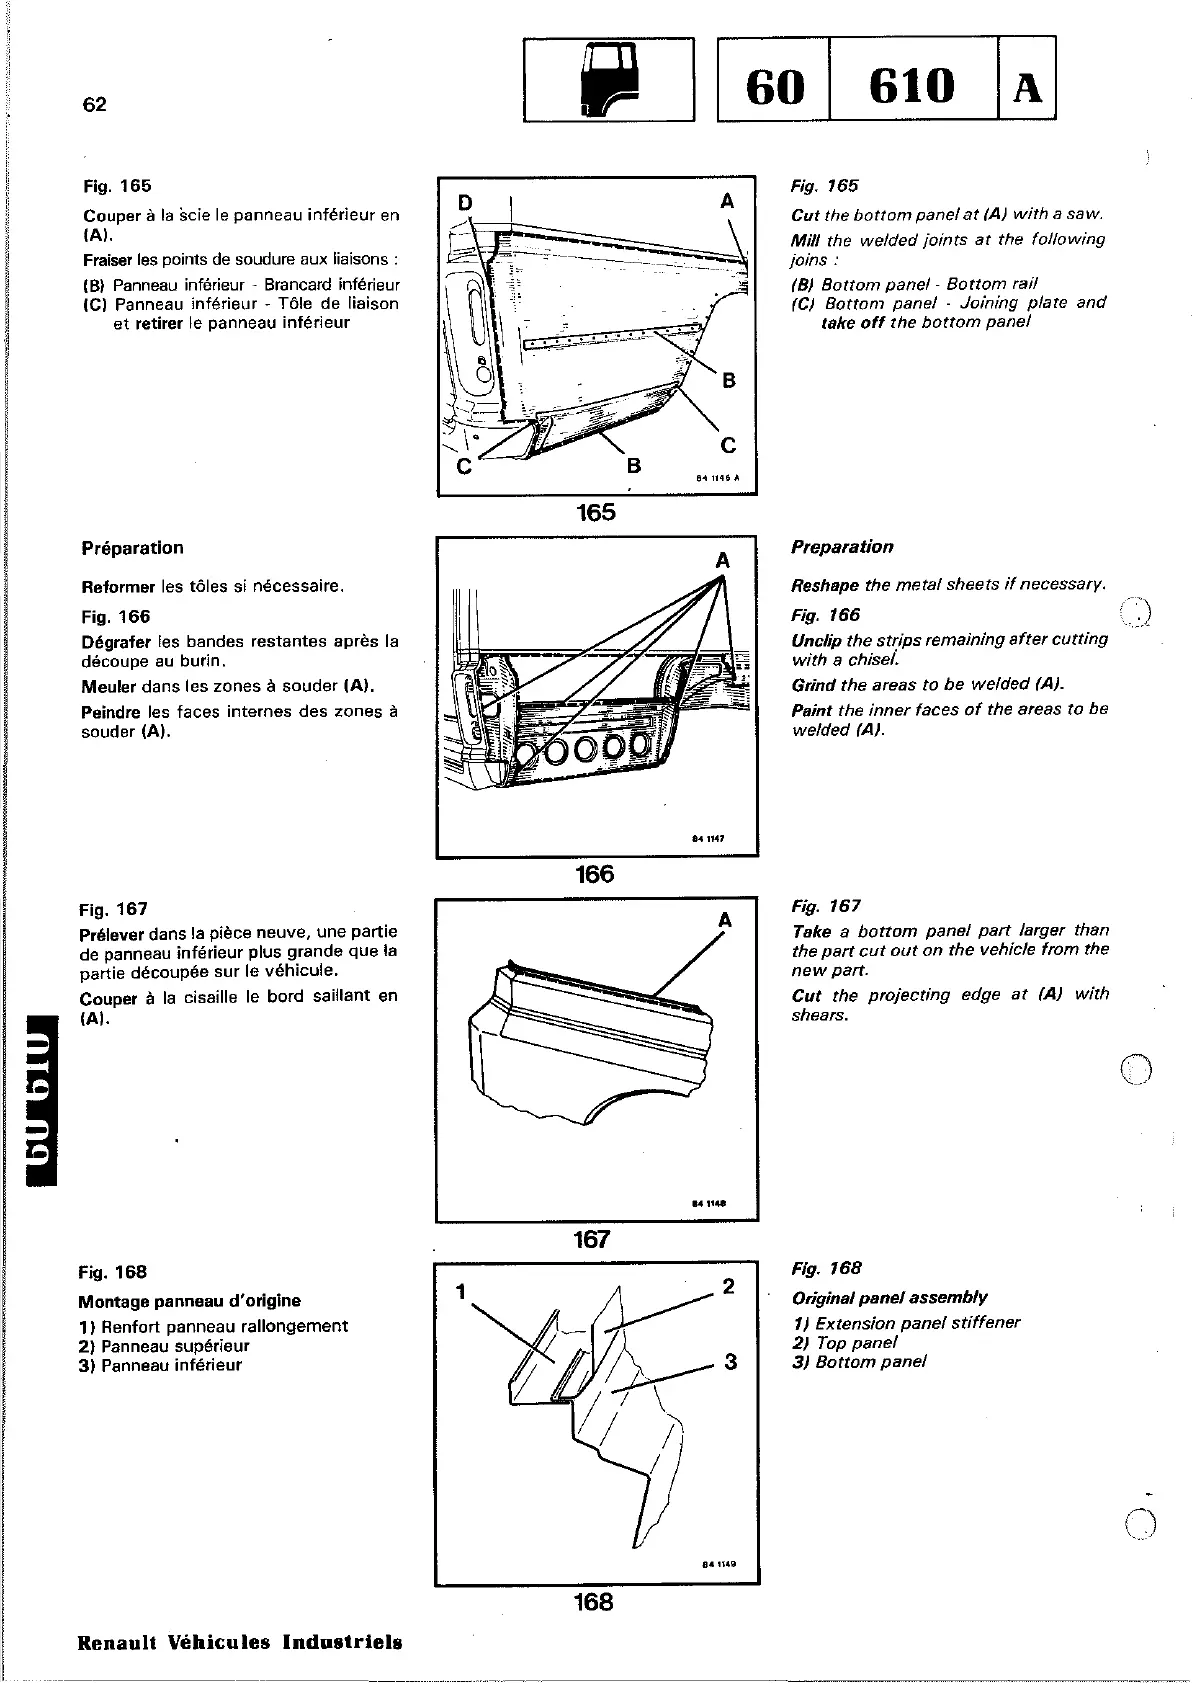
Fig.
165
Couper
à la scie le panneau
inférieur
en
(AI.
Fraiser les points de soudure aux liaÎsons :
(B) Panneau inférieur - Brancard inférieur
(Cl
Panneau
inférieur
- Tôle de liaison
et
retirer le panneau
inférieur
Préparation
o
~-.
-:c-- _
'OC-
165
A
c
841146
A
A
Fig.
765
Cut
the
bottom
panel
at
(A)
with
a saw.
Mill
the
welded
joints
at
the
fo/lowing
joins:
(8)
Bottom
panel-
Bottom
rail
(C)
Bottom
panel
-
Joining
plate
and
take
off
the
bottom
panel
Preparation
Reformer
les
tôles
si nécessaire.
Fig.
166
Dégrafer
les bandes
restantes
après la
découpe
au
burin.
Meuler
dans
les zones à
souder
(AL
Peindre les faces
internes
des
zones
à
souder (A).
841M1
166
Reshape the
metal
sheets
if
necessary.
Fig.
766
Unclip the
strips
remaining
after
cutting
with
a ehiseJ:
Grind
rhe areas ro
be
welded
(A).
Paint the
inner
faces
of
the areas to be
welded
(A).
Fig.
167
Prélever dans la pièce neuve, une partie
de panneau inférieur plus grande que la
partie découpée sur le véhicule.
Couper
à
la
cisaille le bord saillant en
(A).
A
Fig.
767
Take a
bottom
panel
part
larger than
the
part
eut
out
on
the vehicle
trom
the
new
part.
Cut
the
projecring
edge
at
(A)
with
shears.
o
Fig.
168
Montage panneau d'origine
1)
Renfort panneau
rallongement
2}
Panneau supérieur
3)
Panneau inférieur
Renault
Véhicules
Industriels
167
168
141148
2
3
Fig.
768
Original
panel
assembly
7)
Extension
panel
stiffener
2)
Top
panel
3)
Bottom
panel
o



 To Next Page