32
~6_0
__
6_1_0_[;]
Échange
d'une
serrure droite de porte
Dépose
Fig.
77
el
78
Déposer
la
vis
(3), retirer la poignée
intérieure.
Déposer les vis (5), retirer
la
poignée
extérieure
(41.
Déposer
les
vis
(2),
décrocher
les cré-
mones
(1)
et
retirer
la
serrure
et
les
cré-
mones.
Pose
Opérer
dans
l'ordre inverse
de
la
dépose.
NOTA
Au
montage
des crémones supérieure
et
inférieure,
mettre
celles-ci dans les
guides intérieurs de
la
porte
avant
la
pose
de
la serrure.
Échange
du
barillet
de
poignée
de
porte
arrière
Dépose
- Pose
Pour
la
dépose
du
barillet (6), fig. 78,
Ivoir opérations fig.
72
et
73).
=======:::~
1
3
~
ao
1059"
Replacing
a
RH
door
lock
Removal
Fig.
77
and
78
Remove boit
(3)
and take
off
the inte·
rior
handle.
Remove screws
(5)
and take
off
exte-
rior handle
(4).
Remove bolts
(2),
unhook casement
bolts
(7)
and take
off
the lock and the
casement bolts.
Fitting
Proceed
in
the reverse order
of
removal.
NOTE
When assembling
thejop
and bottom
casement bolts,
put
them into the door
interior guides before fitting the lock.
Replacement
of
rear
door
handle
cylinder
RemovallFitting
Forremova/ffitting
of
cylinder (6),
fig.
78,
(see
operations fig. 72
and
73).
,
ii,\\lUII
___
5--------5
7R
ao
10~1
B
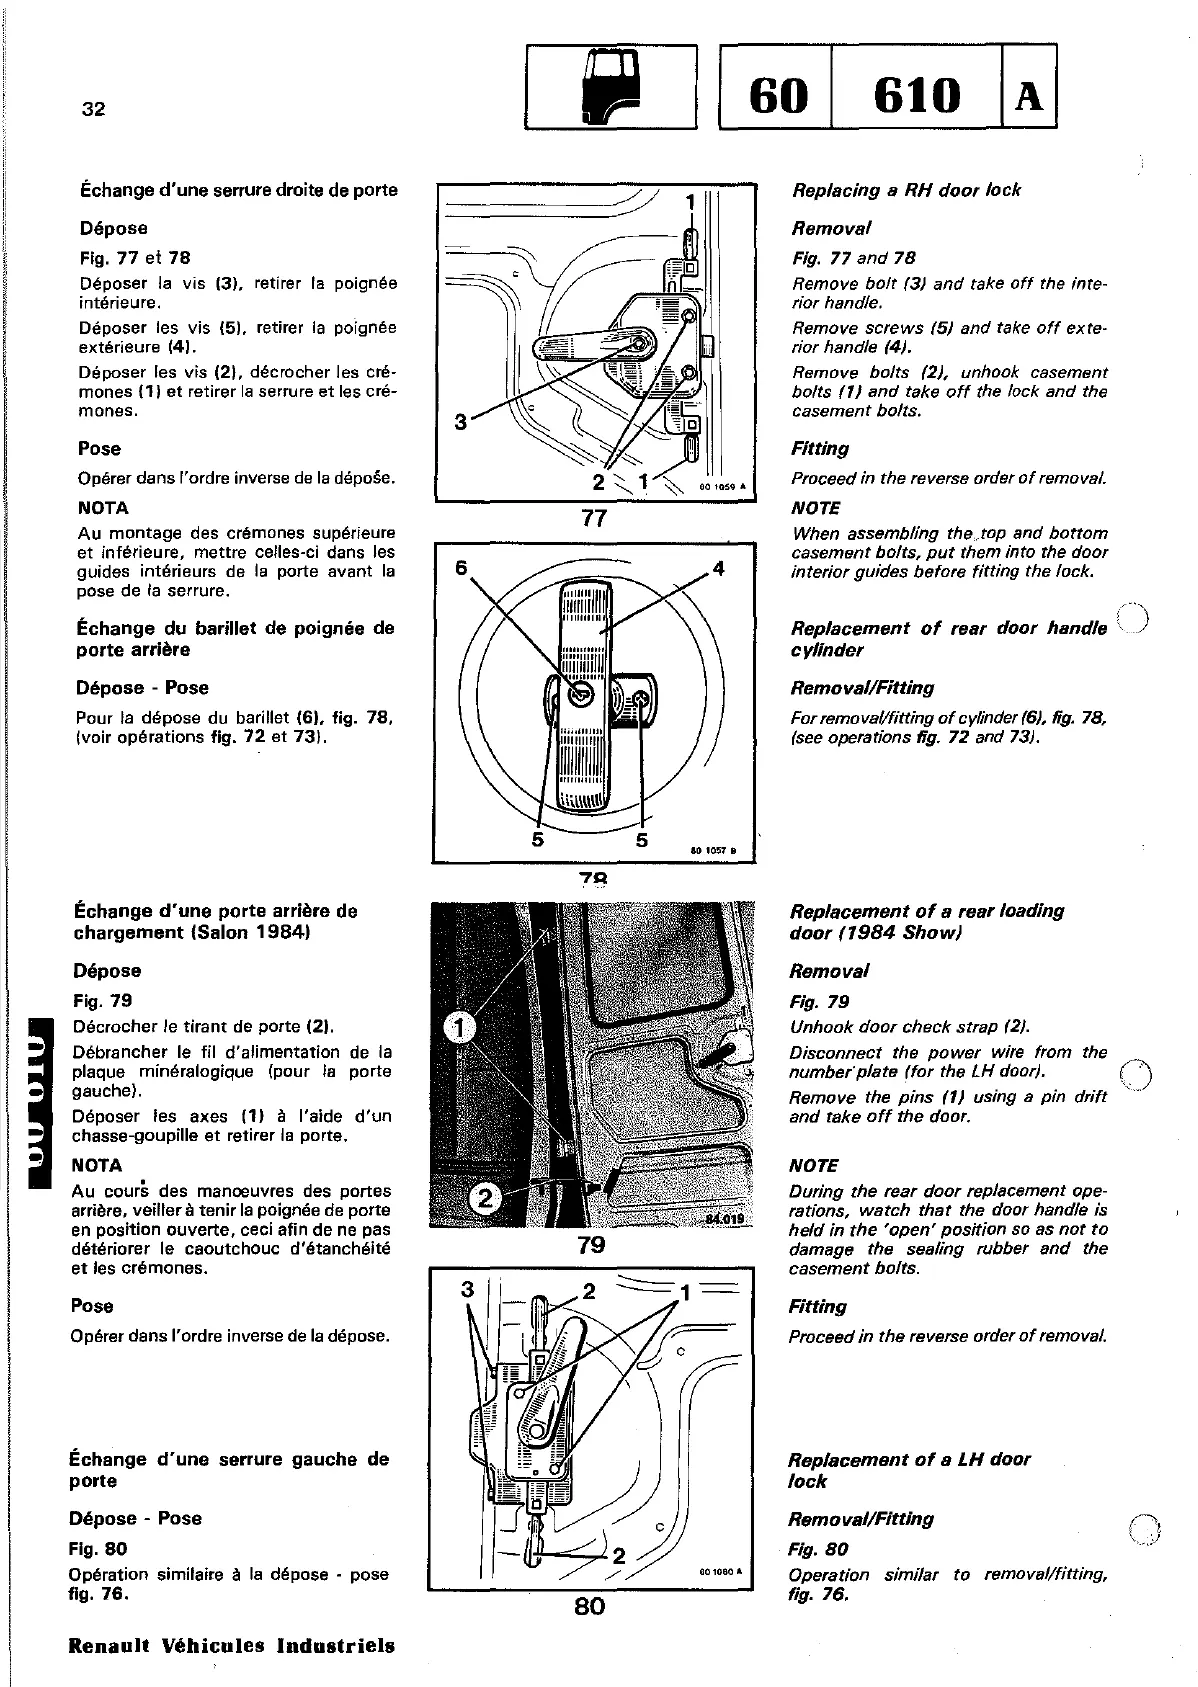
Échange
d'une
porte
arrière de
chargement
(Salon
1984)
Dépose
Fig.
79
Décrocher
le
tirant
de
porte
(2).
Débrancher le fil d'alimentation de la
plaque minéralogique (pour
la
porte
gauche).
Déposer les axes
(1)
à l'aide d'un
chasse-goupille
et
retirer la
porte.
NOTA
Au
cours des manoeuvres des portes
arrière, veiller
à tenir
la
poignée de porte
en
position ouverte, ceci afin de ne pas
détériorer le caoutchouc d'étanchéité
et
les crémones.
Pose
Opérer dans l'ordre inverse de
la
dépose.
Échange
d'une
serrure
gauche
de
porte
Dépose
- Pose
Fig.
80
Opération similaire à
la
dépose - pose
fig, 76,
Renault
Véhicules
Industriels
79
Replacement
of
a
rear
loading
door
(1984
Show)
Removal
Fig.
79
Unhook door check strap (2).
Disconnect the power
wire
trom the
number"plate (for the
LH
door). 0
Remove the pins
(1)
using a pin drift
and take
off
the door.
NOTE
During the rear door replacement ope-
rations, watch that the door handle is
held in
the
'open'
position so as not to
damage the sealing rubber and the
casement
bolts.
Fitting
Proceed in the reverse order
ot
removal.
Replacement
of
a
LH
door
lock
RemovallFitting
Fig.
80
Operation similar ta removal/fitting,
fig. 76,