64
~160
L--
6
_
t
O----l~
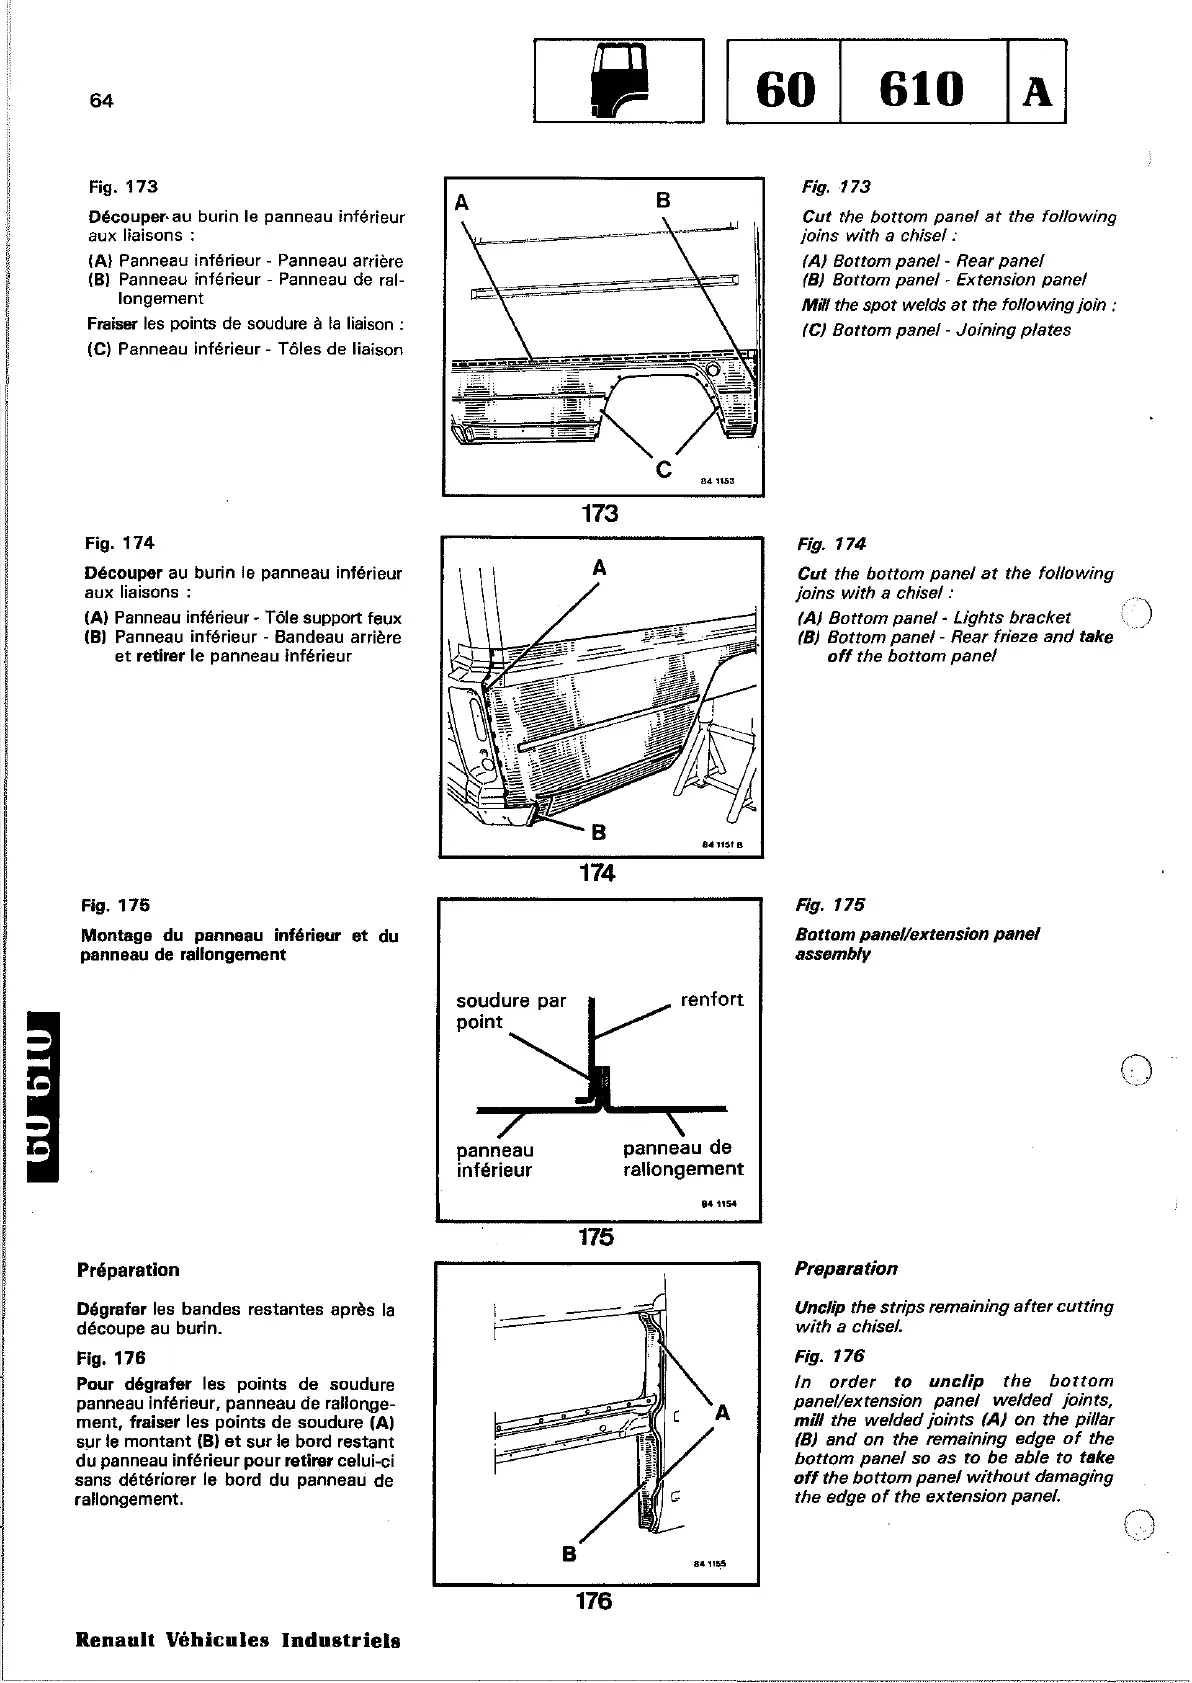
Fig.
173
Découper-au
burin
le panneau
inférieur
aux liaisons :
(A) Panneau inférieur - Panneau arrière
(B)
Panneau inférieur - Panneau de ral-
longement
Fraiser les points de soudure à
la
liaison;
(C) Panneau
inférieur
- Tôles
de
liaison
A
173
B
c
841153
Fig.
173
Cut the bottom panel
at
the following
joins w;th a chisel :
lAI
Bottom
panel"
Rear
panel
(B)
Bottom panel
~
Extension panel
Mill
the spot welds
at
the followingjoin :
ICI Bottom
panel"
Joining
plates
Fig.
174
Découper au burin le panneau inférieur
aux liaisons :
(A) Panneau inférieur - Tôle support feux
(B)
Panneau inférieur - Bandeau arrière
et
retirer le panneau inférieur
Fig.
175
Montage
du
panneau inférieur
et
du
panneau de
rallongement
174
Fig.
174
Cut
the
bottom
panel
at
the
following
joins with a chisel :
lAI
Bottom panel - Lights
bracket
IBI Bottom
panel"
Rear trieze
and
take
off
the
bottom
panel
Fig.
175
Bottom panel/extension panel
assembly
()
Préparation
Dégrafer les bandes restantes après
la
découpe
au
burin.
Fig.
176
Pour dégrafer les points de soudure
panneau inférieur, panneau de rallonge-
ment,
fraiser les
points
de soudure (A)
sur
le
montant
(B}
et sur
le
bord restant
du
panneau
inférieur
pour
retirer
celui-ci
sans détériorer le
bord
du panneau de
rallongement.
Renault
Véhicules
Industriels
soudure par
point
panneau
inférieur
175
1 -
"-
.~.
B
176
renfort
panneau
de
rallongement
141154
A
Preparation
Unclip the strips remaining aftercutting
with a chisel.
Fig.
176
ln order
to
unclip
the
bottom
panel/extension panel welded joints,
mill
the welded
joints
lAI
on the pillar
IBI
and
on the remaining edge
of
the
bottom
panel sa
as
ta
be
able to
tske
off
the
bottom
panel
without
damaging
the edge
of
the extension panel.
----------"-"------
o