45
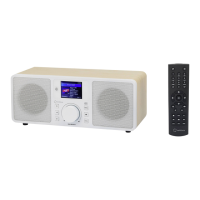
10. Operation
a) Initial Setup
Connection via network cable
If the device is connected to your router via a network cable, the initial network setup is automatic. The main menu is
displayed directly after the boot process.
DHCP must be activated on your router (see the instructions for your router).
Connection via WLAN
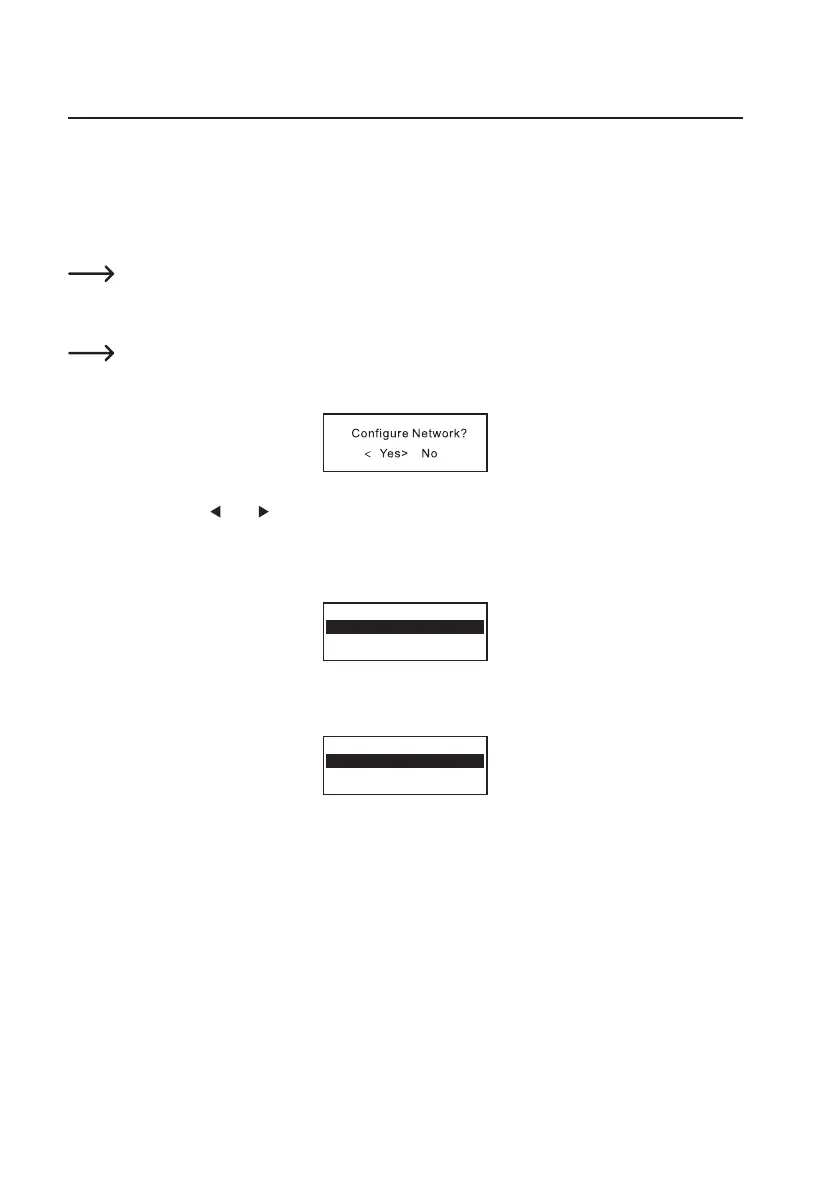
Whenthedeviceisswitchedonforthersttime,orifyouhavepreviouslyresetittothefactorysettings,the
following message appears on the display (6) after switching on. The starting process takes a few seconds.
• Select "YES" with the (2) or (3) buttons or the corresponding arrow buttons (20) on the remote control.
• Conrmtheselectionbypressingtherotaryknob(5)ortheOK(29)buttonontheremotecontrol.
• Inthenextscreen,select"Add/RemoveAP"andconrmtheentryasdescribedabove.
Add/Remove AP
AP:[ ]
• Onthenextscreen,select"AddAP(Scan)"andconrmtheentryasdescribedabove.
Add AP
Remove AP
• The radio now searches for and lists all receivable WLAN routers in the vicinity.
• SelectthedesiredWLANrouterandconrmyourentry.
• Enter the network password of your wireless router. Use either the 10-keyboard (18) on the remote control or turn
the rotary knob (5) to select the required digits and characters.