HOME 24
【
】
Charge overvoltage protection
【
】
Bus overvoltage hardware protection
【
】
Bus overvoltage software protection
【
】
PV overvoltage protection
【
】
Buck Overcurrent Software Protection
【
】
Buck Overcurrent Hardware Protection
【
】
【
】
Side-by-side load protection
【
】
inverter overload protection
【
】
Inverted overcurrent hardware protection
【
】
Inverter short-circuit protection
【
】
Controller over-temperature protection
【
】
inverter over temperature protection
【
】
【
】
【
】
【
】
Error between AC output and bypass
【
】
Internal battery boost circuit failure
Rooftop Solar Array
There are two (2) DC disconnect switches installed in the rooftop solar array. One is located on top of the roof
and one is located inside the unit near the inverter location. It is important that both switches are in the “ON”
position when rooftop solar is needed.
Rover Boost Charge Controller (Exterior Solar Blanket)
The Rover Boost controller is a 10Amp Maximum Power Point Tracking (MPPT) charge
controller engineered to charge the 48V battery bank. Featuring multi-stage battery
charging (Bulk, Boost, Float, and Equalization), the Rover Boost is pre-set to be
compatible with Lithium batteries, and even includes custom battery settings. The
Rover Boost is packed with numerous battery bank, controller, and solar electronic protections for an
optimized system. Key features include:
• Self-adaptable to a wide solar panel input voltage for appropriate battery charging.
• Multi-Function LEDs displaying system information and identifying any errors.
• 4 Pre-set battery charge profiles includes Lithium batteries.
• Multiple battery bank, controller, and solar electronic protections including over-charge protection,
reverse polarity protection, and more.
• RS485 communication port for monitoring using the Bluetooth module and Renogy DC Home App.
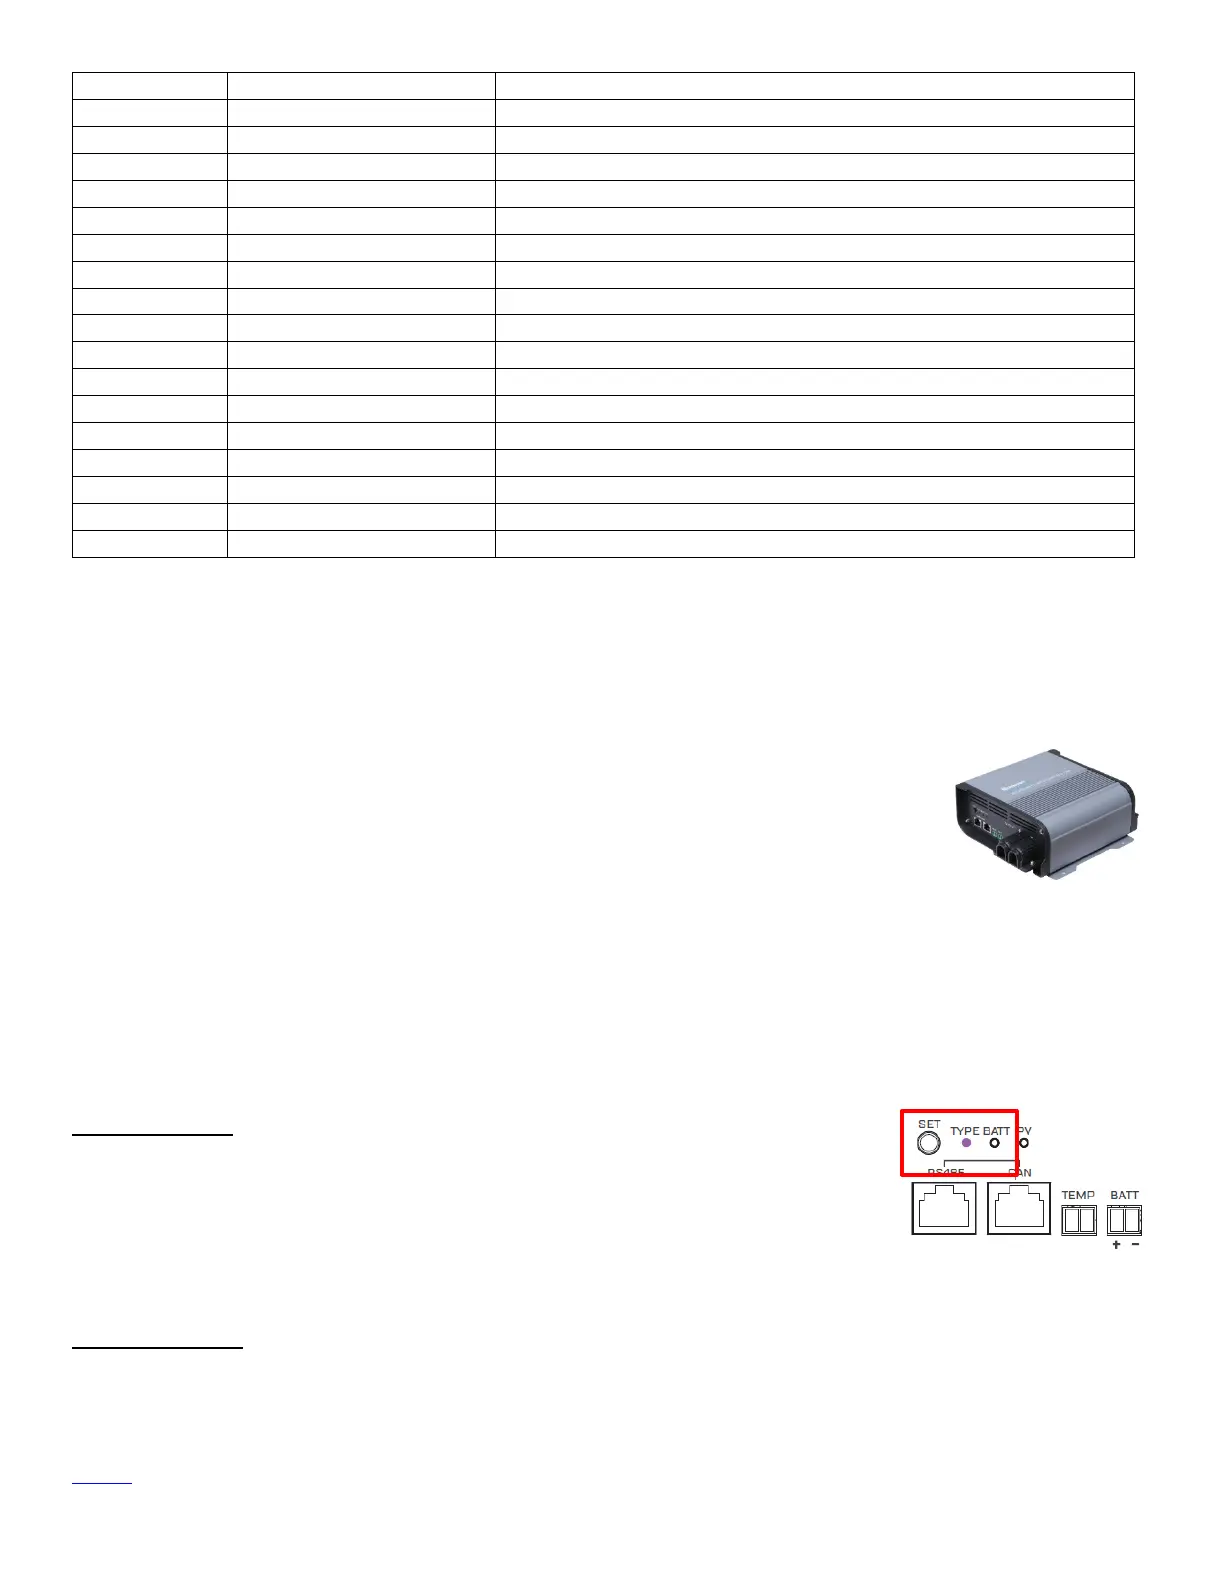
Battery Setup: Your unit should be pre-set with the correct battery type. The
LED Indicators and SET button are found on the OUTPUT side of the Rover Boost.
• Programming: Set Battery Type to Purple LED - To change or set the
battery type, long press the SET button for approximately 8 seconds. The
Type Indicator will flash a color depending on the battery type indicated
below. Tap the SET button to change between battery types until color
PURPLE is showing.
LED Indicators: The Rover Boost LED indicators work to provide battery type information, battery status
information, and solar charging information.
 Loading...