Installation
CAUTION: Before installing the MT-5 Tracer, apply power and make sure the meter
is working properly. Resolve any issues before installing the meter and the meter
cable.
The MT-5 can be mounted in two ways: Frame Mount or in a Wall Mount. A plastic
mounting frame has been included for the purpose of Frame Mounting. If Wall Mounting
then the MT-5 faceplate sits flush with the mounting surface and the body of the meter
would be able to rest comfortably in a hole cut-out on the mounting surface.
NOTE: The screws are NOT included for installation purposes.
Operation
The following keys are used to cycle through the screens or adjust the parameters on
the tracer :( K1) SET, (K2) (), (K3) (), (K4) /
ESC
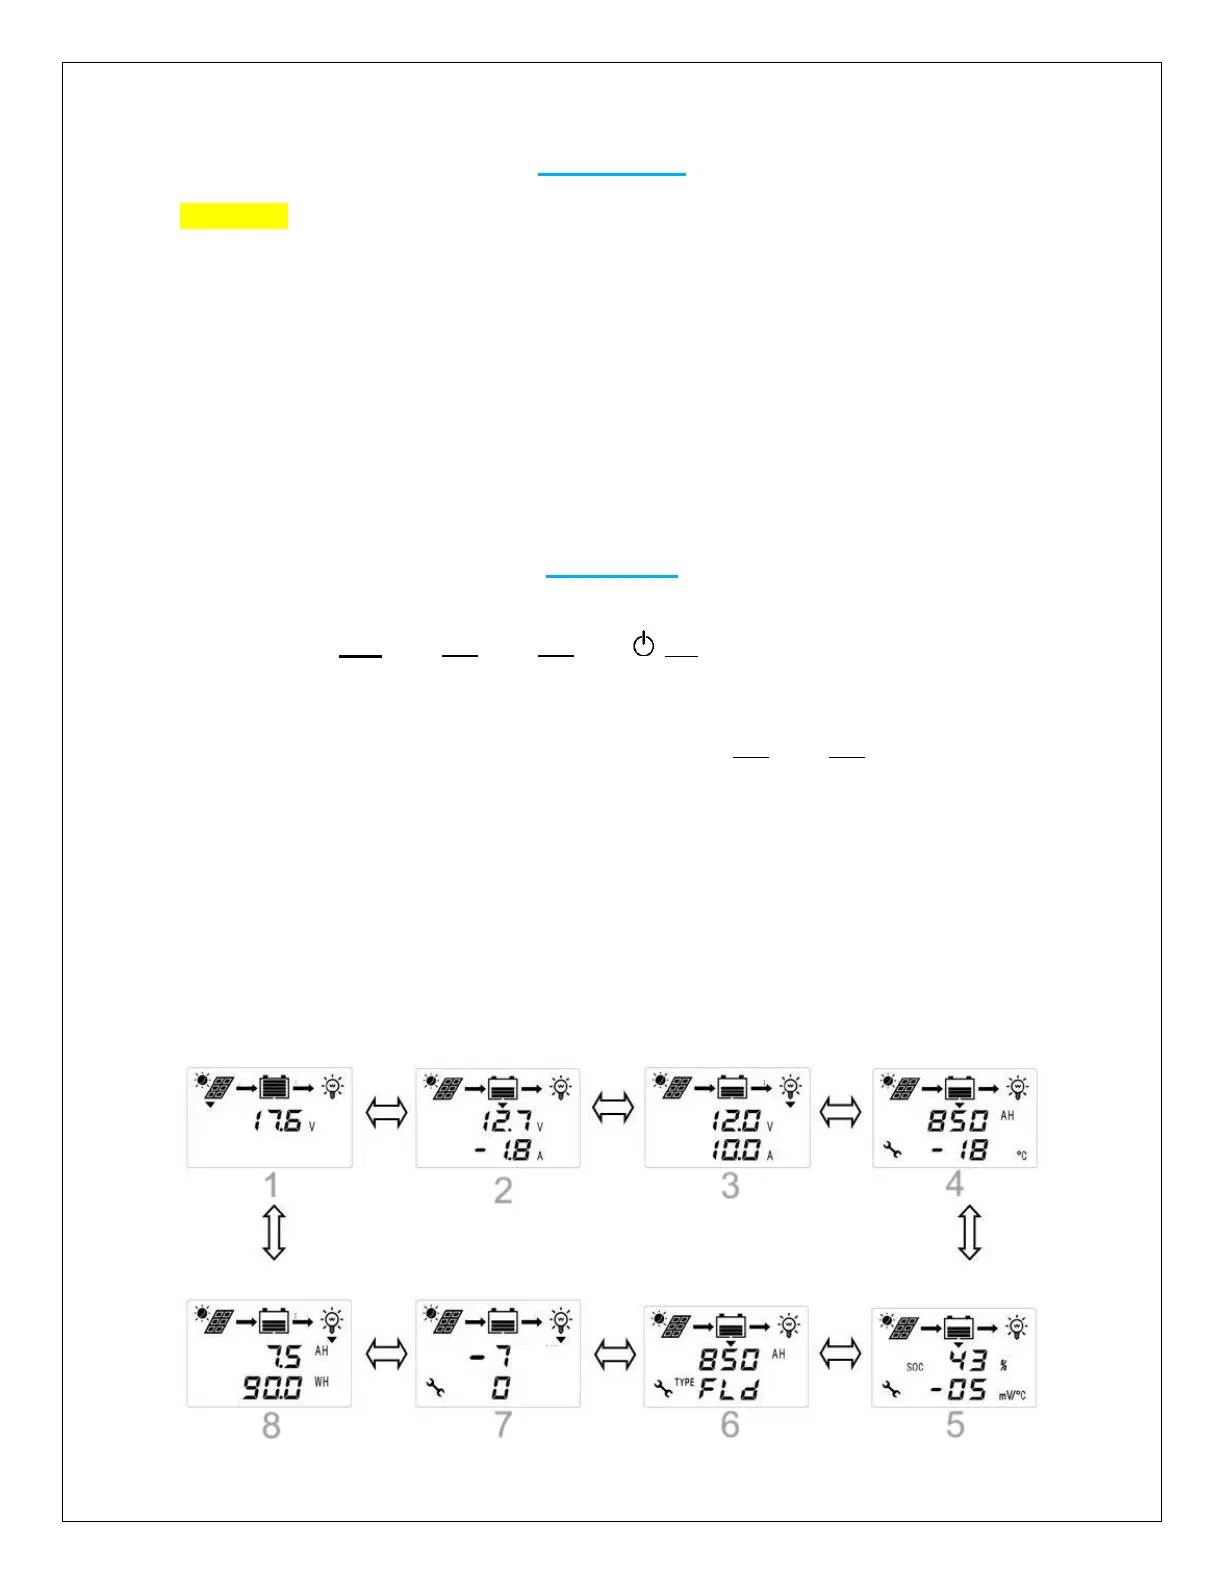
Menu Display
The MT-5 Tracer displays several screens. Use the (K2) (), (K3) () keys to cycle
through the menu and access the data. The screens are displayed in the following
order:
1. Solar Panel Voltage
2. Battery Voltage and Battery Current
3. Load Voltage and Load Current
4. Battery capacity (Ah) and Battery temperature
5. Battery State of Charge (SOC) (%) and Temperature Compensation
6. Battery Amp-hour (Ah) and Battery Type
7. Load Timer 1 and Load Timer 2 Mode
8. Discharge Accumulation in Amp-hour(Ah) and Watt-hour (Wh)