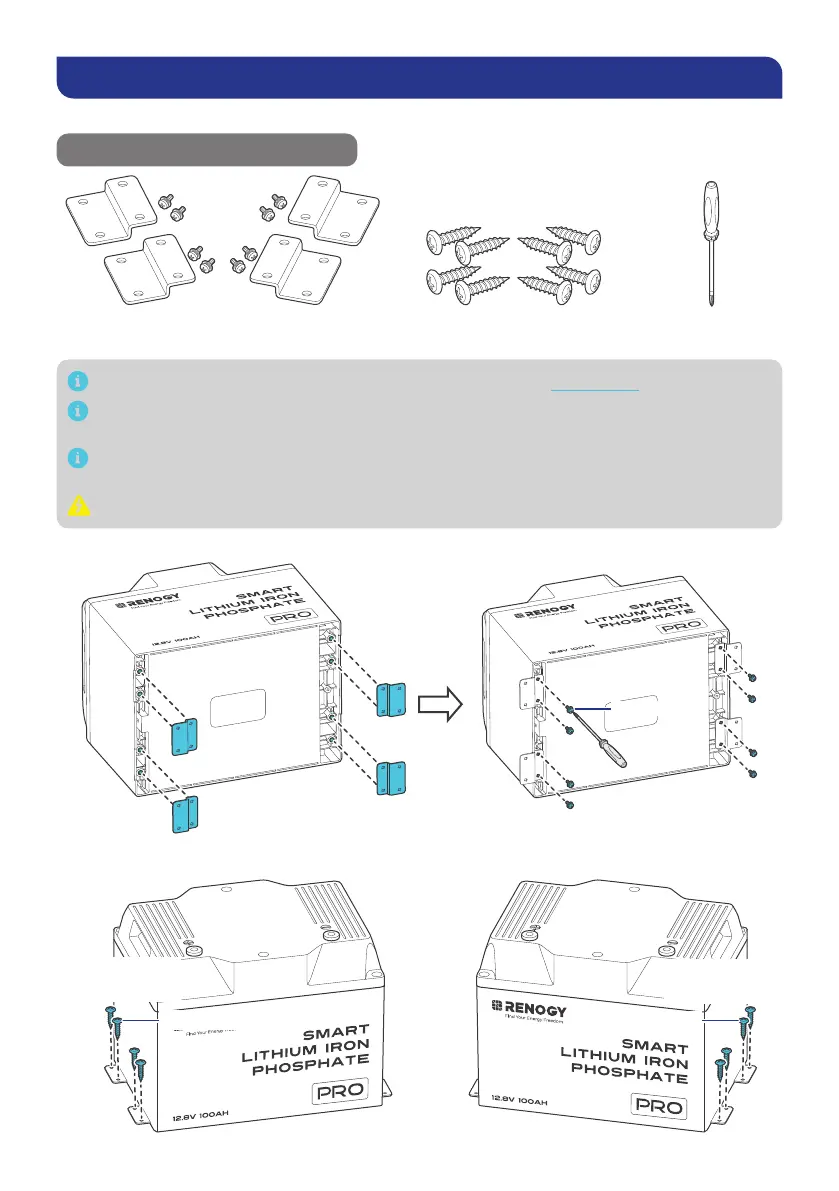
— 5 —
Secure the Battery (Optional)
Securing the battery prevents damage to the battery from loose cables and bumps.
Recommended Components & Tools
*Battery Fix Bracket
(with 8 M4*10 mm Fix Bolts)
Mounting Screws × 8
ST4
Phillips
Recommended components marked with “*” are available on renogy.com.
Alternative mounting methods are allowed to meet the requirements of specific
applications.
Choose proper mounting screws specific to your installation site. This manual takes self-
tapping screws for wooden walls as an example.
Do not install batteries sideways or upside down.
Step 1: Install the battery fix bracket through the mounting holes on the battery.
Fix Bolts
14.16 in·lbs
(1.6 N·m)
Step 2: Mount the battery on a flat surface.
Mounting Screws
Mounting Screws
14.16 in·lbs
(1.6 N·m)
14.16 in·lbs
(1.6 N·m)