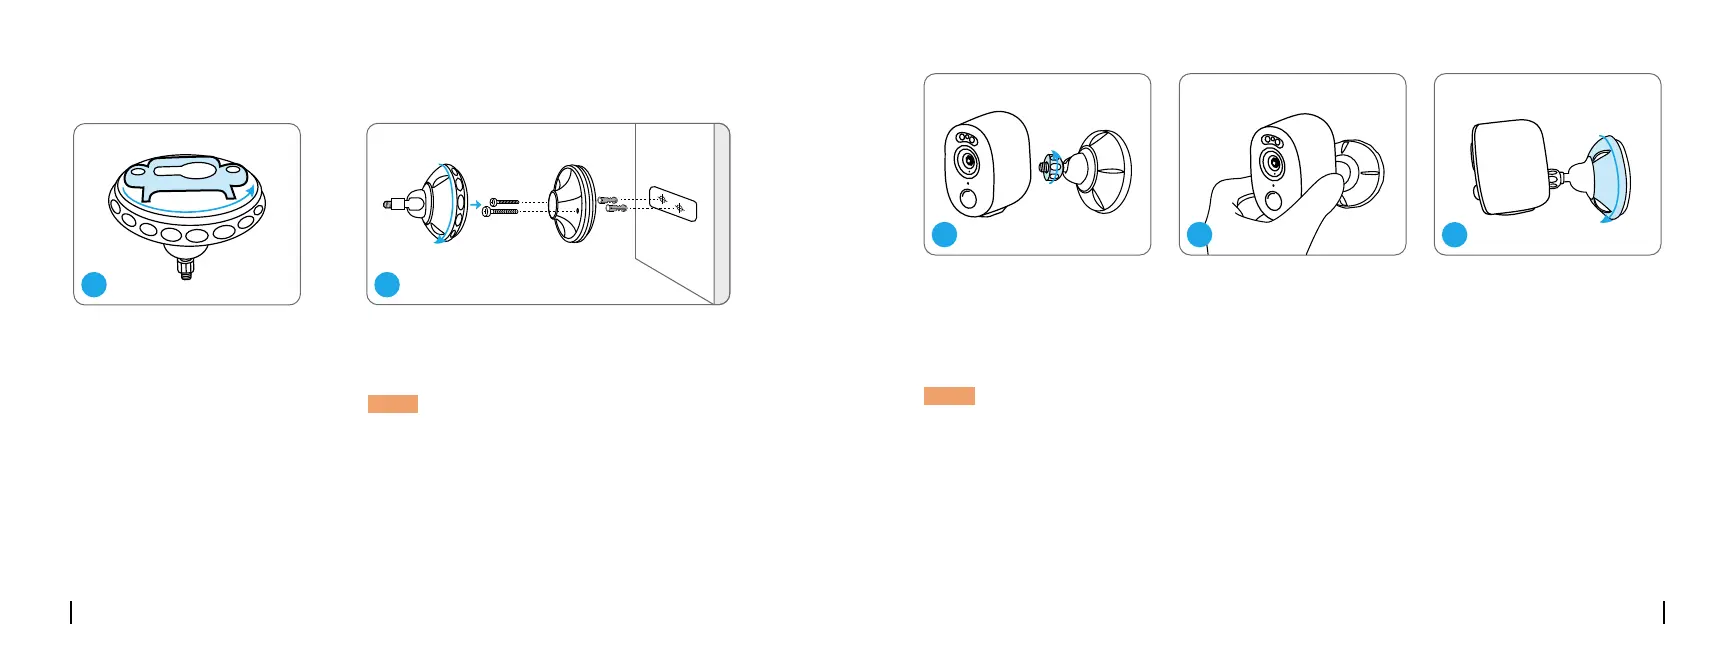
EasyManuals Logo

Reolink Argus 3 Series Operational Instruction

Reolink Argus 3 Series
41 pages
To Next Page IconTo Next Page
To Previous Page IconTo Previous Page
Page #37 background imageLoading...
Page #37 background image
Monte la Cámara
Rótelo para separar la base
del soporte.
Taladre orificios de acuerdo con la plantilla de
montaje y atornille la base del soporte a la pared.
Luego, adjunte la otra parte del soporte a la base.
Atornille la cámara al soporte. Ajuste el ángulo de la
cámara para obtener el
mejor campo visual.
Bloquee la cámara enroscando
la otra parte del soporte en
sentido horario en la base.
NOTA: Use los tacos de anclaje incluidos en el
paquete si los necesita.
NOTA:
Para ajustar el ángulo de la cámara posteriormente, por favor afloje el soporte enroscando la
parte superior en sentido antihorario.
Español
Español
1 2
3 4
5
71 72

Other manuals for Reolink Argus 3 Series

Questions and Answers:

Question and Answer IconNeed help?

Do you have a question about the Reolink Argus 3 Series and is the answer not in the manual?

Reolink Argus 3 Series Specifications

General IconGeneral
Weather ResistanceIP65 Weatherproof
Wireless SecurityWPA-PSK/WPA2-PSK
Operating Temperature-10°C to 55°C (14°F to 131°F)
Night VisionUp to 33 feet (10 meters)
Power SourceBattery/Solar Panel
Battery5200mAh Rechargeable
Connectivity2.4 GHz Wi-Fi
AudioTwo-way Audio
StorageMicro SD Card (up to 128GB) and Cloud Storage
Image SensorCMOS Image Sensor
Color Night VisionYes
PIR Detection DistanceUp to 33 feet (10 meters)
PIR Detection Angle100°
Dimensions121x90x56 mm
Weight330g (11.6 oz)
Resolution2K (4MP)
Field of View120° diagonal

Related product manuals