Install the Camera with Loop Strap
Place the Camera on a Surface
Thread the loop strap
through the slots and
fasten the strap. It is the
most recommended
installation method if you
plan to mount the camera
to a tree.
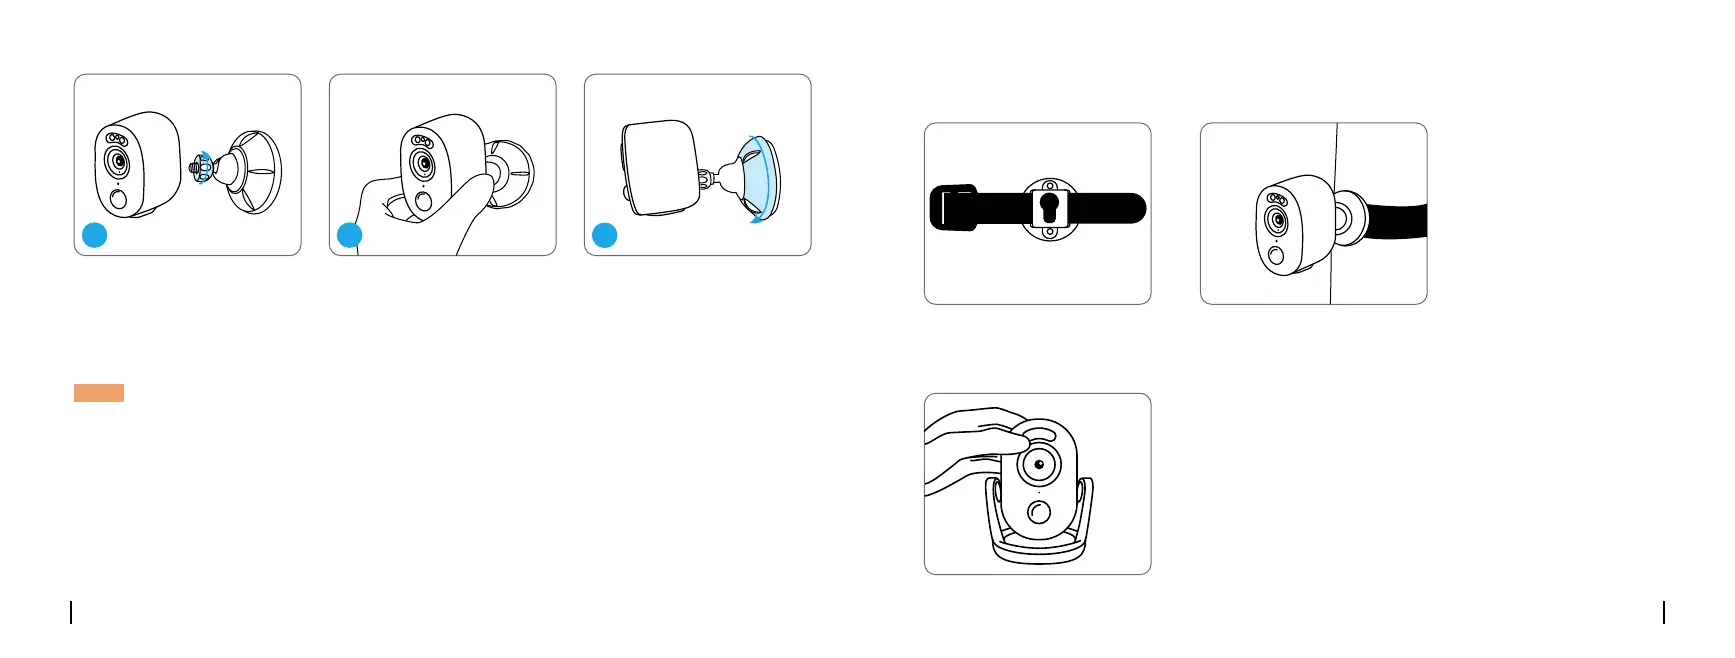
Screw the camera to
the bracket.
Adjust the camera angle to
get the best field of view.
Secure the camera by turning
the part on the bracket
identified in the chart
clockwise.
NOTE:
To adjust the camera angle later, please loosen the bracket by turning the upper part anticlockwise.
If you plan to use the camera
indoors and put it on a flat
surface, you may place the
camera into the stand bracket
and adjust the camera angle
by slightly rotating the camera
back and forth.
English
English
3 4
5
9 10
 Loading...