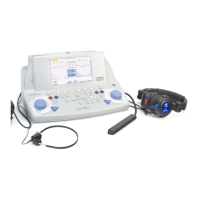
38
Parameter Setups
Once the device is on, proceed with the principal settings involved with test performance.
Press the F1 key (5) to access the setup menu. Via the adjustment knobs (4) or the down arrow, select the
PARAMETER SETUP function and then press ENTER (7). Use the side arrow keys (10) to select the various
options and/or to change selected options. Use the down arrow key to move to the next setup function.
On SETUP page, available options are grouped in separate sections.
Device general parameters
Language: changes the end-user interface language.
Date and time: changes the system date and time that is currently displayed.
Audiometry parameters
AC headphone: selects the type of transducers to be connected to the unit (DD45, TDH39, HDA280 or Insert).
BC right side and BC masked: selects the type of symbols required for the bone conductor graph mapping.
BC marks joined: if active, the points on the bone conduction audiogram will be connected, otherwise the
points will not be connected.
Autom. Change Freq.: if active, by selecting a point on the audiogram with the STORE key (17), the
frequency of the test will change automatically. If not selected, to change frequency the tester will have to
manually change after pressing STORE (17).
Test Data: if active, Tonal and Speech Audiometry results are printed both in graph and numeric format.
Enable Frequencies Audiometry: activates or deactivates the available frequencies only for pure tone
audiometry tests.
The setting entries can be conrmed by pressing F5 (5). Time and date settings can be stored by pressing
F3 (5). Press F1 to return to the main Test Selection page.
Performance of Audiometry Tests
Pure Tone Audiometry
Selection of the type of signals required and relative transmission to the patient
The selection of the type of signal and the transducers used, is performed for both channels by using the
INPUT and OUTPUT (9) keys.
With the F1 (MODE) key, it is possible to activate the pulsed-tone mode. The pulsed-tone pulsing rate can
be changed with the F2 (PULSE RATE).
To choose which ear the signals are to be sent to is entered via the RIGHT and LEFT keys of the two channels
(8). Press again the selected side button to enter R+L mode, this will provide transmission of the channel
signal simultaneously to both ears (R+L). To change the pure tone and NBN frequency use the FREQUENCY
Note: In the description of the dierent tests, the following guidelines, while referring in particular to the
“Pure Tone Audiometry”, are generally applicable to all the audiometry tests.
Once the device has been powered up, audiometry tests can be selected via the display by acting on the
CH2 adjustment knob.
Pressing F3 soft key, additional Audiometry Tests are displayed.
Test selection is performed by operating the CH1 (4) adjustment knob or via up and down arrow keys (10).
To access the test page press ENTER (7) key. It is also possible, in Test Menu, to select a “priority” test by
pressing on softkey F2. Please, follow the displayed instructions to complete the setting.