16 17
Low battery indicator
Your hearing care professional can activate a low battery indicator in your hearing instruments. The hear-
ing instrument will reduce amplification and play a melody if battery power gets too low. This signal will
recur every 15 minutes until the hearing instrument automatically switches off. The timing of the low battery
indicator can vary slightly, depending on the type of battery used. It is recommended that you keep spare
batteries on hand.
Low battery indicator when paired with wireless accessories only
Active usage of the ReSound wireless accessories (Remote Control, Remote Control 2, Phone Clip, Phone
Clip+, TV Streamer, TV Streamer 2, Resound Micro Mic and Resound Multi Mic) or an FM receiver requires
more battery power from the hearing instruments than when they are working without accessories. That
means that battery life is highly dependent on the amount of wireless accessory usage. When the battery in
the hearing instrument has depleted to a level at which use of ReSound wireless TV Streamer, TV Streamer
2, Phone Clip, Phone Clip+, Resound Micro Mic and Resound Multi Mic cannot be supported, the hearing
instrument will play two sets of descending tones.
After this, your hearing instrument and ReSound Remote Control or Remote Control 2 will continue to work
as usual, but you will not be able to use your ReSound TV Streamer, TV Streamer 2, Phone Clip, Phone
Clip+, Resound Micro Mic and Resound Multi Mic. At some point the battery level will also be too low to
support the remote control functionality as well, and you will once again hear the descending tones. The
hearing instruments will continue to work as usual. Once a new battery is inserted, full operation of the ac-
cessories will resume.
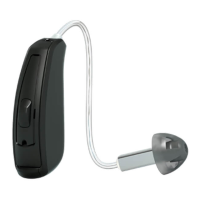
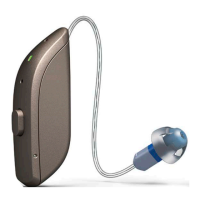
Inserting/Removing hearing instruments
Insertion (custom earmoulds)
1. Hold the earmould between your thumb and index finger and position its
sound outlet in your ear canal.
2. Slide the earmould all the way into your ear with a gentle, twisting
movement.
3. Turn the top part of the earmould gently backwards and forwards so
that it tucks behind the fold of skin above your ear canal.
4. Move the earmould up and down and gently press to ensure it is
positioned correctly in the ear. Opening and closing your mouth can
ease insertion.
5. Make sure the hearing instrument is seated behind the ear.
By experimenting, an easier method may be discovered. With proper inser-
tion, hearing instruments should fit snugly but comfortably. If the hearing
instruments cause irritation of the ears, contact your hearing care profes-
sional.
i Note: Never attempt to modify the shape of the hearing instrument,
earmoulds, or tubing yourself.
i
Tip: It may be helpful to pull your ear up and outward with your opposite
hand during insertion.