www.restek.com
3
2.0 Battery Charging:
Only use the universal charger provided. The Leak Detector should be fully charged prior to use. When the unit’s charge is low, the
green battery indicator LED light will begin to blink when the unit is powered up (Figure 1). The Leak Detector cannot be used during
the charging cycle.
3.0 Powering Up
Depress and hold the power button (Figure 1) until the unit
responds with the wake-up mode. The leak detector will run
through a self-calibration sequence for approximately 15
seconds. During this time DO NOT attempt to zero the unit.
4.0 Zeroing the Unit
After the LED lights stop flashing, the unit is ready for use. The
instrument may need to be zeroed periodically between uses, espe-
cially if it is moved from room to room, or between areas of dif-
fering temperature or humidity. Do not attempt to zero the unit
while the probe is stored in the holder. The probe MUST be
removed from the storage container before zeroing the unit. To re-
zero, press the Zero switch. The unit will run a self-calibration
sequence for approximately 4 seconds. When all LED lights stop
flashing and the green LED light is lit, the unit is ready for use.
NOTE: To avoid false readings, do not attempt to use the unit while the self calibration sequence is in progress.
UUnniitt ssttaattuuss wwhhiillee eennggaaggeedd wwiitthh CChhaarrggee LLEEDD
tthhee wwaallll cchhaarrggeerr CCoonnddiittiioonn
Pre-charge qualification
(immediately following plug-in) 1Hz flash
Unit is charging Continuous on
Unit is fully charged Off
NNOOTTEE::
Replacement of the rechargeable cells in this unit is performed at the factory.
TThheerree aarree nnoo sseerrvviicceeaabbllee ppaarrttss iinn tthhiiss uunniitt.. OOppeenniinngg tthhee ccaassee oorr ttaammppeerriinngg wwiitthh tthhee
iinntteerrnnaall ppaarrttss wwiillll vvooiidd tthhee ffaaccttoorryy wwaarrrraannttyy..
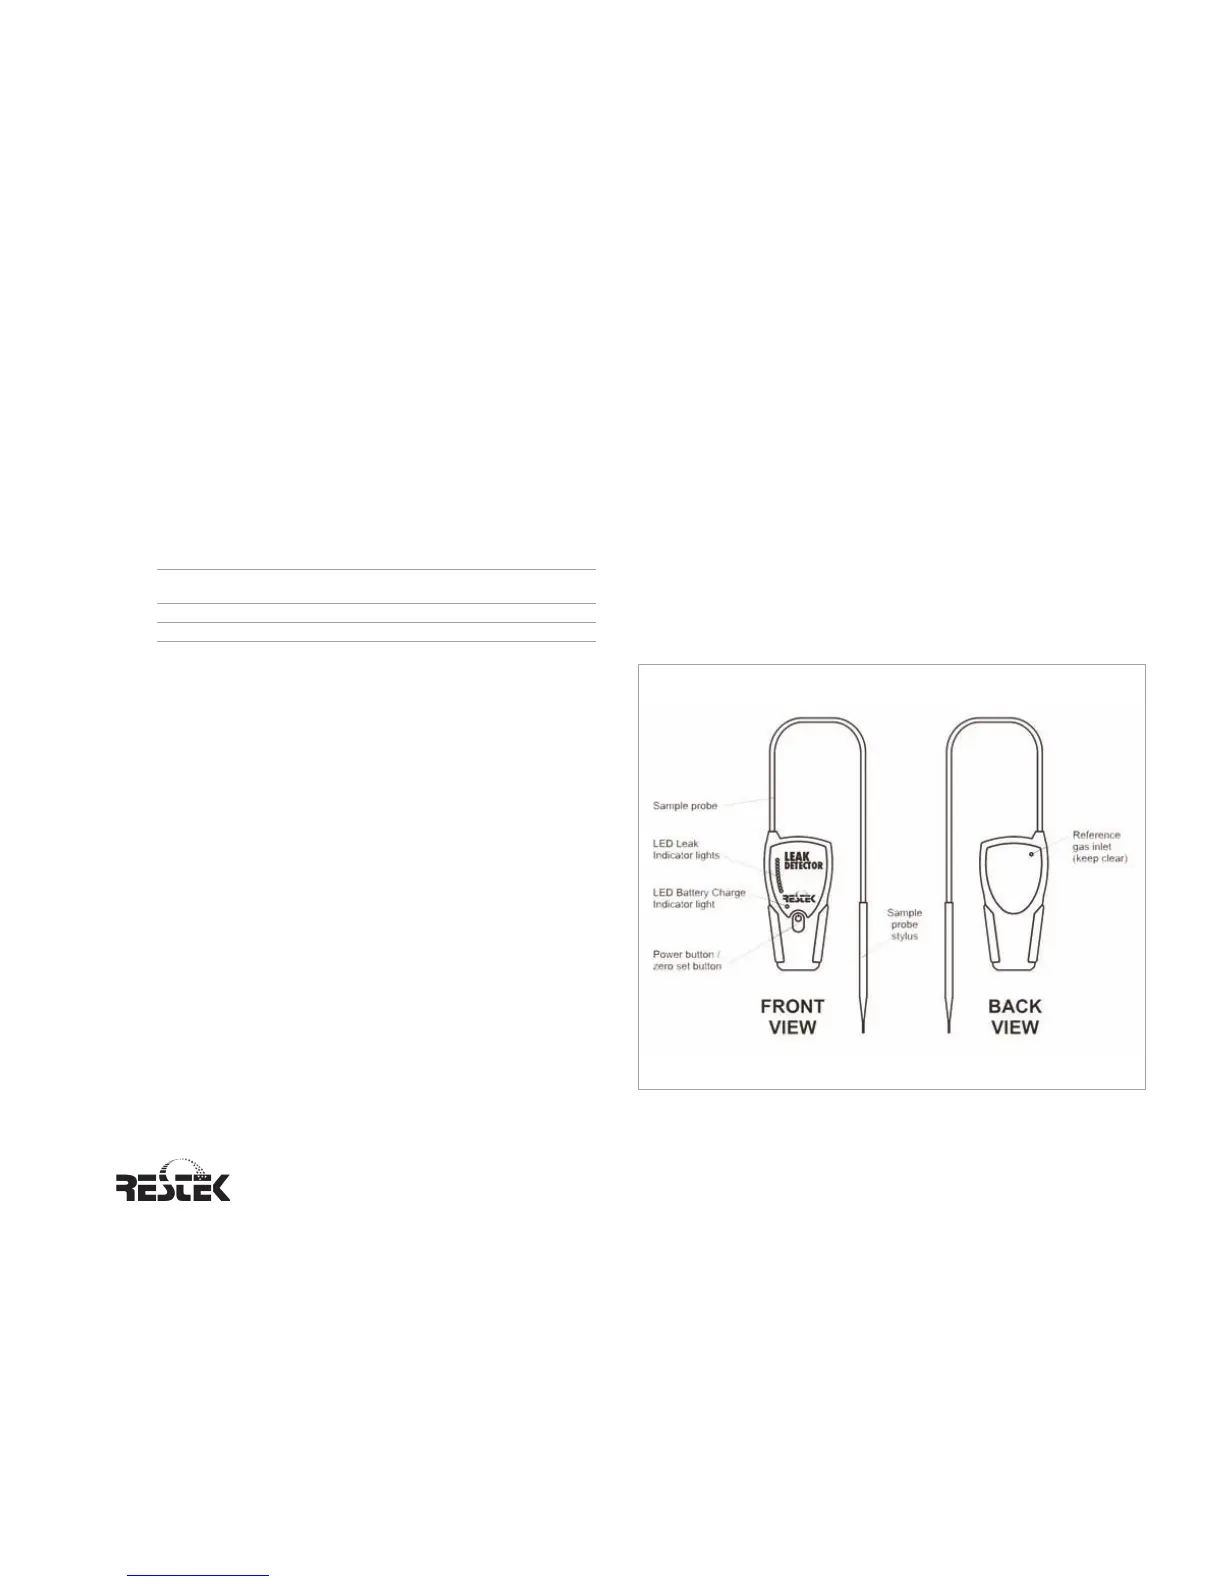
Figure 1 Leak Detector schematic.