02
a) Antenna selection:
For the best signal radiation, a well-calibrated antenna length is ve impoant, on the other hand, there are other factors to be
considered: the size of the vehicle and its usual speed.
b) Mobile antenna:
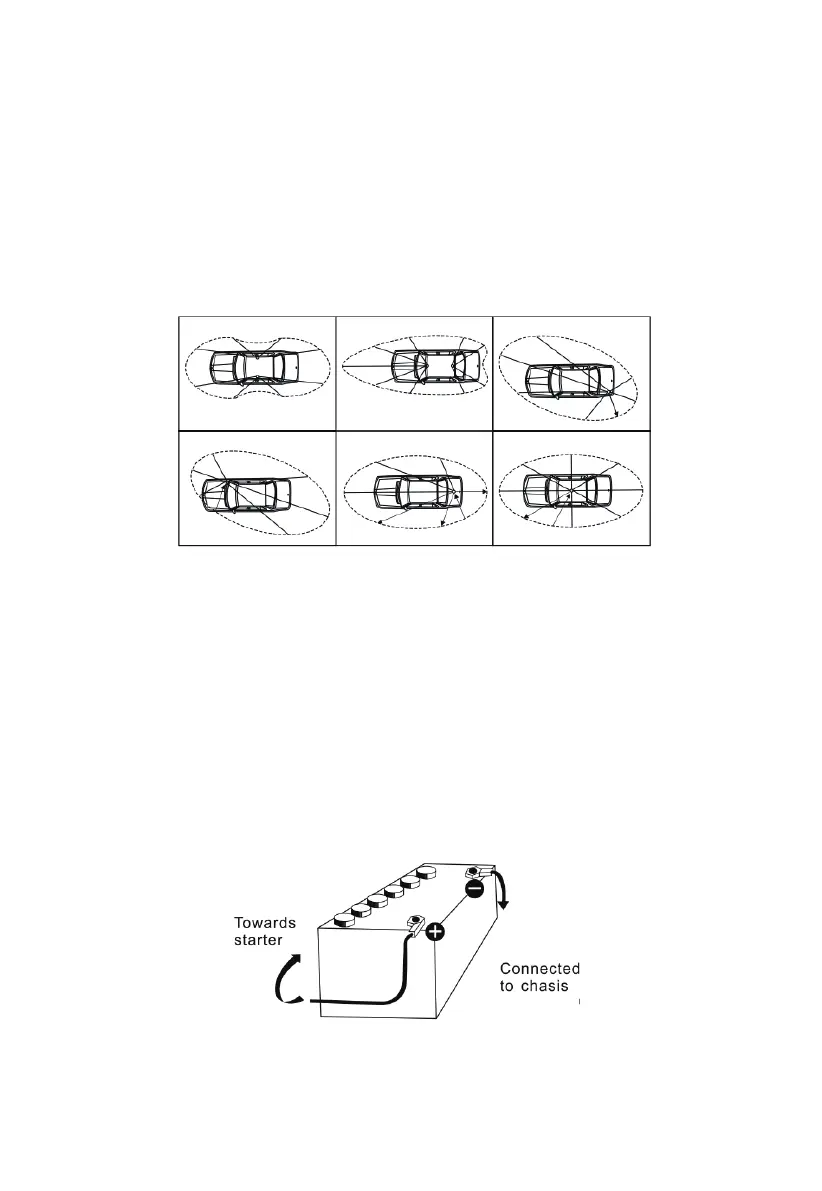
-Must be xed to the vehicle where there is a maximum of metallic suace (ground plane) away from windscreen mountings.
-There are two types of antennas: Pre-Regulated Antenna which should be used on a good ground plane (e.g. car roof or lid of the
boot), and Adjustable Antenna which oers a much wider frequency range and can be used over a smaller ground plane. For an
antenna that must be xed by drilling, you will need a good contact between the antenna and the ground plane. To obtain this, you
should lightly scratch the suace where the screw and tightening star are to be placed.
-Be careful not to pinch or atten the coaxial cable (as this runs the risk of breakdown and/or sho-circuiting).
-Connect the antenna to location (B).
c) Fixed antenna:
A xed antenna should be installed in a predominant area, possibly emerging over the entire surrounding topography, including the
canopies of trees. Normally the antenna is raised and xed on the top of a mast. In some areas, especially urban ones, it may be
necessa to obsee the regulations in force in the specic region. To avoid unnecessa inconvenience, it is advisable to check this
matter with the authorities entrusted.
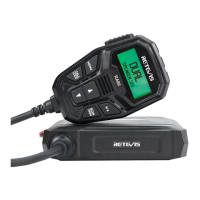
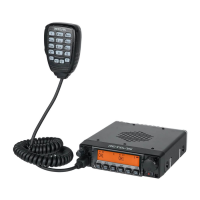
3. POWER CONNECTION ON THE CAR
Your radio is protected against an inversion of polarities. However, before switching it on, you are requested to check all the
connections. Your equipment must be supplied with a voltage of 12 volts DC(Direct Current). Today, most cars and trucks are negative
eah. You can check this by making sure that the negative terminal of the batte is connected either to the engine block or to the
chassis. If this is not the case, you should consult your dealer.
WARNING: trucks generally have two batteries to supply a voltage of 24 volts, in which case it will be necessa to inse a 24/12-volt
inveer into the electrical circuit. The following connection steps should be carried out with the power cable disconnected from the set.
a) Check whether the batte is 12 volts.
b) Locate the positive and negative terminals of the batte (+ is red and – is black). Should it be necessa to lengthen the power
cable, please use the same or a superior type of cable.
c) It is necessa to connect your radio to a permanent (+) and (-). We advise you to connect the power cable directly to the batte (as
the connection of the cable to the wiring of the car radio or other pas of the electrical circuit may, in some cases, increase the
possibilities of inteerence).
d) Connect the red wire (+) to the positive terminal of the batte and the black (-) wire to the negative terminal of the batte.
e) Connect the power cable to your radio.
WARNING: Never replace the original fuse (10A) by one of a dierent value.
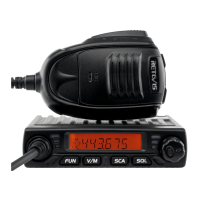
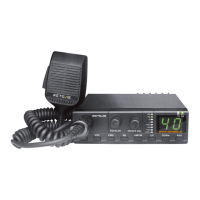
4. BASIC OPERATIONS TO BE CARRIED OUT BEFORE USING
YOUR SET FOR THE FIRST TIME (without transmitting or using the <<Push-To-Talk>> switch on the microphone)
a) Connect the microphone
b) Check the antenna connections
c) Turn the set on by rotating the volume knob clockwise
d) Rotate the squelch knob to minimum
e) Adjust the volume to a comfoable level
f) Tune to channel 20 at the D bank by using either the UP or DN key on the microphone or the rota knob.