8
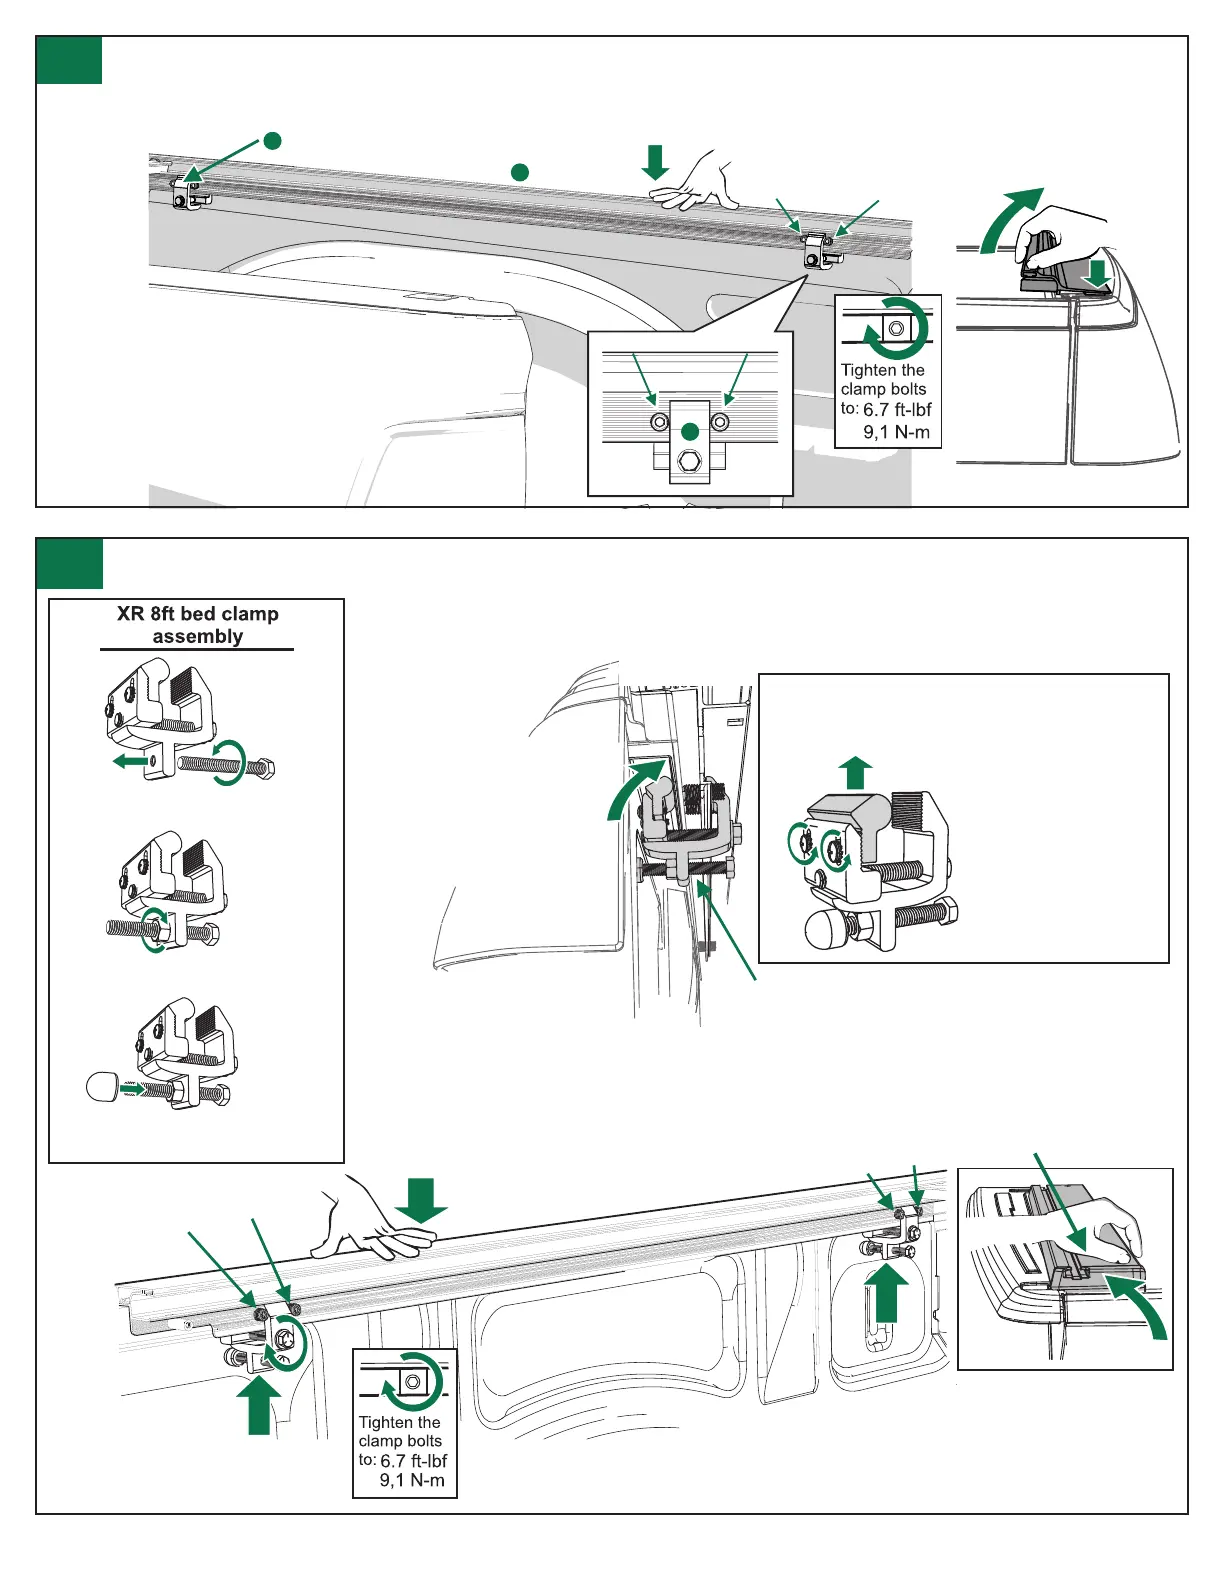
XR Rail system clamp installation:
9
Retrax • 917 S. 46th St., Grand Forks, ND 58201 • 800-206-4070 © Retrax is Retrax Holdings, LLC, 2023
4000-174 IR-RTS-01 Rev. 10.17.23
Install the front and rear clamps:
Position the clamps (G) between the adjustment screws. Using a 9/16” or 1/2” wrench (depending on your clamps), tighten
the clamps (G). It is important to push down on the rail (B & C) while tightening, AND to tilt the rail up approximately two degrees
simultaneously. Both the pushing down and tilting of the rail will position the rail best to minimize water intrusion.
To install the front and rear clamps on
the XR Rails go to step 9.
9d - The adjustable-back clamp is designed and tested for the extra loads for the
retractable cover with the XR rail system. The adjustable-back clamps must be positioned
correctly under the truck bed rail to properly carry the extra loads.
9e - The adjustable top jaw
of the clamp must be tucked
rmly to the top and
inside corner of the sheet
metal of the truck bed rail.
9f - If the jaw does not contact rmly into the
corner of the bed ange, remove the clamp
and loosen the screws to adjust the jaw.
Re-tighten screws and
fully engage the lock
washers.
Always make sure the
two sets of teeth are
fully engaged.
9g - Replace the clamp between the adjustment
screws and recheck to make sure the jaw seats rmly
into the corner of the truck bed rail.
Position the clamps between the adjustment screws both front and back. Using a 9/16”
wrench, tighten the clamps. It is important to push down on the rail while tightening. AND to
tilt the rail up approximately two degrees simultaneously. Both the pushing down and tilting of
the rail will position the rail best to minimize water intrusion.
9a - Thread the stand-o bolt
into the lower ange of the
clamp.
9b - Thread the stand-o jam
nut onto the bolt.
9c - Slide the stand-o bumper
onto the bolt.
Adjustment Screws
C
G
G
 Loading...