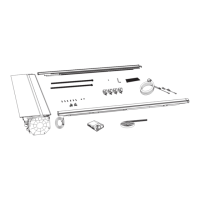
9h. Tighten the rail clamp stand-o bolt:
From steps 9, 10 & 11 the rails are now adjusted to be even.
Loosen the jam nut, then tighten the
stand-o bolt until the bumper rmly
contacts the truck bed wall. Re-tighten
the jam nut.
Do Not over torque the bolt.
NOTE: If the clamps need to be
removed after the stand-o bolts
are set, the jam nut and bolt will
have to be loosened.
NOTE: Due to variations in vehicle designs, the clamps may t dierently on your truck than on our test vehicles.
Retrax is not responsible for cover-to-vehicle installations, nor is Retrax liable for any damages resulting from
attachment, installation, or use.
Retrax • 917 S. 46th St., Grand Forks, ND 58201 • 800-206-4070 © Retrax is Retrax Holdings, LLC, 2023
4000-174 IR-RTS-01 Rev. 10.17.23
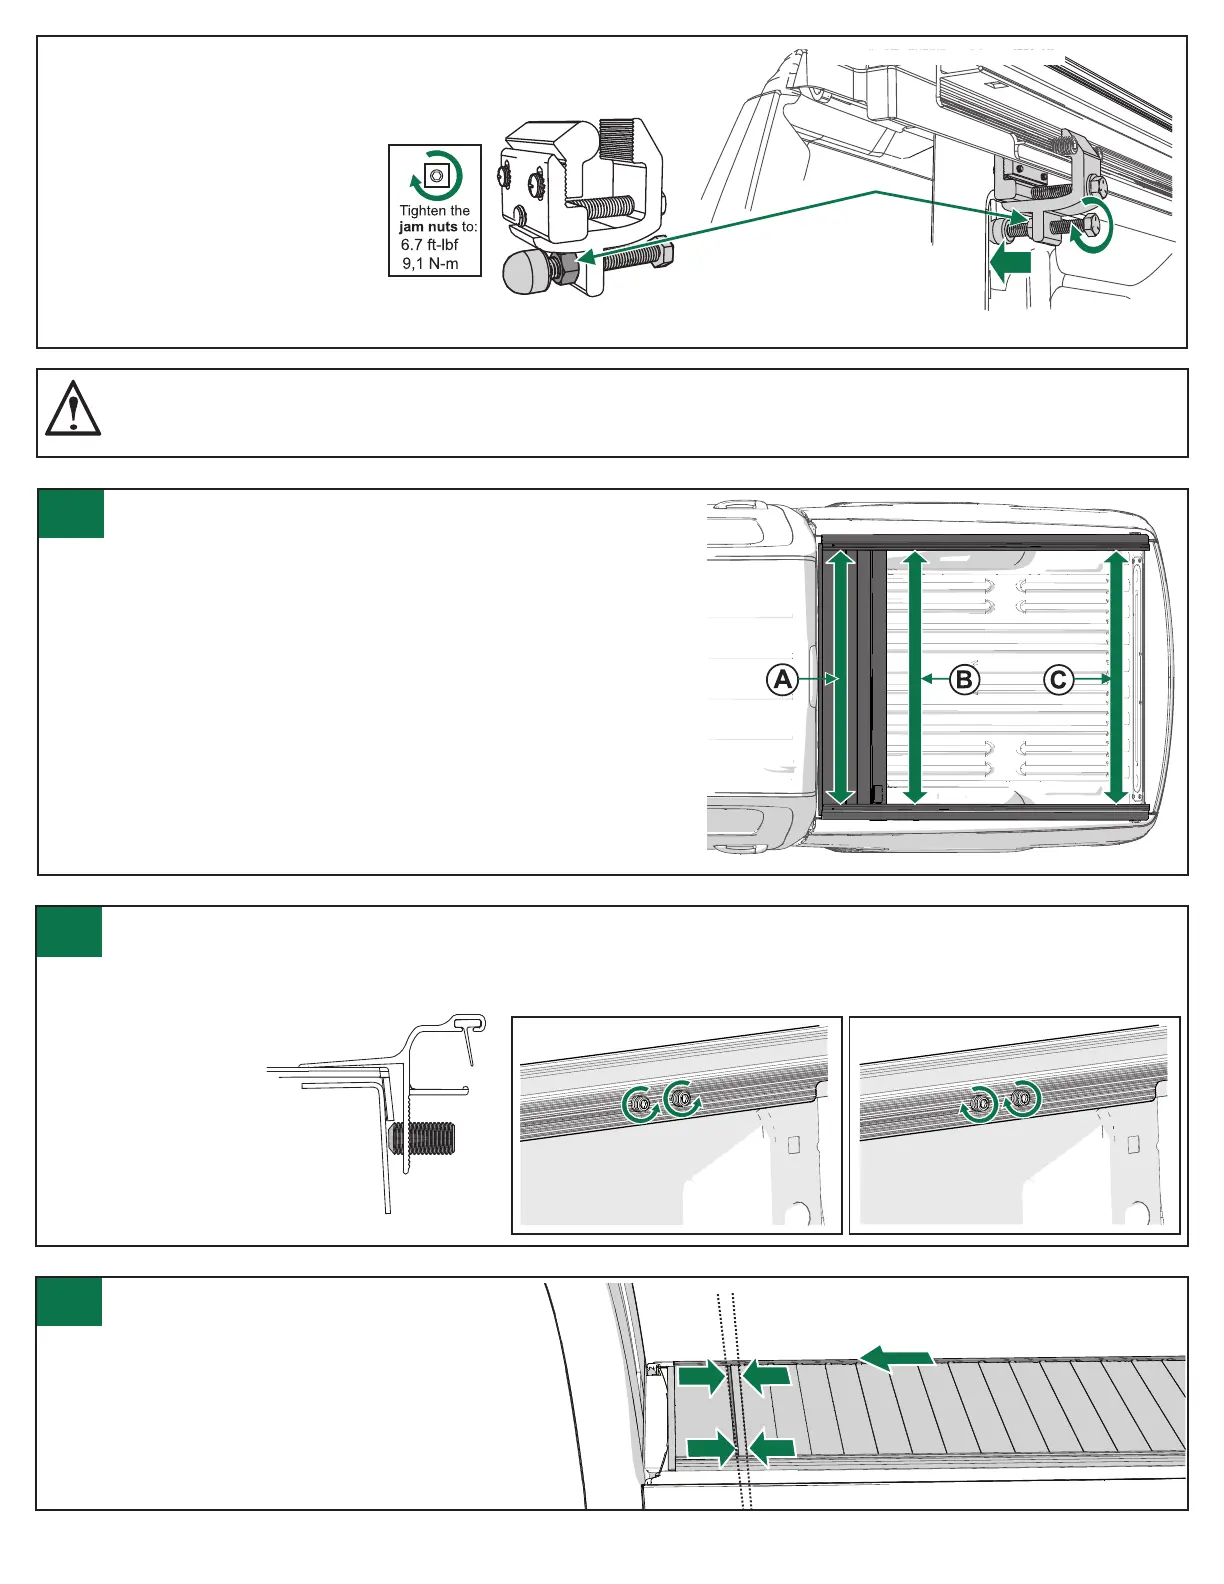
Adjust the distance between the rails:
Remove the clamps and turn the white
adjustment screws with the 6mm Allen wrench (J)
to move the rails. One
complete turn = 1/16”.
Turn both screws.
NOTE: When properly
adjusted, replace the
clamps as in step 8.
If the rails measured too close
together, turn the screws counter
clockwise.
If the rails measured too far apart,
turn the screws clockwise.
Jam Nut
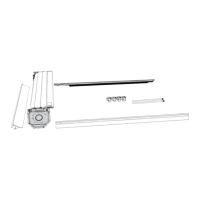
Measure and record the distance between the rails
10a. Measure the distance at point A (on top of the front cover).
10b. Then measure the distance at points B & C (above each clamp).
They must measure the same ±1/16” as at point A.
10c. It is important the rails are parallel, if they are not proceed to step 11.
If the measurements are correct, proceed to step 12.
10
11
12
Check for proper t between the front
cover and the rolling cover:
With the cover closed and latched, if there is less
weatherstrip exposed on one side versus the other
then adjust that rail more forward and toward the cab.
Loosen the clamps and move the rail.
Check again for equal spacing, adjust as necessary
then tighten all the clamps per step 8.
 Loading...