Retrax • 917 S. 46th St., Grand Forks, ND 58201 • 800-206-4070 © Retrax is Retrax Holdings, LLC, 2023
4000-174 IR-RTS-01 Rev. 10.17.23
Remove any snow or
foreign matter before
operating cover.
Remove any snow or
foreign matter before
operating cover.
Remove any snow or
foreign matter before
operating cover.
Remove any snow or
foreign matter before
operating cover.
FINAL NOTES
•
Open and close the cover to ensure that it is rolling without
rubbing or binding.
•
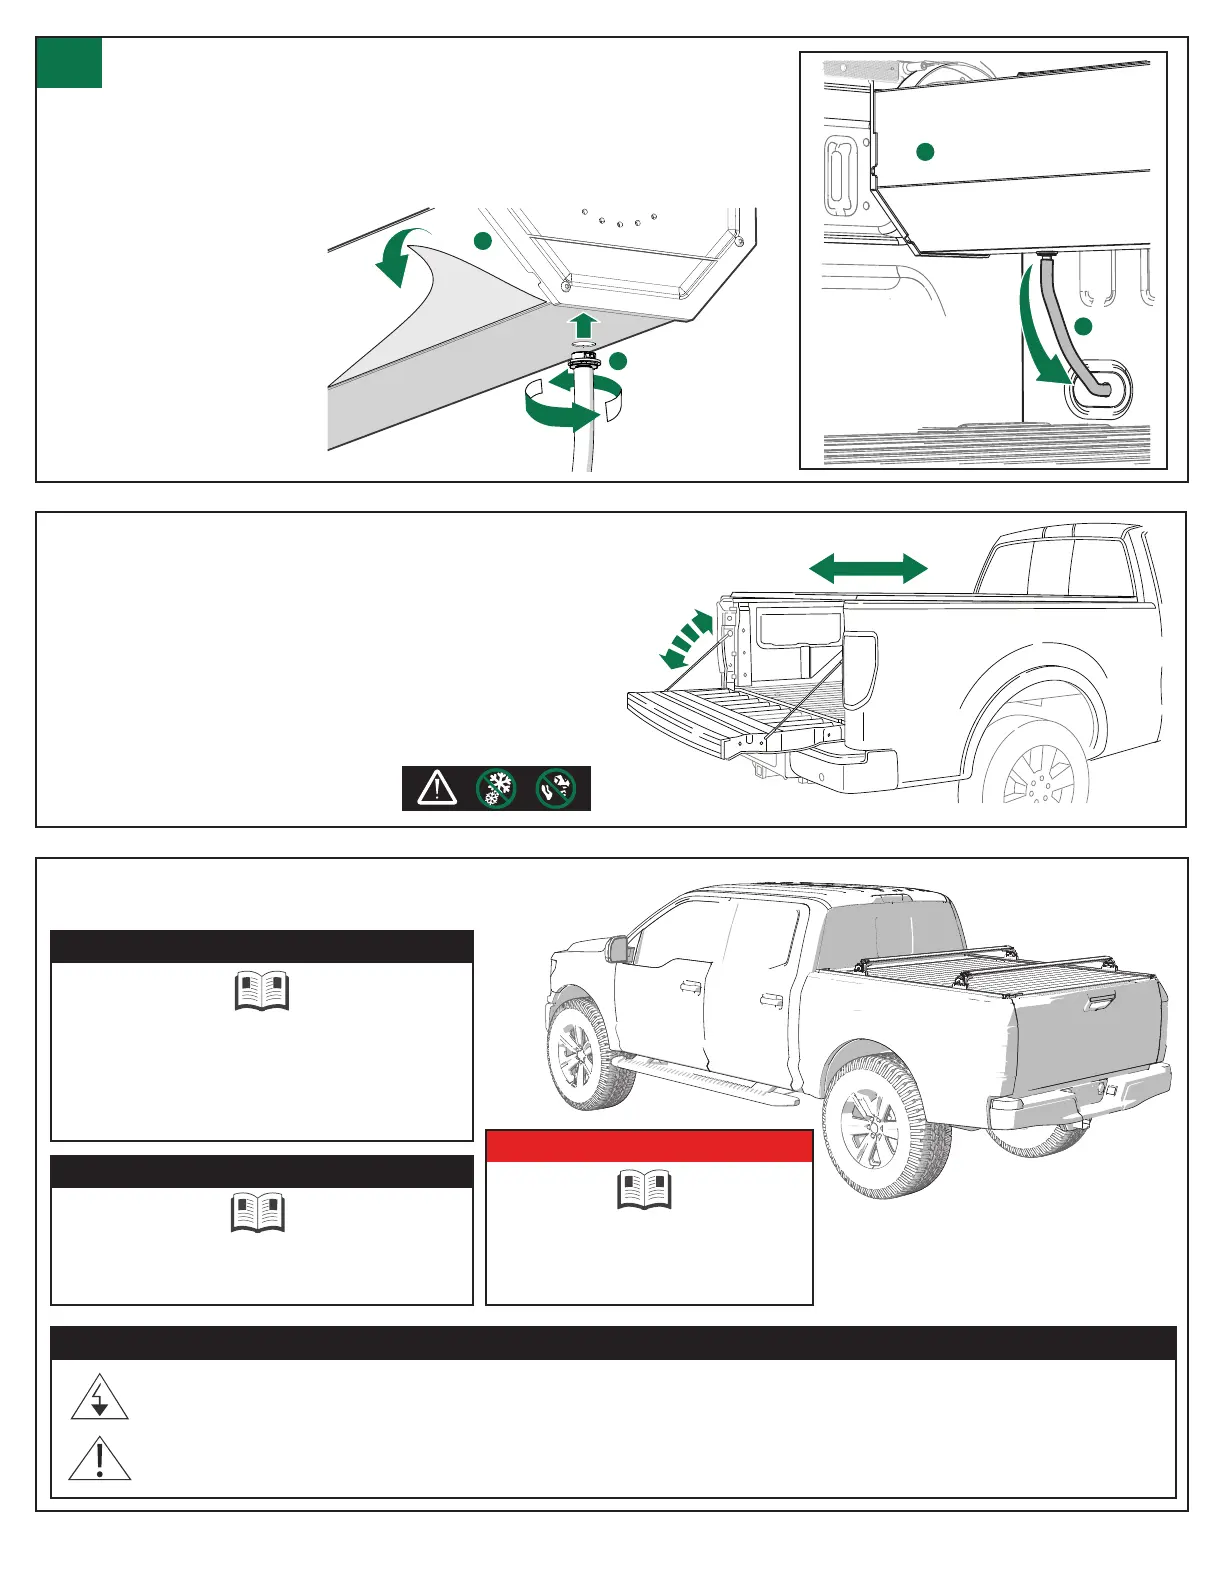
Open and close the tailgate to check for proper movement.
•
On some models, a better t with the tailgate may be obtained
if the rear of the rails are adjusted slightly up or down.
•
Remove all remaining protective lm.
•
Recheck that all of the clamps are tight.
Do this periodically throughout the use of the cover.
•
Check that the rails are level and
spaced evenly, and adjust accordingly.
XR Trax Rail System Only - Rack System Installation Information
Remove any snow or
foreign matter before
operating cover.
Be sure to refer to the truck owner’s manual
for load ratings for the truck. When calculating
weight of cargo, be sure to include occupants
and the Retrax cover.
Retrax cover with rack system= 125Ibs.
For installation instruc tions and load ratings
for the rack system, refer to the rack system’s
manual.
Check the vehicle manufacturer’s
weight capacity in the owner’s
manual. 2024 Ranger Retrax cover
on-road carrying capacity = 500lbs.
Truck Owners Manual
Remove any snow or
foreign matter before
operating cover.
Remove any snow or
foreign matter before
operating cover.
Rack System
Remove any snow or
foreign matter before
operating cover.
WARNING
Remove any snow or
foreign matter before
operating cover.
CAUTION
To prevent damage or loss of cargo when driving, check to make sure cross bars and cargo are securely fas-
tened. Loading cargo on the roof rack will make the vehicle’s center of gravity higher. Avoid high speeds, sudden
starts, sharp turns, sudden braking or abrupt maneuvers; otherwise, it may result in a loss of control. If driving
for a long distance on rough roads, or at high speeds, occasionally stop the vehicle and make sure the cargo
remains in its place. Do not ever exceed the maximum vehicle capacity when loading the vehicle.
H
H
13
Remove the protective lm and install the drain tubes:
13a. Remove all of the protective plastic lm from the canister (D). 13b.
Insert the drain tube (H) into the canister (D) on both sides, rotate to the right,
clockwise, the tting will click twice when secure. 13c. Generally the drain tubes (H)
will be routed out through a hole drilled in the factory bed plug. Otherwise a suitable
existing hole must be utilized. Or a new hole can be drilled, taking great caution to
be aware of lines and anything behind where the hole is drilled.
NOTE: For better water
drainage, be sure to
route the drain hose out
of the truck in the most
direct line as possible.
D
D
 Loading...