4000-175 IR-RTP-01 Rev. 10.17.23
Retrax • 917 S. 46th St., Grand Forks, ND 58201 • 800-206-4070 © Retrax is Retrax Holdings, LLC, 2023
Page 9 Top
Page 9 Middle
O C
O C
O C
Page 10 Top
Page 10 Bottom Right
Page 10 Bottom Left
4
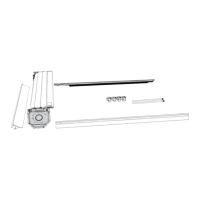
Wiring options:
Option 2:
Route the wiring (D) in the gap between the cab and truck
bed leaving about 24” in the truck bed. The wires will be
hidden under the front weather stripping of the Retrax cover.
Option 1:
Route the wiring (D) to the driver side drain hole in the truck
bed (leave about 24” in truck bed). Use split wire loom (A)
to wrap around the wires as a barrier between the wires
and the drain tube hole.
Note: This may require a larger hole than normal.
1
Routing wire harness from battery to truck bed:
Using a wire tie (E), secure the fuse holder (B) end of
the wire harness (D) near the battery (red wire and brown wire).
Note: Do not connect the wiring harness (D) to your
battery yet.
2
3
Route the wire harness (D) to the driver side of the
truck if it is not already. Note: Using wire ties (E),
secure the wiring harness (D) so it does not come into
contact with moving parts or exhaust pipes.
Route the wiring harness (D) down along the frame
rails to the truck box as shown on the right. Keep the
wires as high as possible to prevent damage while driving.
Secure the wiring harness (D) with ties (E) every 2-3 feet.
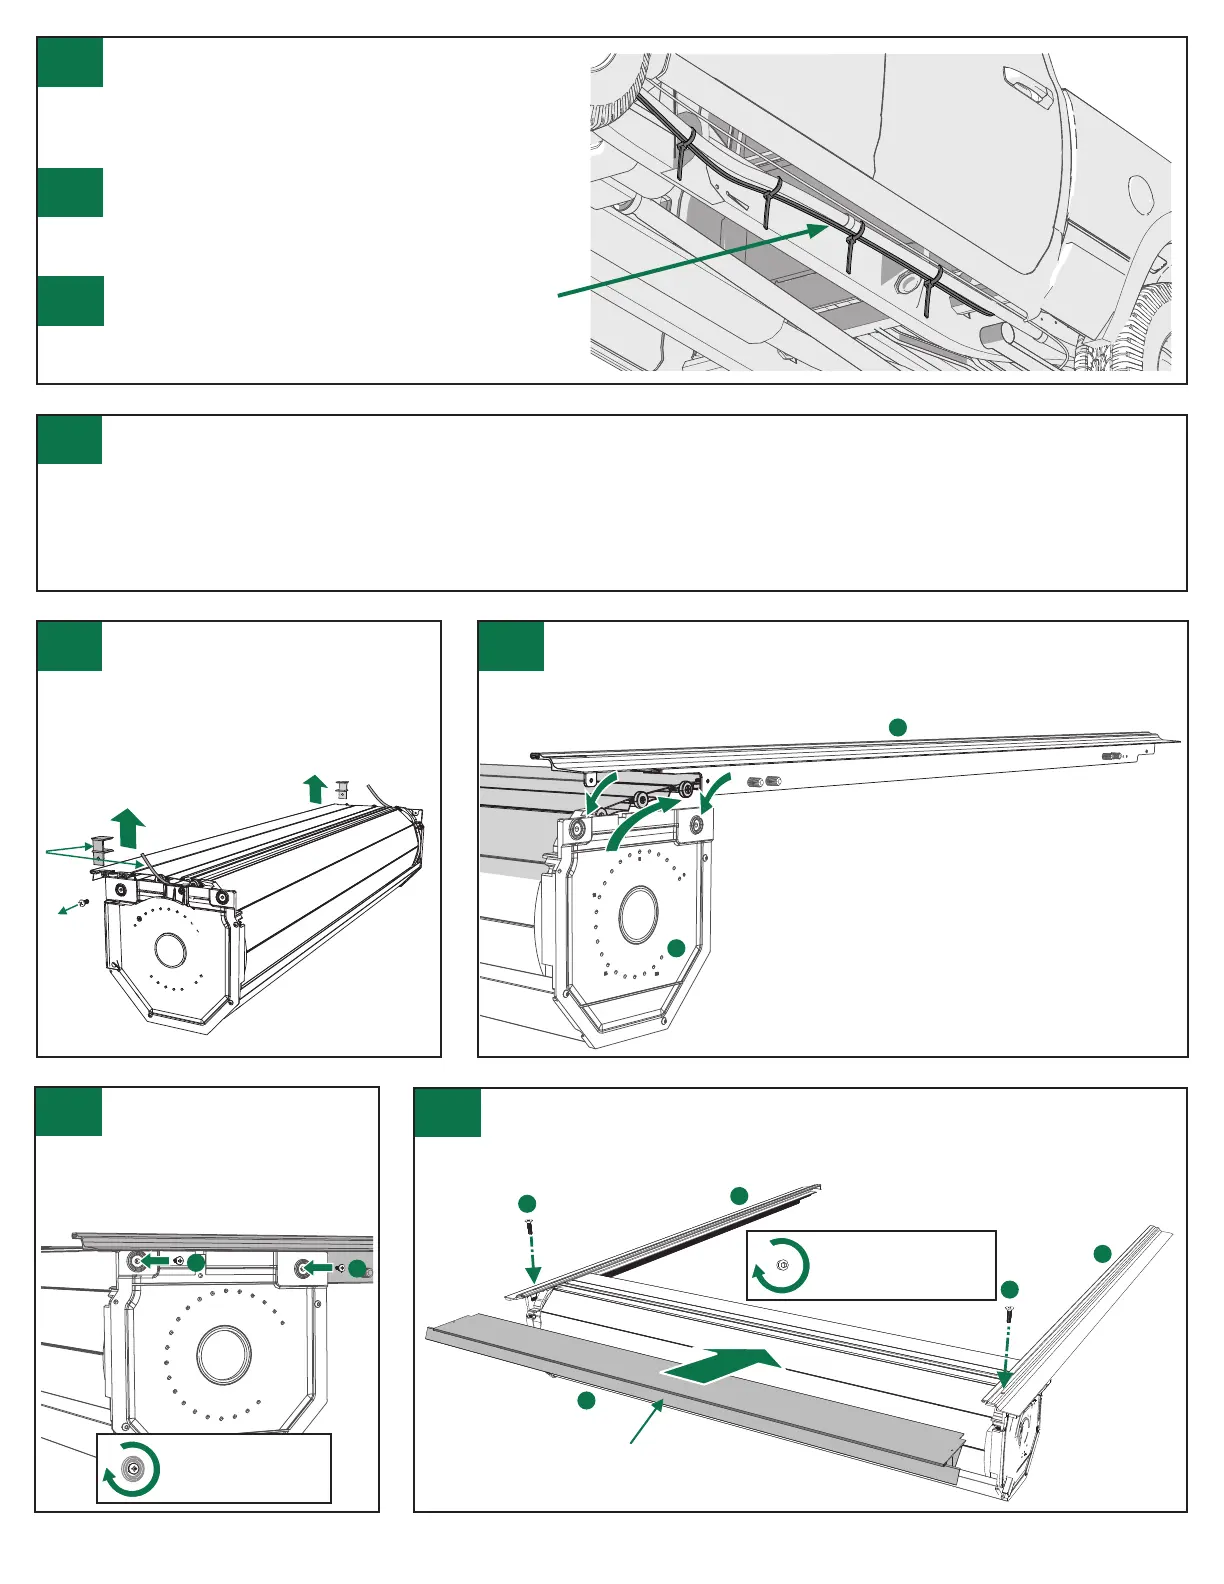
8
Install the front cover:
Slide the front cover (J) under the rails (K & L), attaching it with the two
10-24 x 3/4” front cover screws (O) with the
1/8” Allen wrench (R)
. The front cover
attaches through the top of the rail.
K
The weather strip is on the outside.
N
O
N
O
L
J
Tighten the canister
mounting screws to:
32 in-lbs.
Tighten the front cover
mounting screws to:
32 in-lbs.
Fasten the rails to the
canister:
With the rails in place and the cover
slid into the rail channel, attach the
rails with the four 10-32 x 7/16”
canister mounting screws (N).
7
K
M
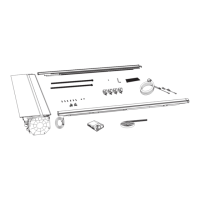
5
Remove shipping materials:
Remove the screws, shipping
brackets and the white shipping tubes from
both sides. Retain a shipping bracket for later
use as a shim.
Install the rails to the canister:
Pull the cover out of the canister (M) 6 to 8 inches, holding it from rolling
back in, guide the cover into the rail (K & L) channel while positioning the rails
into the canister (M). Align the front and rear rail attachment tabs and holes to the
inside of the corresponding canister holes.
6

 Loading...