4 - Remove the rear wheel, remove the axle nuts and washers, switch the chain tensioner to the opposite side of the axle and replace the axle washers and nuts.
5 - Flip the wheel around and place it back into the frame.
6 - Replace the chain on the cog.
7 - Pull the wheel back so the chain is taut and tighten the nut on the end of the chain tensioner to adjust chain tension. Do not over tighten the chain. There should be
approximately V4" of chain slack up and down when properly adjusted.
8 - While holding the wheel centered in the frame, tighten the axle nuts a little at a time alternating between eachone until the axle nuts are tight holding the rear wheel
securely in the frame.
STEP 9: GEARS- 7 speed Models
The gears on this model come adjusted from the factory. If the gears need adjustment, please have this done by a professional bike shop.
NOTE:
• You must be pedaling with light pedal pressure when shifting for the gears to shift
• For best results shift one gear at a time. Attempting to shift multiple gears at one time may cause system to jam, fail, or for the chain to fall off.
• Always downshift into an easier gear before coming to a complete stop.
STEP 10: TIRES
Locate the tire manufacturer's recommended inflation pressure found on the tire sidewall (listed as "PSI").
2 - Using a hand or floor pump with a gauge, begin to inflate the tire to half its recommended inflation pressure and check to see that the tire is properly seated on the rim.
Be sure to inspect both sides of the tire for proper fit.
3 - If the tire is seated unevenly or bulges out along the rim, let some air out of the tire and reposition the tire by hand so that it sits evenly on the rim.
4 - Continue to inflate the tire to the manufacturer's recommended pressure.
5 - Do not exceed the recommended pressure as this will cause an unsafe condition potentially causing the tire to unexpectedly explode.
6 - Do not use a compressed air device to inflate your tires as the rapid inflation of the tire can cause it to explode.
NOTE: Tires and tubes are not warranted against damage caused by over-inflation or punctures from road hazards.
BEFORE YOUR FIRST RIDE
We strongly recommend you take your bike to a professional bike shop and have them check your work and fine tune the bike
to ensure your bike is safe to ride.
SERIAL NUMBER
It is important that you locate and record the serial number of your bicycle in case of a recall or if the bicycle is stolen.
The serial number can be found under the crank bottom bracket stamped into the frame (Fig. 15)
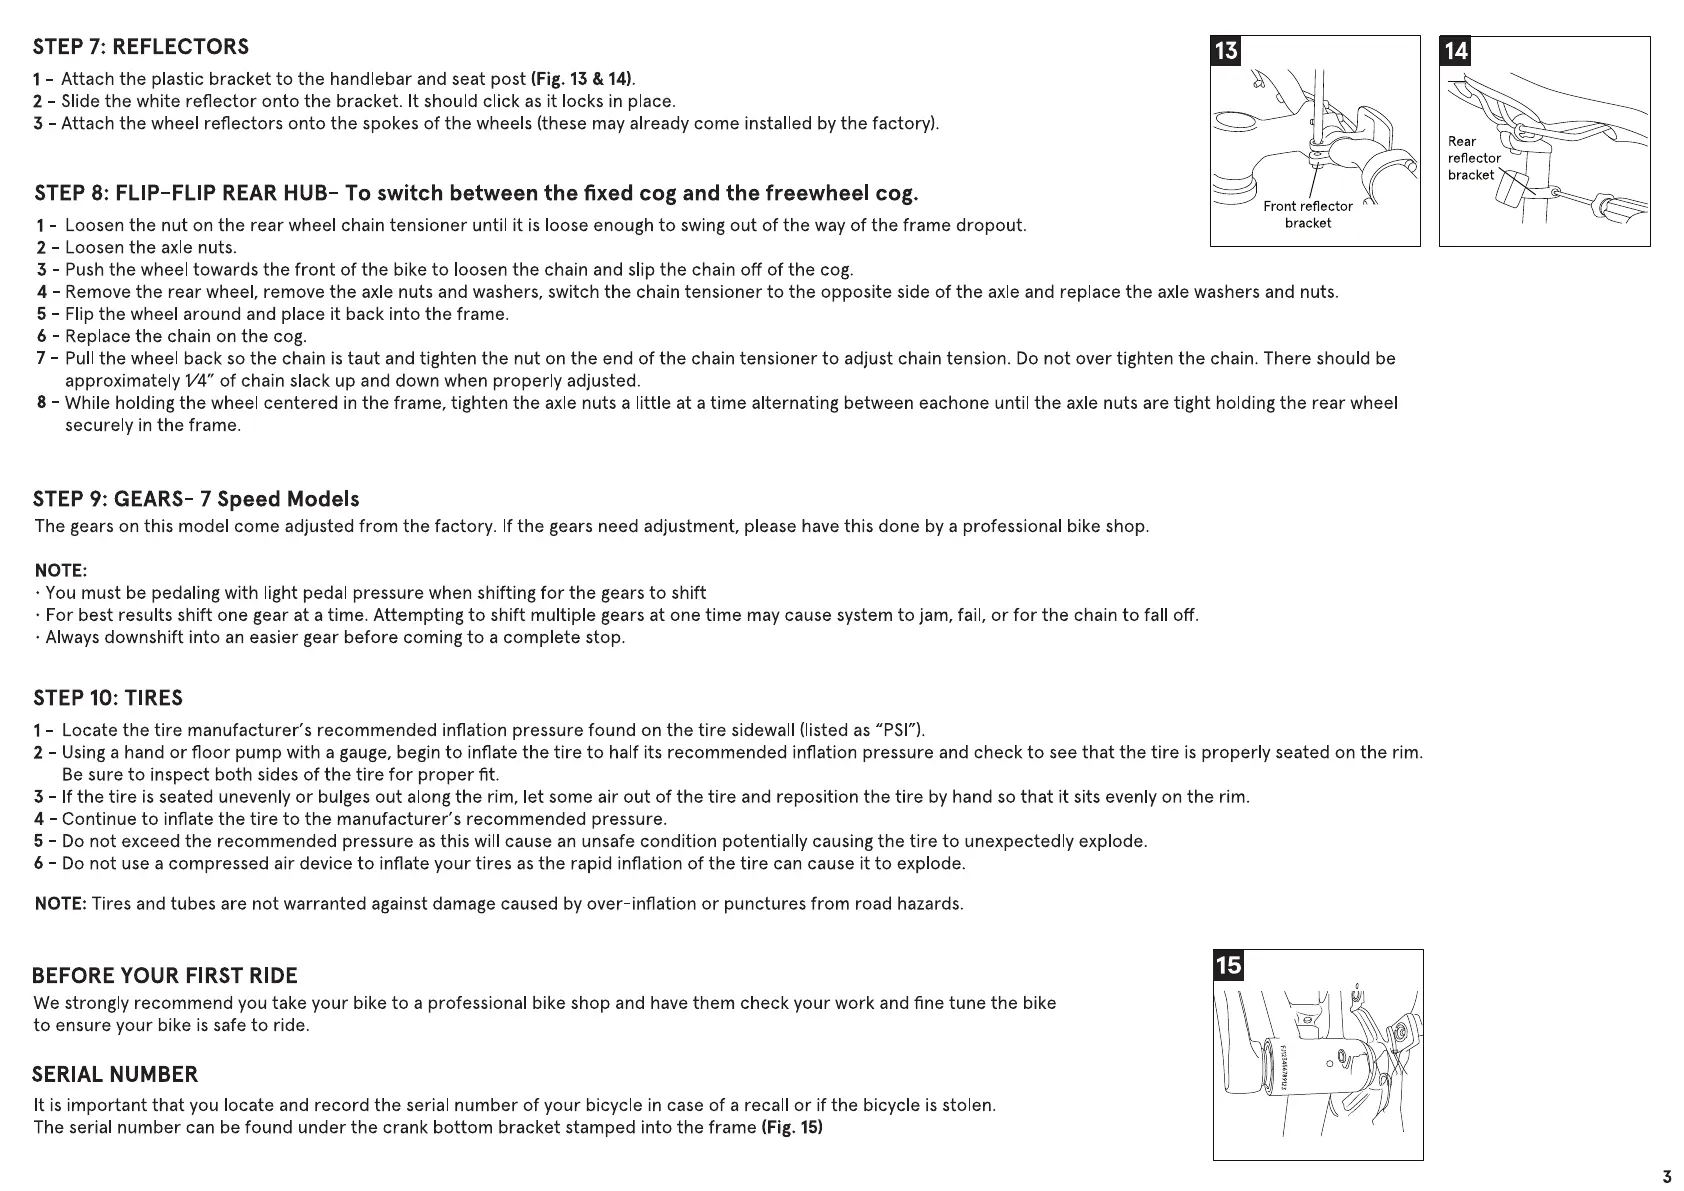
STEP 7: REFLECTORS
I - Attach the plastic bracket to the handlebar and seat post (Fig. 13& 14).
2 - Slide the white reflector onto the bracket. It should click as it locks in place.
3 - Attach the wheel reflectors onto the spokes of the wheels (these may already come installed by the factory).
STEP 8: FLIP-FLIP REAR HUB- To switch between the fixed cog and the freewheel cog.
Loosen the nut on the rear wheel chain tensioner until it is loose enough to swing out of the way of the frame dropout.
I
2 - Loosen the axle nuts.
3 - Push the wheel towards the front of the bike to loosen the chain and slip the chain off of the cog.
I-
13
Front reflector
bracket
14
Rear
reflector
bracket
3
 Loading...