RetroTINK 2X Quick Start Guide VideoGamePerfection.com
Overview
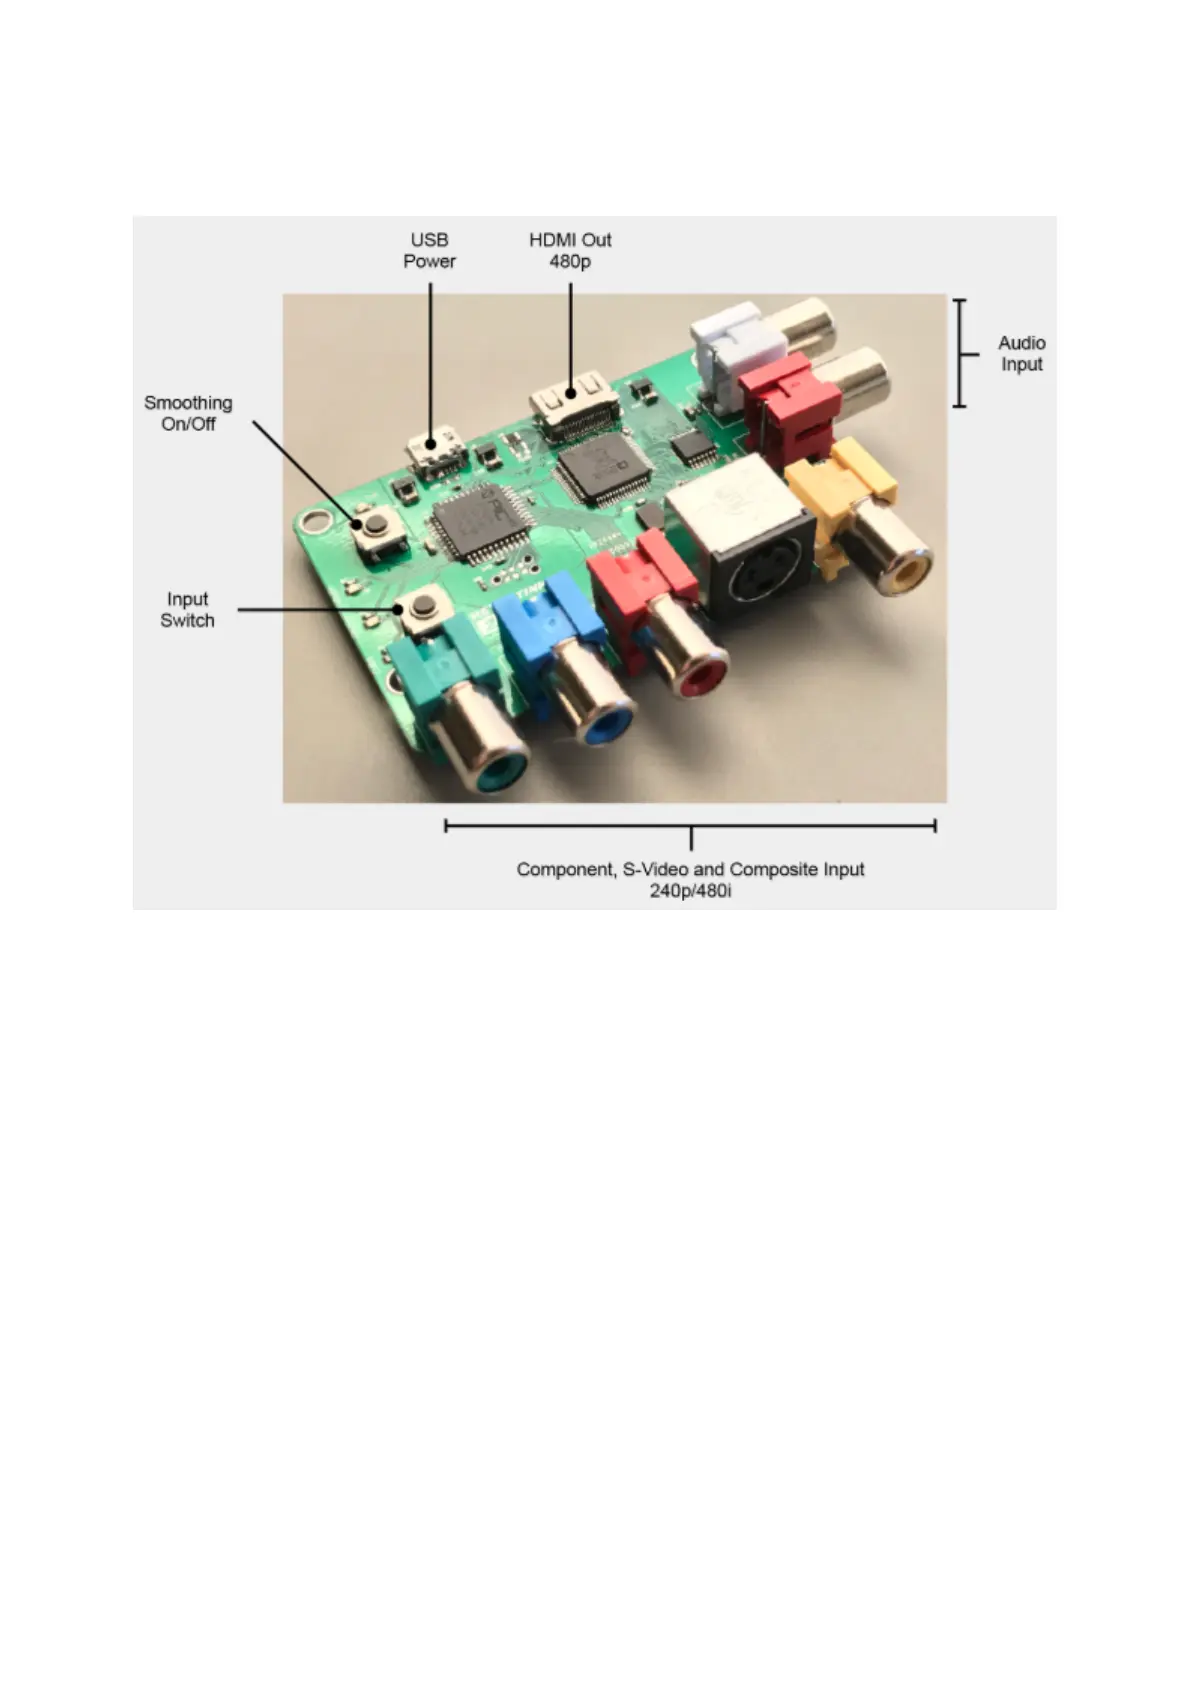
USB Power – Connect a standard MicroUSB cable between an active USB port and the RetroTINK
2X to provide power. Alternatively, use one of our approved power supplies and USB adapter.
HDMI Out 480p – Connect this output to your display or secondary scaler/converter using a
standard Mini HDMI cable.
Audio Input – Connect a standard analogue audio source here in order to enjoy digitised audio
output via the HDMI out connector.
Component, S-Video and Composite input – Connect the appropriate video input to these ports.
Composite video signals should connect to the yellow composite video connector on the right. S-
Video signals should connect to the black DIN connector. Component video signals require three
separate signal wires and these connect to the three RCA connectors on the left.
Input Switch – Press this button to cycle through the three inputs. A LED light indicator on the
RetroTINK 2X, below the input select button, will illuminate to show the currently active input.
Smoothing on/off – Press this button to cycle through the three output modes. These modes are
explained in the next section.
Page 4