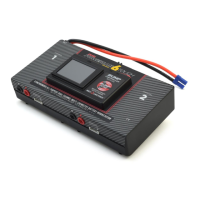
BumpTag Installation
BumpTags are small enough and light enough to offer a great deal of flexibility in installation. This section
provides some guidelines for attaching the BumpTags to your batteries and some alternative approaches
for situations where direct attachment may not be feasible or desirable.
1. BumpTag attached directly to the battery
This is the ideal scenario since the BumpTag always stays with the battery and each battery has its
own unique ID for purposes of logging history and performance analysis. The most convenient
location on the battery is normally the end opposite the power/charge leads. This location makes it
easy to align the BumpTag to the Bump Zone area of the charger and typically doesn’t interfere with
installation of the battery.
For smaller batteries (where the end of the battery is less than the 25mm diameter of the BumpTag),
the BumpTags can also be applied to the side of the battery, assuming it doesn’t interfere with
installation. In this case, we recommend installing on the back side of the battery, closest to the end
opposite the power/charge leads – having it in a consistent location, near the end of the battery
makes it faster and easier to align with the Bump Zone during use.
BumpTags can be attached pretty much anywhere as long as they aren’t bent at sharp angles or
installed in such a way that they are repeatedly bent back and forth during use – either of those
situations will result in the internal antenna being broken and the BumpTag will stop functioning.
Wrapping the BumpTag around the gradual curve of the power/charge leads end of a Lithium battery
will normally work pretty well for accommodating batteries that are slightly thinner than the 25mm
diameter of the BumpTag, although thick power/charge leads can be difficult to bend out of the way
when bumping the battery, so it may not always be acceptable.
2. BumpTag attached to bottom of a small battery container
This approach works well for micro-size batteries. Not only are micro-size batteries too small to
directly attach a BumpTag, but they may also be so inexpensive that the cost of a BumpTag per
battery may be excessive.
If possible, use a container roughly the size of the Bump Zone to simplify alignment.
For larger containers, place BumpTags under the bottom of one or more corners in such a way that
that the BumpTag is easy to visually align with the Bump Zone during use.
Clear containers (like servo boxes) are ideal because you can see the location of the BumpTag from
the top side of the container to simplify alignment with the Bump Zone.
3. BumpTag attached to keychain, card, or other small object
This approach works well for larger, fixed batteries or batteries permanently installed inside of
models. Attached a BumpTag to a small non-metallic object, like a plastic keychain ring, and write a
description on the opposite side. Leave it inside your charge case and bump it whenever you need to
charge that stationary battery.
4. BumpTag attached to model (canopy, cowl, fuselage, etc.) using a mobile device with NFC
If you are using the Revolectrix CCS mobile app on an NFC-enabled mobile device, then you have an
alternative to #3. BumpTags can be attached directly to your model (or large fixed battery) and the
BumpTag can be scanned from your mobile device. As long as the model surface is non-metallic, the
BumpTag can be installed on the inside of your model so it isn’t visible or vulnerable to damage on
the outside. For example, inside the fuselage, next to the charge jack for the receiver pack.
TIP: Clear packing tape or heat shrink can be used over the top of the BumpTag
to keep it secured in situations where the edge of the BumpTag is vulnerable to
peeling during use.