EasyManua.ls Logo

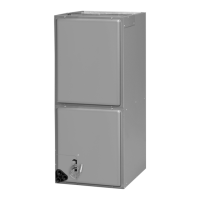
Rheem RH1T6024STANDA - User Manual

Rheem RH1T6024STANDA
56 pages
To Next Page IconTo Next Page
Loading...
WARNING
sWARNING
!
These instructions are intended as an aid to qualified licensed
service personnel for proper installation, adjustment and
operation of this unit. Read these instructions thoroughly before
attempting installation or operation. Failure to follow these
instructions may result in improper installation, adjustment,
service or maintenance possibly resulting in fire, electrical
shock, property damage, personal injury or death.
AIR HANDLERS
FEATURING INDUSTRY STANDARD R-410A REFRIGERANT:
(-)H1P Standard Efficiency with Aluminum Coil
(-)H1T High Efficiency with Aluminum Coil
INSTALLATION INSTRUCTIONS
92-20521-110-00
(BASED ON 92-20521-66-09)
Question and Answer IconNeed help?

Do you have a question about the Rheem RH1T6024STANDA and is the answer not in the manual?

Rheem RH1T6024STANDA Specifications

General IconGeneral
ModelRH1T6024STANDA
TypeAir Handler
Airflow800 CFM
RefrigerantR-410A
Tonnage2 Ton
Phase1
Motor TypePSC
Depth21 inches
Cooling Capacity24000 BTU
Voltage208/230V
Filter Type1 inch
Cabinet TypeInsulated
Width21"
Heating CapacityNot applicable (Cooling Only)

Summary

1.0 SAFETY INFORMATION

2.3 MODEL NUMBER NOMENCLATURE

2.5.1 DIMENSIONS & WEIGHTS: (-)H1 P MODELS

2.5.2 DIMENSIONS & WEIGHTS: (-)H1 T MODELS

2.6 IMPORTANCE OF PROPER INDOOR;OUTDOOR MATCH-UPS

2.7 IMPORTANCE OF QUALITY INSTALLATION

3.0 INSTALLATION

3.1 TOOLS & REFRIGERANT

Lists necessary tools and details R-410A refrigerant specifications and handling.

3.2 APPLICATIONS AND ORIENTATION

3.2.4 INSTALLATION IN MOBILE;MANUFACTURED HOMES

3.6 DUCTWORK

3.7 RETURN AIR FILTER

3.9 REFRIGERANT LINE CONNECTIONS & CHARGING

Leak Testing, Evacuation, and Charging

TXV Sensing Bulb Attachment

3.11 CONDENSATE DRAIN

3.13 ELECTRICAL WIRING

3.13.2 GROUNDING

Emphasizes the importance of permanent grounding for electrical safety.

3.13.3 POWER WIRING

Discusses power requirements, branch circuits, and disconnects.

3.13.4 COPPER WIRE SIZE

3.13.5 ELECTRICAL DATA - BLOWER MOTOR ONLY - WITHOUT ELECTRIC HEAT: (-)H1 P

3.13.5.2 ELECTRICAL DATA - BLOWER MOTOR ONLY - WITHOUT ELECTRIC HEAT: (-)H1 T

3.13.6.1 ELECTRICAL DATA - WITH ELECTRIC HEAT: (-)H1 P

3.13.6.2 ELECTRICAL DATA - WITH ELECTRIC HEAT: (-)H1 T

3.13.7 ELECTRIC HEATER KIT SUPPLEMENTAL INFORMATION

3.13.8 CONTROL WIRING

3.13.9 THERMOSTAT & CONTROL WIRING CONNECTIONS

3.14 AIRFLOW

3.14.2 SELECTING INDOOR BLOWER MOTOR SPEED

Guides on selecting the correct blower motor speed based on static pressure.

3.14.2.1 (-)H1 P MODELS (PSC MOTOR)

3.14.2.2 (-)H1 T MODELS (CONSTANT TORQUE ECM MOTOR)

3.14.3.1 240 V AIRFLOW PERFORMANCE DATA: (-)H1 P (PSC MOTOR)

3.14.3.2 115;208;480 V AIRFLOW PERFORMANCE DATA: (-)H1 P (PSC MOTOR)

3.14.3.3 115;208;240;480 V AIRFLOW PERFORMANCE DATA: (-)H1 T (CONSTANT TORQUE MOTOR)

4.0 START-UP

4.1 PRE-START CHECKLIST

A checklist of essential items to verify before system start-up.

4.2 SYSTEM START-UP AND OPERATIONAL CHECK-OUT

Procedures for performing an operational check-out after installation.

4.3.1 COOLING MODE

4.3.2 ELECTRIC HEAT MODE

4.3.3 HEAT PUMP HEATING MODE

4.4 CORRECTING ELECTRIC HEAT kW FOR VOLTAGE

4.5 CALCULATING ELECTRIC HEAT CAPACITY IN BTUH

4.6 CHECKING INDOOR AIR-FLOW

4.7 CHECKING REFRIGERANT CHARGE

5.0 COMPONENTS & CONTROLS

5.1 BLOWER MOTOR

Details on PSC and ECM blower motors, speed taps, and controls.

5.6 INDOOR COIL ASSEMBLY

6.0 ACCESSORIES & KITS

6.1 ELECTRIC RESISTANCE HEATER KITS

Lists available electric heater kits and their specifications.

7.0 MAINTENANCE

7.6 MOTOR REPLACEMENT

7.7 BLOWER WHEEL REPLACEMENT

8.0 DIAGNOSTICS

9.0 WIRING DIAGRAMS

9.1 WIRING DIAGRAM (-)H1 P - 115 V

Electrical wiring diagram for H1P models operating at 115V.

9.2 WIRING DIAGRAM (-)H1 P - 208;240 V

9.3 WIRING DIAGRAM (-)H1 P - 480 V

9.4 WIRING DIAGRAM (-)H1 T - 115 V

9.5 WIRING DIAGRAM (-)H1 T - 208;240 V

9.6 WIRING DIAGRAM (-)H1 T - 480 V

Related product manuals