ASSEMBLY
SE10-4A/SE15-4A 03/09 Assembly Section 3-2
© 2009 Alamo Group Inc.
ASSEMBLY
DEALER SET-UP INSTRUCTIONS
Set up mower as received from factory with these instructions. Refer to complete Check List when set up is
finished.
Select a suitable working area. Open parts box and lay out parts to make location easy. Refer to Parts List and
exploded view drawing in Repair Parts Section and the Packing List.
Cut all wire ties, including those on blades if present.
This mower is shipped partially assembled. Assembly will be easier if components are aligned and loosely
assembled before tightening hardware. Refer to chart on page 5-8 for proper torque. All bolts are Grade 5
unless otherwise specified.
1. Position center section on flat surface. Elevate approximately 10 inches from ground to permit the
installation of wings.
Support the frame securely at enough points so that there is no danger of it falling during
assembly, causing injury to persons or damage to the cutter.
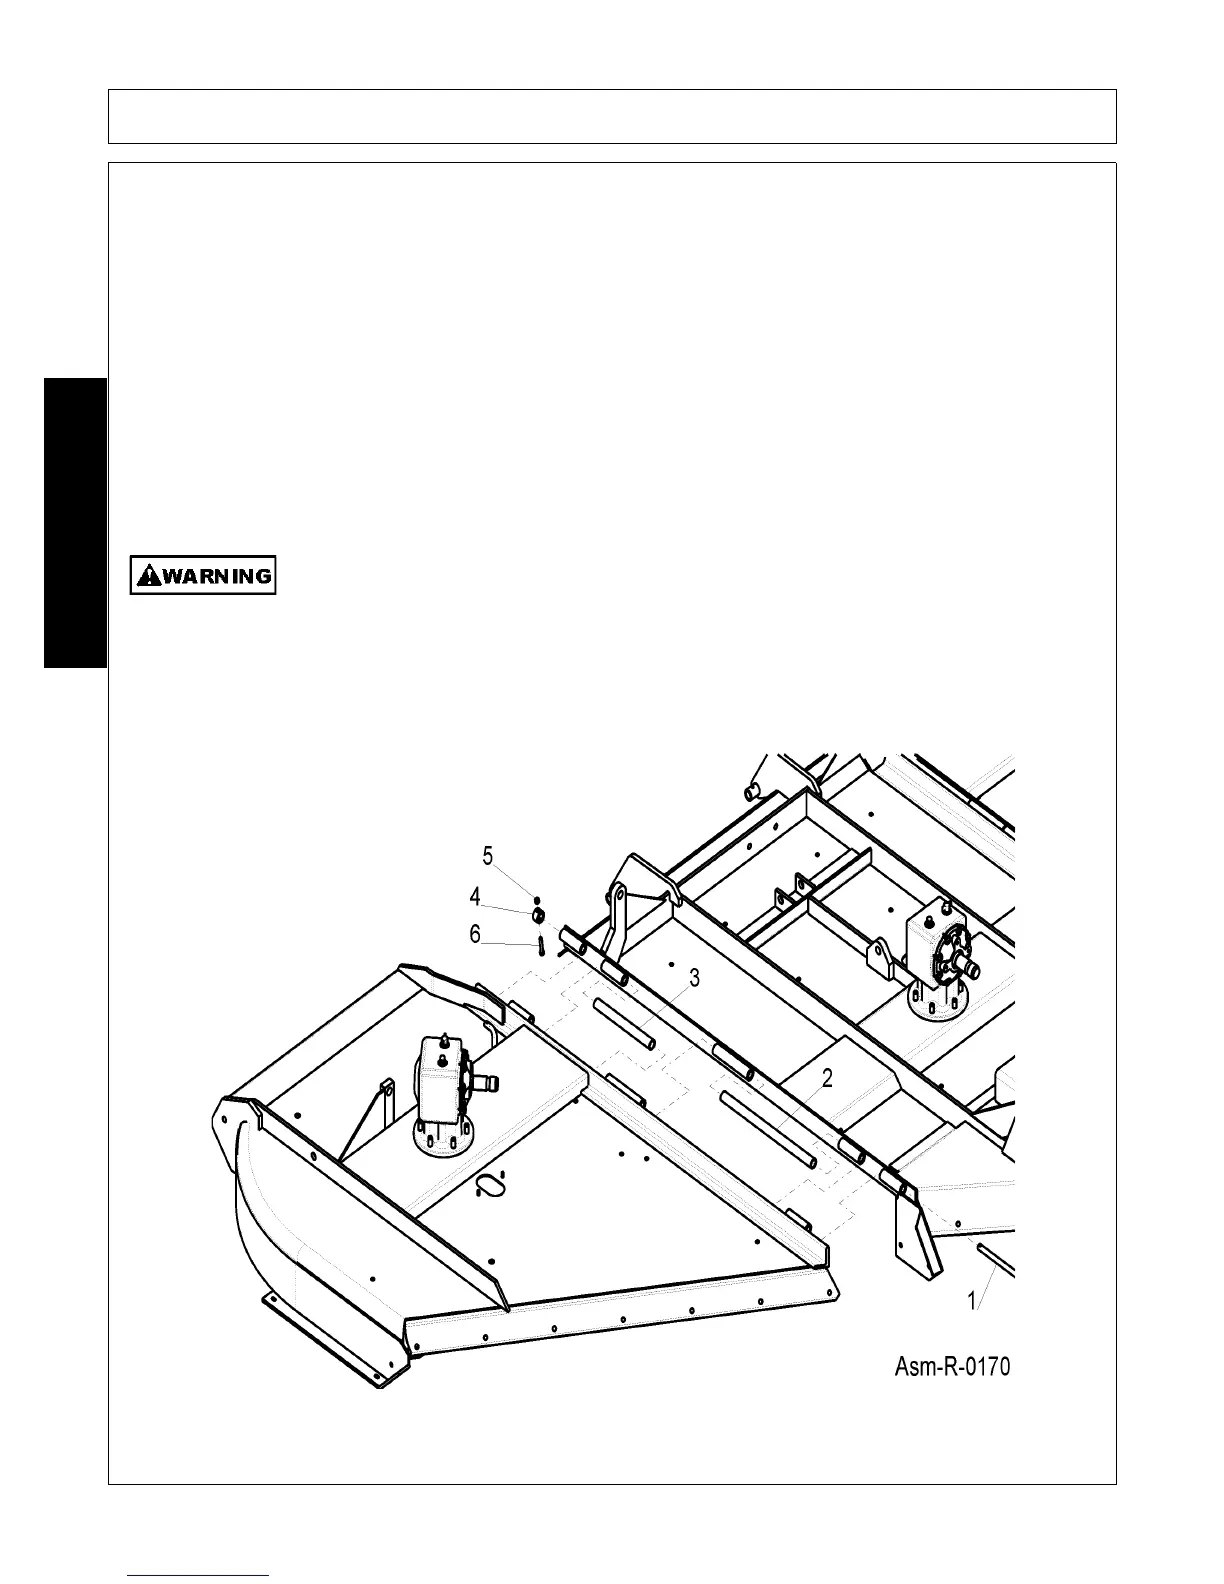
2. Installing Right Wing, Left Wing, or Counter Weight (#1). Align hinges, making sure to include spacer tube
(#4). Insert Hinge Rod (#6) from front of machine. (To facilitate installing hinge rod, insert a long 3/4" bolt or
rod through the first few rear hinges. This will keep the wing in alignment while inserting rod.) Secure rod
using Spacer (#2), 3/8 x 2 bolt (#3), and locknut (#5). FIGURE Asm-R-0170.
 Loading...