Do you have a question about the Ricoh Acifio MP C3002 and is the answer not in the manual?
Access the Copy function by pressing the [Home] key and then the [Copier] icon on the screen.
Press the [Reset] key to clear any existing settings before starting a new copy job.
Position the documents to be copied on the scanner glass or document feeder.
Make desired adjustments to copy settings such as paper type or color.
Use the number keys to specify the quantity of copies, up to a maximum of 999.
Initiate the copying process by pressing the [Start] key.
Press the [Reset] key after the copy job is finished to clear all current settings.
Access the Scanner function by pressing the [Home] key and then the [Scanner] icon.
Press the [Reset] key to clear any previous settings before starting a new scan.
Navigate to the E-mail tab on the scanner interface to configure email scanning.
Position the documents to be scanned on the scanner glass or document feeder.
Enter the recipient's email address using the manual entry option.
Set the sender's name for the outgoing email by pressing the [Sender Name] option.
Initiate the scan-to-email process by pressing the [Start] key.
Plug your USB stick into the designated port on the right side of the control panel.
Access the Scanner function by pressing the [Home] key and then the [Scanner] icon.
Press the [Reset] key to clear any previous settings before scanning to USB.
Position the documents to be scanned on the scanner glass or document feeder.
Select the desired file type by pressing [Send File Type / Name].
Press [Store File] and then [Store to memory device] to save the scan to USB.
Begin the scan-to-USB process by pressing the [Start] key.
Access the Printer function by pressing the [Home] key and then the [Printer] icon.
Choose the [Print from Memory Storage Device] option to print from the USB stick.
Select the desired file from the USB device and start the printing process.
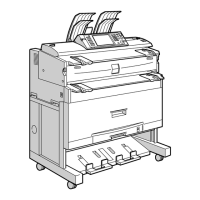
This document outlines the operational procedures for a Ricoh Aficio MP C3002 multifunction device, covering essential functions such as copying, scanning to email, scanning to a USB stick, and printing from a USB stick. The device is designed for ease of use, featuring a clear control panel and intuitive menu navigation to streamline various office tasks.
The Ricoh Aficio MP C3002 is a versatile multifunction printer (MFP) capable of handling a wide range of document management tasks. Its core functions include:
Copying: The device allows users to quickly and efficiently duplicate documents. It supports basic copying operations, including setting the number of copies and initiating the copy job with a dedicated "Start" key. The maximum copy quantity is 999, catering to both small and large-volume copying needs. The system also includes a "Reset" key to clear previous settings, ensuring that each new copy job starts with a clean slate.
Scanning to Email: This feature enables users to digitize physical documents and send them directly as email attachments. The process involves selecting the "Scanner" function, ensuring previous settings are cleared, and then navigating to the "E-mail" tab. Users can specify destinations by manually entering email addresses or selecting from a list of frequent contacts. The device supports various scan settings, such as black and white or color scanning, resolution (e.g., 200 dpi), and auto-detection of document characteristics. This functionality is crucial for quick document sharing and digital archiving.
Scanning to USB Stick: For users who prefer local storage or need to transfer documents without network access, the device offers the ability to scan directly to a USB stick. The process involves plugging the USB stick into the designated port on the control panel, selecting the "Scanner" function, and clearing any prior settings. Users can then place their originals, specify file types (e.g., TIFF/JPEG, PDF, High Compression PDF, PDF/A), and initiate the scan. This feature provides a convenient and secure way to digitize and transport documents.
Printing from USB Stick: The Ricoh Aficio MP C3002 also supports direct printing from a USB stick. Users can insert their USB stick, access the "Printer" function, and select "Print from Memory Storage Device." From there, they can browse and select the desired file for printing. This eliminates the need to transfer files to a computer first, offering a streamlined printing workflow for documents stored on portable media.
The device incorporates several features designed to enhance usability and efficiency:
Intuitive Control Panel: The control panel is centrally located and features a "Home" key that serves as the primary navigation point. Dedicated icons for "Copier," "Scanner," and "Printer" allow users to quickly access the desired function. The layout is designed to be straightforward, reducing the learning curve for new users.
Clear Setting Management: The "Reset" key is a prominent feature, ensuring that users can easily clear all previous settings before starting a new task. This prevents unintended settings from affecting subsequent jobs and helps maintain consistent output quality. For scanning functions, the device also prompts users to ensure no previous settings remain, reinforcing good operational practices.
Flexible Destination Options: When scanning to email, the device offers both manual entry of email addresses and the ability to select from a list of "Frequent" contacts, as well as "Recent" destinations. This flexibility caters to both ad-hoc and routine document distribution needs. The "Search Dest." and "Switch Dest. List" options further enhance the ability to manage and select destinations efficiently.
Customizable Scan Settings: For scanning operations, users can specify various parameters such as scan mode (B&W: Text / Line Art), resolution (e.g., 200 dpi), and auto-detection features. The "Scan Settings" menu provides granular control over the output, allowing users to tailor scans to specific requirements, such as optimizing for text clarity or image quality. The "Auto Density" feature simplifies the process by automatically adjusting scan density.
Multiple File Type Support: When scanning to a USB stick, the device supports a range of file types, including TIFF/JPEG, PDF, High Compression PDF, and PDF/A. This ensures compatibility with various document management systems and user preferences. The ability to select "Single Page" or "Multi-page" output further adds to its versatility.
Document Feed Options: The device supports different original feed types, such as "1 Sided Original" and "Original Feed Type RR NY," indicating its capability to handle various document orientations and double-sided scanning, which is crucial for efficiency when processing multi-page documents.
Visual Feedback: The control panel provides visual cues, such as the "Ready" status, to inform users about the device's current state. For scanning, it also displays "Ttl. Dest. Memory" and a percentage indicator (e.g., "0 100%") to show memory usage, which can be helpful for managing large scan jobs.
Start Key for Job Initiation: A prominent "Start" key is used to initiate all copy and scan jobs, providing a consistent and easy-to-locate button for beginning tasks. This simplifies the user interface and reduces confusion.
While the provided document primarily focuses on operational procedures, certain aspects imply ease of maintenance and user-friendliness:
Clear Error Handling (Implied): The emphasis on clearing previous settings with the "Reset" key suggests a design philosophy that aims to minimize user errors and simplify troubleshooting. If a job fails due to incorrect settings, the "Reset" key provides a quick way to rectify the situation without complex diagnostic steps.
Modular Design (Implied by USB Port): The presence of an easily accessible USB port on the right side of the control panel indicates a design that supports external peripherals and modularity. This simplifies the process of connecting and disconnecting USB devices, reducing wear and tear on internal components and making it easier for users to manage their storage media.
Consistent Interface for Different Functions: The consistent use of the "Home" key and function-specific icons across all operations (copy, scan, print) means that users do not need to learn entirely new interfaces for different tasks. This consistency reduces the cognitive load on users and makes the device easier to maintain from a user training perspective.
Digital Signature and Security Settings (Implied): For PDF files, the device offers "Security Settings" and "Digital Signature" options. While not directly a maintenance feature, these indicate advanced capabilities that allow for secure document handling, which can be critical for compliance and data integrity. This indirectly contributes to the "health" of the document workflow by ensuring that digital documents are processed securely.
User ID Management (Implied for Printing): When printing from a USB stick, the "Print Jobs" section shows "Select User ID" with options like "User1" and "User2." This suggests that the device supports user authentication or job tracking, which can be useful for managing print quotas, monitoring usage, and ensuring accountability in a shared office environment. This feature can indirectly aid in maintenance by helping administrators identify heavy users or potential misuse.
In summary, the Ricoh Aficio MP C3002 is designed as a robust and user-friendly MFP, prioritizing ease of operation and versatility across its core functions. Its intuitive interface, flexible settings, and clear operational steps make it suitable for a dynamic office environment where efficiency and reliability are key.
| Print Technology | Laser |
|---|---|
| Print Resolution | 1200 x 1200 dpi |
| Monthly Duty Cycle | 100, 000 pages |
| Standard Functions | Print, Copy, Scan |
| Optional Functions | Fax |
| Hard Disk Drive | 250 GB |
| Max Paper Size | A3 |
| Print Speed | 30 ppm |
| Paper Capacity | 4, 400 sheets (maximum) |
| Connectivity | USB, Ethernet |
| Duplex Printing | Yes |
| Paper Size | A3, A4, A5, B4, B5, Legal, Letter, Executive |
| Memory (RAM) | 1.5 GB |
| Type | Multifunction |
| Operating System Compatibility | Windows, macOS, Linux |