Do you have a question about the RIDGID RP 241 and is the answer not in the manual?
Alerts users to potential personal injury hazards.
Signifies a hazardous situation resulting in death or serious injury.
Signifies a hazardous situation resulting in death or serious injury.
Signifies a hazardous situation resulting in minor or moderate injury.
Symbol indicating risk of crushing hands, fingers, or body parts.
Symbol indicating risk of electrical shock.
Precautions related to electrical connections and usage.
Maintain tools for proper operation; repair if damaged.
Do not use damaged or modified battery packs.
Do not expose battery packs to fire or excessive temperature.
Keep fingers away from pressing attachments to avoid crushing.
Never repair damaged attachments; discard and replace them.
Stand clear and wear protective gear due to large forces.
Use only RIDGID tools with appropriate RIDGID attachments.
Use correct tool, attachment, and fitting combinations for safety.
Read and understand all manuals and instructions before operation.
Red light indicates tool requires service after interval.
Red light indicates malfunction; requires battery re-insertion.
Red light indicates tool/battery is outside temperature range.
Red light indicates tool locked to prevent unauthorized use.
Red light indicates low battery; tool will not operate.
Inspect tool daily to reduce injury risk and prevent damage.
Check for proper assembly, maintenance, and completeness.
Check for broken, worn, missing, or binding parts.
Do not use the tool until any problems are repaired.
Inspect and maintain tool attachments per their instructions.
Keep hands away from attachments to avoid crushing injuries.
Stand clear and wear protective gear due to large forces.
Use proper tool, attachment, and fitting combinations.
Follow setup and operation instructions to prevent damage.
Select the correct RIDGID tool and attachment for the application.
Prepare the connection according to fitting manufacturer's instructions.
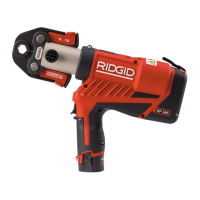
Place open jaws around fitting, aligning profile.
Ensure jaws are appropriately placed and square to fitting.
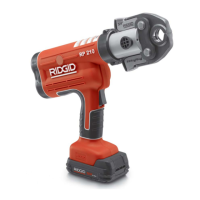
Open ring and place around fitting, aligning profile.
Confirm actuator installed; open tips and align with ring pockets.
Ensure ring is appropriately placed and square to fitting.
Depress run switch; tool locks on and completes cycle.
Use pressure release button if tool must be removed before completion.
Check for full insertion of tube into fitting.
Test connection according to connector manufacturer instructions and codes.
Ensure battery is removed from tool before maintenance.
Tools must be serviced at set intervals by a RIDGID Independent Service Center.
Possible reasons include discharged battery or improper insertion.
Usually occurs when press was not successfully completed.
Caused by wrong jaws, incorrect alignment, or tool needing repair.
Indicates seal or mechanical problems, or low oil level.
Typically due to low oil level.
Often caused by low oil level.
Improper service can make the machine unsafe.
Service and repair must be performed by a RIDGID Independent Service Center.
Only use equipment specifically designed and recommended for the tools.
Use attachments designed for the specific fitting system.
| Type | Press Tool |
|---|---|
| Battery | 12V Lithium-Ion |
| Capacity (Copper & Stainless Steel) | 1/2" - 1 1/4" |
| Capacity (PEX) | Up to 1 1/2" |
| Hydraulic Ram Output | 5, 400 lbs |
| Operating Temperature Range | 15°F to 122°F (-10°C to 50°C) |