P a g e | 21
1800 MY RILU www.rilu-e-bike.com.au
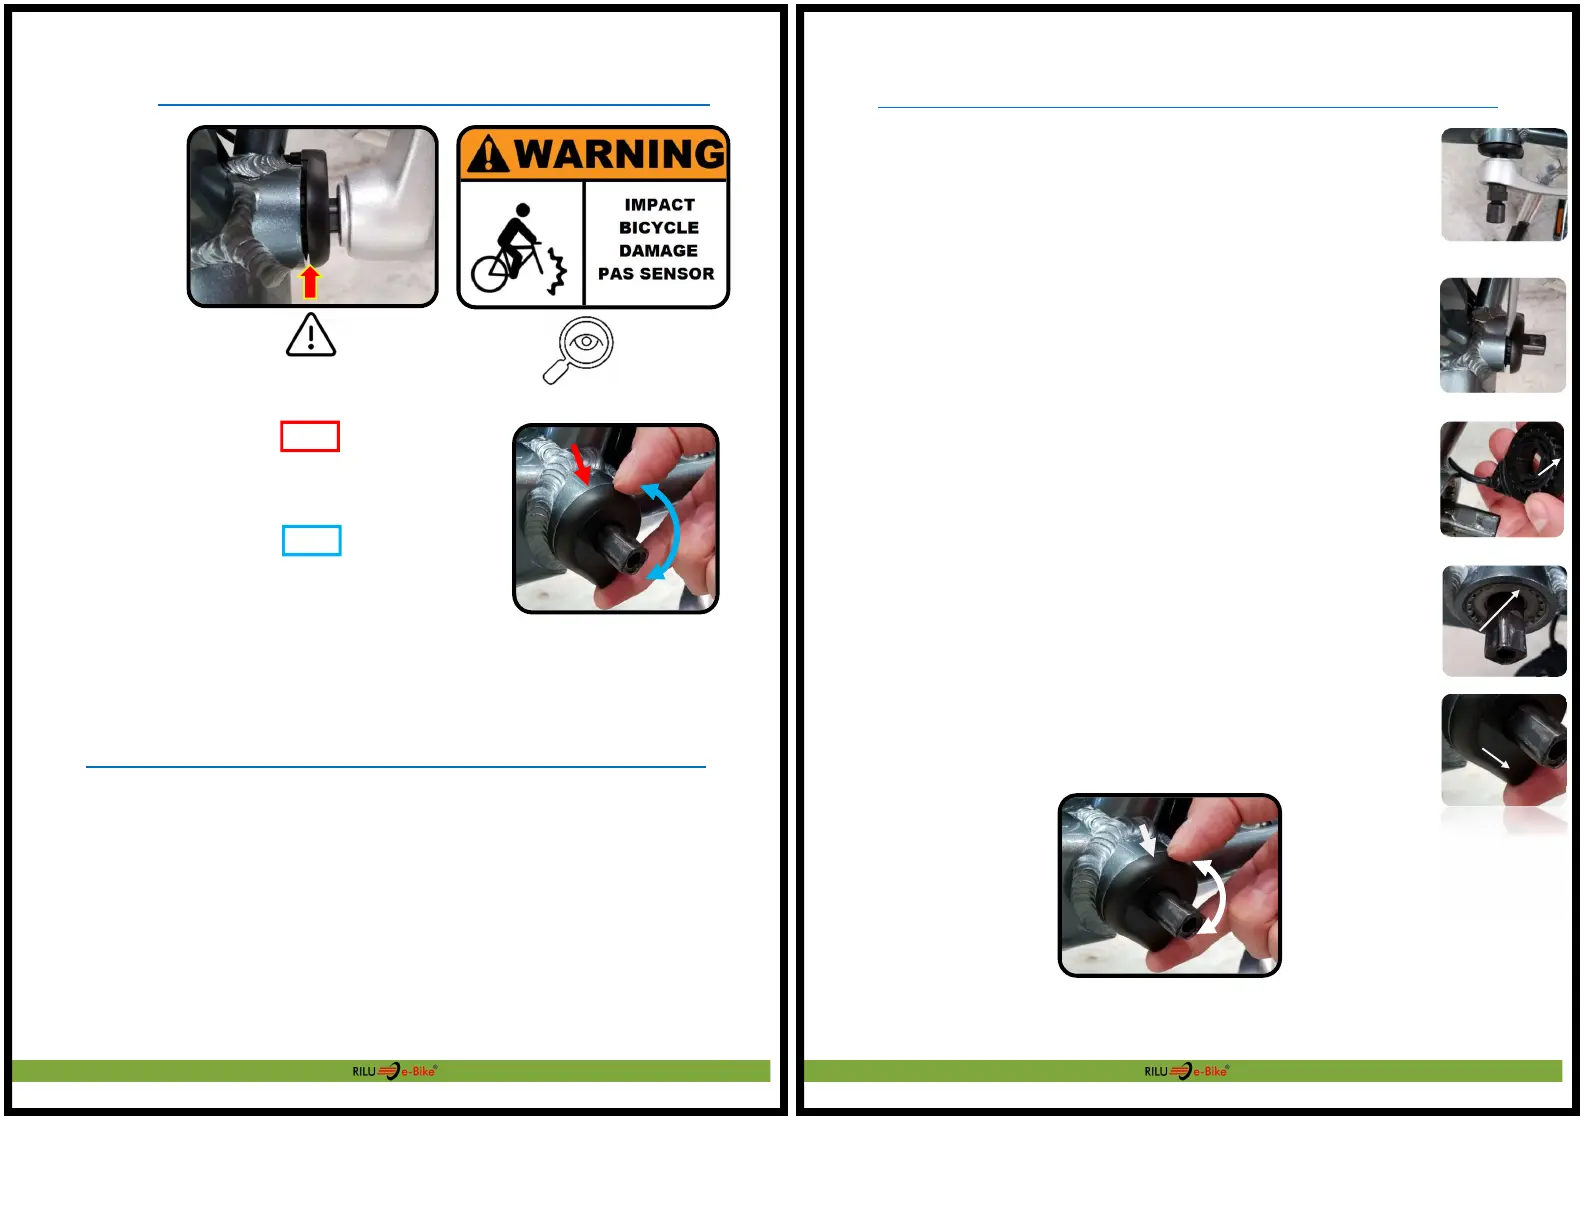
Pedal Sensor – No Motor Power
PAS Sensor – Error Gap
If the sensor becomes misaligned it is possible that your pedal motion
may not be detectible. This will cause interment (or no motor power)
output to occur.
Diagnosing - Faulty PAS Sensor
If you are riding the bike in Level 1 – 5 and do not experience any motor power.
Step 1 - Stop riding the bike
Step 2 - Step of the bike and stand beside it
Step 3 - Hold the
–
(Down) button on the Display to activate 6Km/h walk function
Step 4 - If the motor only works using 6km/h please contact dealer for servicing.
Step 5 - If the motor does not turn using either 6km/h walk assist or Level 1 – 5
when pedalling please check motor cable is connected correctly and tightly
A
NO GAP
Between sensor and the frame.
B
NO MOVEMENT
Sensor must remain firm when twisted.
A
P a g e | 22
1800 MY RILU www.rilu-e-bike.com.au
Replacing - Faulty PAS Sensor
Step 1 - Remove the axle bolt using an 8mm Allen key
Step 2 - Use a crank puller to remove the crank
Step 3 - Remove the pedal
Step 5 - Gently use a flat head screw driver to
wedge and pry the PAS sensor (be very gently)
Step 6 - Fully remove the PAS from the axle by wiggling by hand
Step 7 - Inspect the PAS sensor teeth for damage
All teeth must be in good condition, (A) No damage to teeth
Step 8 - (B) Align teeth and re-install the PAS sensor onto the axle
(C) The sensor cable must be at the base, towards the ground
Step 9 - Check the PAS sensor is snugly fit with no play.
(D) No gaps, between sensor and frame.
(E) No movement, sensor remains firm when twisted.
Step 10 - Re-install the crank arm and tighten the 8mm
C
D
E