Rinnai Water Heater Service Manual 15 100000098 Rev B
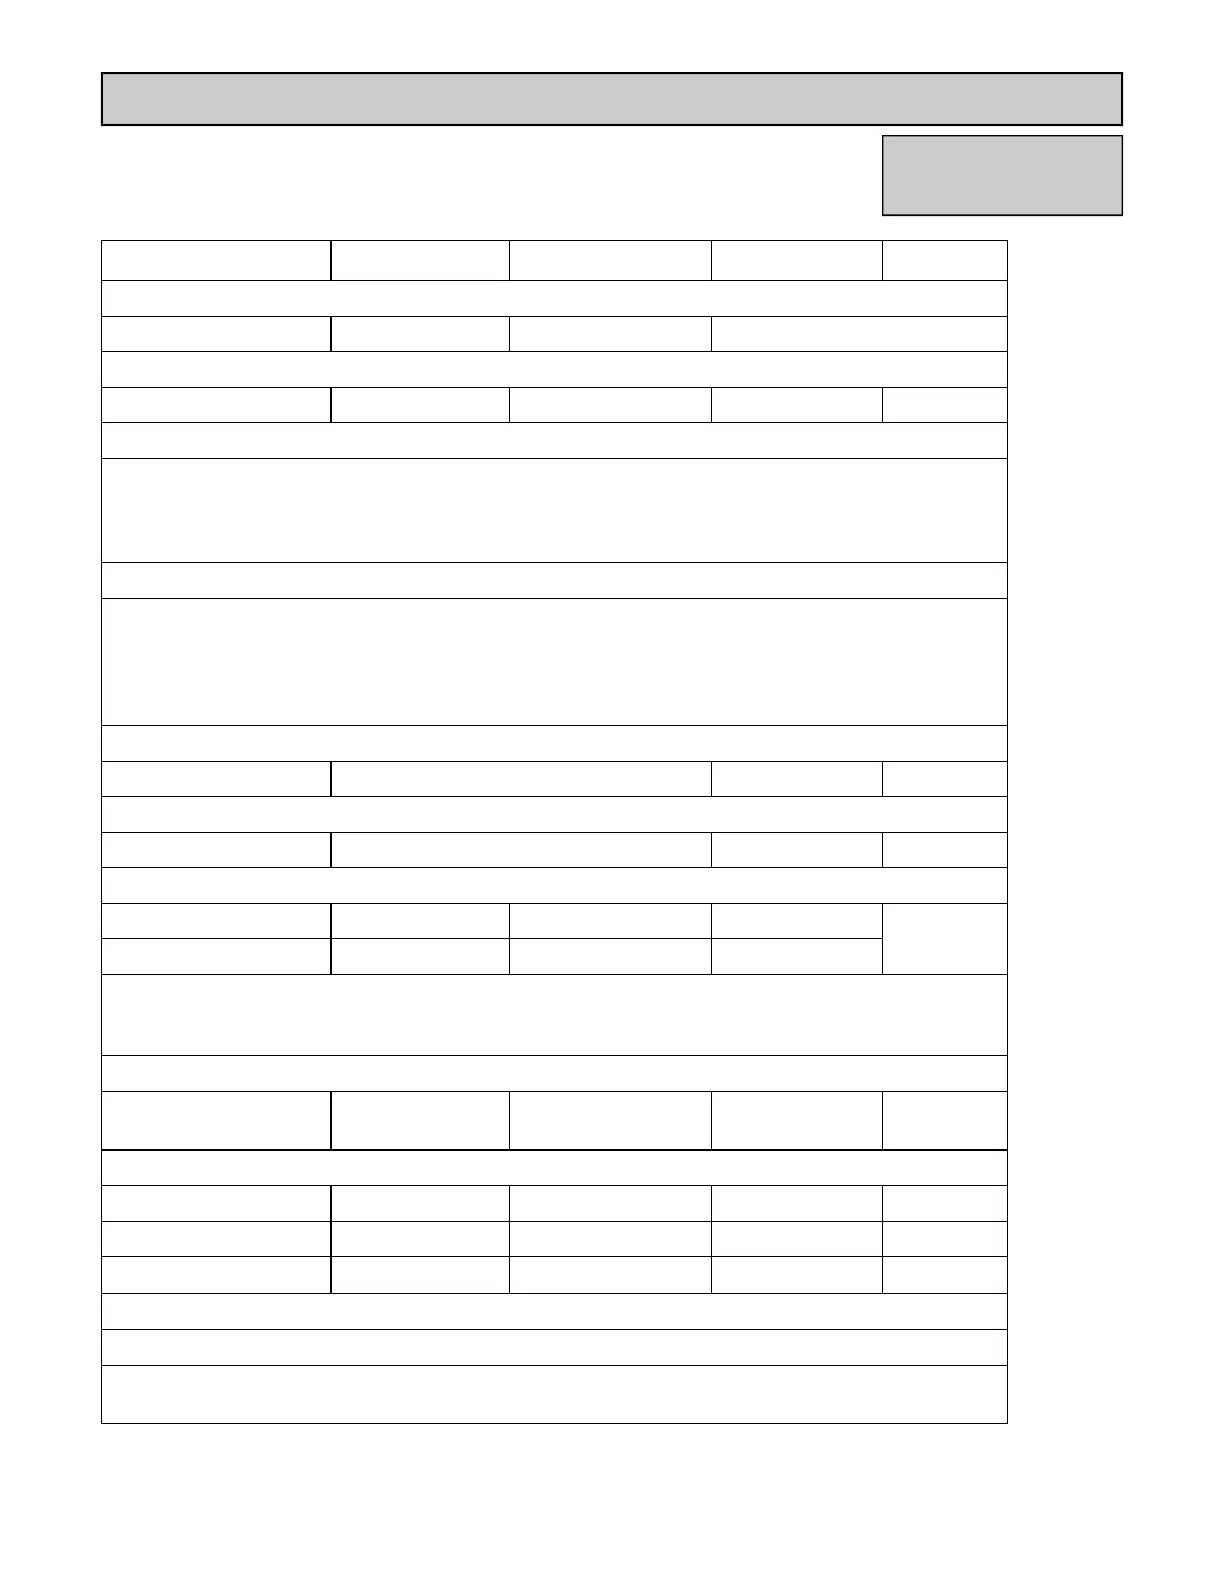
Electrical Diagnostic Points
R/C98e(ASME),
R/C98i(ASME)
Wire Color Voltage Resistance Connector No. Pin No.’s
Thermal Fuse
White - Red 12 VDC below 1 ohm
Overheat Switch
Red - Red 12 VDC below 1 ohm G2 1 ~ 2
Flame Rod
Place one lead of the meter to the flame rod and the other to ground. With the unit running, 5-150
VAC should be read. Set the meter to the μ amp scale and series the meter in line with the flame
rod. Proper flame circuit should read 1 μ amp or greater. If not, then remove the flame rod and
check for carbon build-up. Clean with sand paper or emery cloth.
Thermistors
Check all thermistors by inserting meter leads into each end of the thermistor plug. Set the meter to
the 20 K ohm scale and read resistance. Applying heat to the thermistor bulb should decrease the
resistance. Applying ice to the thermistor bulb should increase the resistance. Typical resistance
values are: 11.4-14 K ohm for 59°F; 6.4-7.8 K ohm for 86°F; 3.6-4.5 K ohm for 113°F; 2.2-2.7 K ohm
for 140°F; 0.6-0.8 K ohm for 221°F
Outgoing Water Thermistor
White - White see above G5 1 ~ 2
Heat Exchanger Temperature Thermistor
White - White see above G4 1 ~ 2
Surge Protector
Black - White 108 - 132 VAC N/A D1
1 ~ 3
Black - White 108 - 132 VAC N/A D2
With the power off, check the continuity through the surge protector. Check by placing one meter
lead on the top pin #1 and bottom pin #2. Check by placing one meter lead on the top pin #2 and
bottom pin #1. If there is continuity across both sets of points, then the surge protector is good.
Controller
Black - Black
10 - 13 VDC
digital
N/A A 1 ~ 3(A)
Frost Protection
White - White 120 VAC * 150 ohms D4 1 ~ 2
White - White 60 VAC * 360 ohms D5 1 ~ 2
White - White 60 VAC* 360 ohms D6 1 ~ 2
* only when Frost Sensing Switch (D3) is ON
Amp fuses
There are two inline 3 amp glass fuses. Remove the fuse and check continuity through it. If there is
continuity then the fuse is good.
G1 (red) pin 1 - E3 (white) pin 1